
Level Up Your Snacking: The Ultimate Guide to Building a Stunning Cheese Flight
Let’s be real: sometimes you just want to feel fancy without, you know, actually being fancy. You want to host, but not cook. You want to impress, but also probably stay in your sweatpants. Enter the Cheese flight. It’s the culinary equivalent of putting on a blazer over your pajamas—instant elegance, minimal effort. Forget elaborate three-course meals; a perfectly curated cheese board is where the real magic happens. Who needs a main course when you have this kind of deliciousness? Nobody, that’s who.
Why This Cheese Flight Is Your New Best Friend

Why bother with a cheese flight when you could just eat cheese straight from the block? Because this isn’t just cheese; it’s an experience. It showcases variety, texture, and flavor in a way that just pulling out a cheddar brick can’t.
First, it’s effortlessly elegant. You literally just arrange stuff on a board, and suddenly you’re Martha Stewart. Second, it’s infinitely customizable. Pick cheeses you love, add accompaniments that sing, and make it your own. Third, it’s the ultimate party starter or chill-night indulgence. Guests will flock to it like moths to a flame, and you’ll look like a gourmet genius. Plus, it requires absolutely zero cooking, which, IMO, is a win in any scenario.
Ingredients: Your Curated Culinary Journey


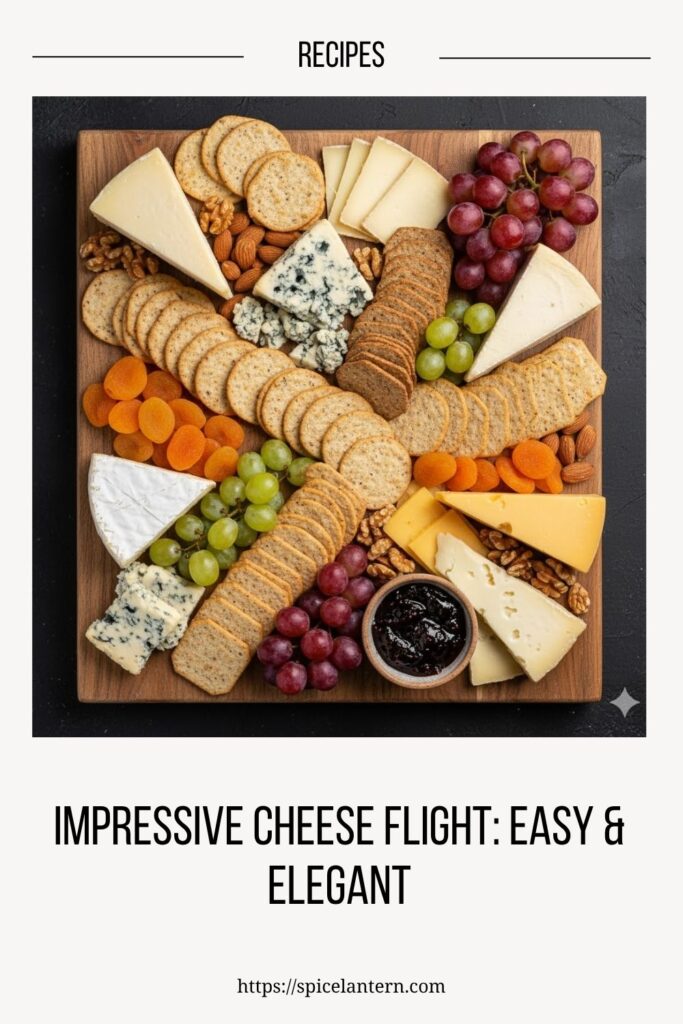
Building a great cheese flight is about balance. Think different textures, milk types, and flavors. Aim for 3-5 cheeses for a good variety.
H3: The Cheese Stars (Pick 3-5, aim for variety!)
- Soft Cheese (e.g., Brie, Camembert, Goat Cheese (Chèvre)): Creamy, spreadable, often tangy.
- Semi-Hard Cheese (e.g., Gruyère, Gouda, Fontina, Monterey Jack): Versatile, nutty, good for slicing.
- Hard Cheese (e.g., Parmigiano-Reggiano, Aged Cheddar, Manchego): Salty, crumbly, intense flavor.
- Blue Cheese (e.g., Gorgonzola, Roquefort, Stilton): Pungent, sharp, a little goes a long way.
- Fresh Cheese (e.g., Fresh Mozzarella, Burrata): Delicate, mild, best served with simple accompaniments.
H3: The Supporting Cast (Accompaniments are key!)
- Crackers & Bread:
- Plain crackers: Water crackers, oat crackers (for neutral palate cleansers).
- Artisan crackers: With nuts, seeds, or herbs (for texture and flavor pairing).
- Toasted baguette slices or rustic bread: Good for softer cheeses.
- Fruit (Fresh & Dried):
- Fresh fruit: Grapes (red & green), apple slices, pear slices, figs, berries.
- Dried fruit: Apricots, cranberries, dates, figs (great with hard cheeses).
- Nuts:
- Assorted nuts: Almonds, walnuts, pecans, pistachios (adds crunch and richness).
- Candied nuts: For a sweet crunch!
- Spreads & Jams:
- Honey: Classic with blue cheese and goat cheese.
- Fruit jam/preserves: Fig jam, apricot preserves, berry jam (pairs well with many cheeses).
- Mustard: Dijon or whole-grain (especially good with harder, savory cheeses).
- Savory Bits (Optional but recommended):
- Olives: Marinated, various types.
- Cornichons/Pickles: Adds a tangy, acidic bite.
- Cured Meats (Charcuterie): Prosciutto, salami, sopressata (if you want to upgrade to a full charcuterie board!).
Key Substitutions:
- Cheese Variety: Don’t stress if you can’t find specific cheeses. Focus on getting a variety of textures and milk types (cow, goat, sheep). Ask your cheesemonger for recommendations!
- Gluten-Free: Offer gluten-free crackers and ensure all other accompaniments are naturally GF.
- Nut-Free: Skip the nuts, or substitute with seeds (e.g., pumpkin seeds, sunflower seeds).
- Vegan Cheese: There are some fantastic plant-based cheeses available now! Offer a selection for your vegan friends.
Tools & Kitchen Gadgets Used: Your Assembly Line
You mostly need serving pieces and a few basic knives.
- Large Serving Board/Platter: The star of the show! A beautiful wooden board, slate platter, or large ceramic plate.
- Small Cheese Knives: Crucial for each cheese. Prevents flavor transfer. Have one for soft, one for hard, one for blue.
- Small Bowls/Ramekins: For honey, jams, olives, nuts, etc.
- Tongs or Small Spoons: For serving accompaniments.
- Parchment Paper (Optional): To protect your board from oily cheeses or messy spreads.
- Paring Knife and Cutting Board: For slicing fruits and any last-minute prep.
Step-by-Step Instructions: Arranging Your Edible Art
This isn’t really a “recipe” as much as it is a masterclass in artful arrangement. Get ready to channel your inner food stylist.
H3: Step 1: Gather Your Goods & Let Cheeses Breathe
Take all your cheeses out of the fridge about 30-60 minutes before serving. Room temperature cheese tastes best – the flavors fully develop! While they’re warming up, gather all your accompaniments.
H3: Step 2: Prep the Board & Slice the Cheeses (Strategically)
Grab your large serving board. Arrange the cheeses first. Cut some cheeses into slices, wedges, or cubes, but leave some blocks whole (with a knife nearby) for visual appeal and to show off their natural shape. Place them spaced out around the board. Think about contrasting colors and shapes.
H3: Step 3: Fill ‘Er Up! (The Main Components)
Next, add your larger accompaniments. Arrange piles of crackers and bread in different spots. Place small bowls of olives, nuts, and larger fruit pieces (like grapes or figs) around the cheeses. Fill in empty spaces.
H3: Step 4: The Finishing Touches (The “Pizazz” Layer)
Now for the details! Tuck in dried fruits, smaller berries, and fresh herb sprigs (like rosemary or thyme) into any gaps. Drizzle honey over a soft goat cheese, or place a tiny spoon next to your favorite jam. This makes it look abundant and inviting.
H3: Step 5: Add the Tools (Don’t Forget the Cutlery!)
Place a separate cheese knife near each block of cheese. This is a subtle yet important detail that elevates the experience and prevents weird flavor mixing (e.g., blue cheese contaminating your Brie).
H3: Step 6: Serve & Enjoy (The Best Part!)
Present your masterpiece! Stand back and admire your handiwork. Tell your guests, “Oh, this old thing?” as if it took no effort at all. Enjoy the oohs, aahs, and inevitable compliments. Don’t forget to point out which cheese is which, if you’re feeling generous.
Calories & Nutritional Info: The Delicious (and Dense) Truth

A cheese flight is pure indulgence, so don’t expect salad vibes here. These estimates are highly variable based on your choices and how much you actually eat (spoiler: it’s probably a lot).
- Estimated Calories per serving (generous appetizer portion): 400-800+ calories
- Fat: 30-60g+ (cheese is delicious because it’s fatty!)
- Carbohydrates: 20-50g (crackers, fruit, jams)
- Protein: 20-40g (excellent source from cheese)
- Good source of Calcium: Hooray for dairy!
- Note on Indulgence: This is a treat! Embrace the deliciousness. Life is too short for bland snacks.
Common Mistakes to Avoid: Don’t Ruin Your Delicious Display!
Even an “easy” cheese flight has its pitfalls. Sidestep these common errors like a pro.
- Serving Cold Cheese: This is the ultimate cheese crime! Always let your cheeses come to room temperature for at least 30 minutes (up to an hour for larger pieces) before serving. Cold cheese tastes dull and lacks aroma.
- One Knife for All: Eek, no! Give each cheese its own knife. Nobody wants blue cheese residue on their mild Brie, trust me.
- Lack of Variety: Just putting out three types of cheddar is a missed opportunity. Aim for different textures, milk types, and flavor intensities to make it interesting.
- Not Enough Crackers/Bread: People love carbs with their cheese. Always have more crackers/bread than you think you need. You can always refill!
- Ignoring Negative Space: Don’t cram everything on the board. Leave a little space between items initially, then fill in with smaller garnishes. It makes it look more artful, not like a grocery store shelf.
Variations & Customizations: Your Board, Your Rules
This is your cheese flight. Make it reflect your mood, your guests, or your pantry!
- The “Local Love” Flight: Source cheeses, jams, and even honey from local farms and artisans. Highlight your region’s culinary gems!
- The “Sweet Tooth” Flight: Focus on milder, creamier cheeses that pair well with sweeter accompaniments like honeycomb, candied nuts, chocolate-covered fruit, and dessert wines.
- The “Spicy & Savory” Flight: Include cheeses with a kick (e.g., pepper jack, aged gouda), spicy salami, hot honey, chili-spiced nuts, and pickled jalapeños. Pair with a bold red wine or craft beer.
FAQ Section: Your Most Pressing Cheese Queries, Answered
You’ve got questions about this glorious dairy-laden delight. I’ve got the answers.
H3: Q1: How much cheese do I need for a cheese flight?
A1: Plan for about 1-2 ounces of each cheese per person for an appetizer. If it’s the main event, increase to 3-4 ounces per person. Always better to have a little extra than too little!
H3: Q2: What’s the best way to arrange cheese on a board?
A2: Start by placing your cheeses first, spaced out. Then fill in with larger accompaniments (crackers, big fruit clusters), and finish with smaller items (nuts, berries, herbs) to fill gaps. Think about color, texture, and height.
H3: Q3: How do I store leftover cheese?
A3: Wrap each cheese individually in parchment paper or wax paper, then loosely in plastic wrap or foil. Store in the coolest part of your fridge (often the crisper drawer). Don’t use tight plastic wrap directly on the cheese; it needs to breathe!
H3: Q4: Can I use pre-sliced cheese for a cheese flight?
A4: While convenient, pre-sliced cheese often lacks the freshness and visual appeal of a freshly cut block. For a truly impressive flight, buy blocks and slice/cut them yourself.
H3: Q5: What wines pair best with a cheese flight?
A5: It depends on the cheeses! Generally, lighter white wines (Sauvignon Blanc, Pinot Grigio) pair well with fresh/soft cheeses. Medium-bodied reds (Pinot Noir) go with semi-hard cheeses. Full-bodied reds (Cabernet, Zinfandel) can handle aged/hard cheeses. And dessert wines or Port are fantastic with blue cheese. Offer a variety, or pick a universal crowd-pleaser like a dry Rosé.
H3: Q6: How do I stop crackers from getting soggy on the board?
A6: Place crackers on the board just before serving. If you need to prep ahead, keep them in an airtight container nearby and replenish as needed. Avoid putting them directly next to very moist fruits or spreads.
H3: Q7: What’s the difference between a cheese board and a charcuterie board?
A7: A cheese board focuses primarily on cheese and its accompaniments. A charcuterie board emphasizes cured meats (salami, prosciutto) and often includes pâtés and terrines, with cheese as a secondary element. Many boards combine both!
Final Thoughts: You’ve Nailed the Art of the Cheese Flight!
You did it! You built a magnificent, delicious, and utterly impressive Cheese flight that makes you look like a culinary wizard. Go ahead, pat yourself on the back. You’ve earned every glorious bite of that perfectly paired, room-temperature cheese. Are you ever going back to sad, single-cheese snacking? I highly doubt it. Enjoy your sophisticated (yet easy!) feast!

