Forget Garlic Knots: The Ultimate Recipe for Gooey, Cheesy Cheese Bread
Let’s be honest, regular bread is fine. It does its job. But bread covered, filled, and blessed by a mountain of melted cheese? That’s a religious experience. I’m talking about the kind of cheese bread that makes your eyes roll back in your head and forces everyone around you to abandon all manners. This isn’t some thin pizza crust imposter; this is a soft, fluffy loaf with gooey pockets of sharp cheddar and a golden, irresistible crust. Why buy a sad, half-hearted slice when you can bake a whole loaf of cheesy perfection right now? You deserve this level of buttery, savory decadence.
Why This Recipe Is Awesome (It’s Pure Comfort Food)
This is the definition of comfort. It’s easy, smells amazing, and tastes even better.
- Minimal Kneading, Maximum Fluff: This recipe uses a simple, quick mixing method (it’s a quick bread, not yeast bread!) to deliver a loaf that’s surprisingly light and tender. You don’t need a stand mixer or biceps of steel.
- The Perfect Cheese Pull: We use a strategic cheese blend to ensure maximum melt and flavor. Think sharp, tangy flavor paired with an unbeatable, gooey stretch. The cheese pull is non-negotiable!
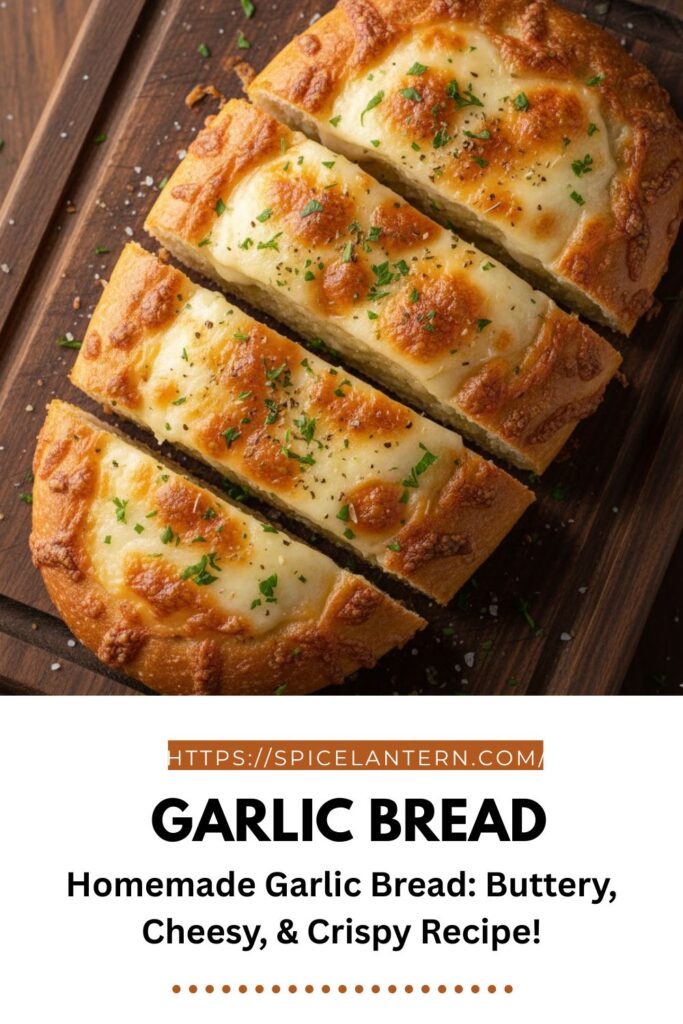
- The Golden Crust: A generous butter and herb topping gives the crust a gorgeous golden hue and a salty, herby counterpoint to the cheesy center. You’ll impress guests and probably make your cat jealous.
Ingredients: The Gooey Necessities

Get ready to melt some magic. Freshly shredded cheese is key here!
- 2 cups All-Purpose Flour: The basic building block. Spoon and level this!
- 2 teaspoons Baking Powder: Our quick-rise leavener.
- ½ teaspoon Baking Soda: Helps react with the buttermilk/milk for an extra soft crumb.
- 1 teaspoon Salt: Flavor balance.
- 2 tablespoons Granulated Sugar: Just a touch of sweetness to balance the savory.
- 1 cup Shredded Cheese Blend: Use ⅔ cup for the dough and ⅓ cup for the topping. Best blend: Sharp Cheddar (for flavor) and Monterey Jack (for melt).
- 1 large Egg: Binder, structure, and richness.
- ¾ cup Milk or Buttermilk: Buttermilk yields a slightly tangier, more tender loaf. If using regular milk, add 1 teaspoon of lemon juice to it first.
- ¼ cup Unsalted Butter (Melted and Cooled): For richness in the dough.

For the Garlic Herb Topping (The Flavor Boost):
- 2 tablespoons Unsalted Butter (Melted):
- ½ teaspoon Dried Parsley (or 1 tsp fresh):
- ¼ teaspoon Garlic Powder:
Key Substitutions:
- Cheddar/Jack Cheese: Substitute with Colby, Gruyère, or Pepper Jack for a spicier result. Always shred your own cheese—pre-shredded has anti-caking agents that hinder melt!
- Buttermilk: Use regular milk plus 1 teaspoon of white vinegar or lemon juice. Let it sit for 5 minutes.
- All-Purpose Flour: Use a 1-to-1 Gluten-Free blend with xanthan gum for a GF version.
Tools & Kitchen Gadgets Used: Your Baking Essentials
Keep it simple. No dough hooks needed here!
- Large Mixing Bowl: For combining the dry ingredients.
- Medium Mixing Bowl: For combining the wet ingredients.
- Whisk: For making sure the leaveners are evenly distributed.
- Rubber Spatula: CRITICAL for gentle mixing.
- 9×5-inch Loaf Pan: The essential shape.
- Parchment Paper or Non-Stick Spray: To prevent that heartbreak of a stuck loaf.
- Wire Cooling Rack: To prevent the soggy bottom.
Step-by-Step Instructions: The Cheesy Quick Bread Method
Mix gently and quickly. Remember: overmixing is the enemy of moist quick bread.
Step 1: Prep and Dry Combine (3 Minutes)
- Preheat your oven to 350°F (175°C). Grease and flour your 9×5-inch loaf pan or line it with parchment paper.
- In your large bowl, whisk together the flour, baking powder, baking soda, salt, and sugar. Whisk for at least 30 seconds to ensure the leaveners are spread evenly.
- Add ⅔ cup of the shredded cheese blend (the portion for the dough) to the dry ingredients and toss gently.
Step 2: Wet Mix and Gentle Fold (3 Minutes)
- In your medium bowl, whisk together the egg, milk/buttermilk, and the melted and cooled butter.
- Pour the wet mixture into the dry mixture.
- Using your rubber spatula, fold the ingredients gently until they are just combined. You should still see small patches of flour. STOP MIXING IMMEDIATELY! A lumpy batter is a happy batter.
Step 3: Bake the Loaf (40 Minutes)
- Scrape the batter into the prepared loaf pan. Smooth the top gently with the spatula.
- Bake for 35 minutes.
- While the bread bakes, prepare the topping: mix the melted butter, parsley, and garlic powder in a tiny bowl.
Step 4: The Topping Reveal (5 Minutes)
- After 35 minutes, pull the loaf from the oven. It should be mostly set but still pale.
- Brush the top generously with the garlic herb butter.
- Sprinkle the remaining ⅓ cup of cheese blend over the top.
- Return the bread to the oven and bake for another 5-10 minutes, until the top cheese is golden, bubbling, and the loaf tests done (toothpick comes out mostly clean).
Step 5: Cool and Attack (15 Minutes)
- Remove the loaf from the oven. Let it cool in the pan for 5 minutes.
- Lift it out (using the parchment paper overhang, if used) and transfer it to a wire cooling rack.
- Let it cool for at least 10 minutes before slicing. Cutting it too soon can result in a gummy center. The cheese also needs a moment to set.
Calories & Nutritional Info: The Cheesy Deets (Estimated)

These are estimates for one thick slice (1/12th of the loaf) with topping.
- Calories per serving (1 slice): ~280-350 calories
- Carbohydrates: ~25-35g
- Protein: ~10-15g (Thanks, cheese!)
- Fat: ~15-20g
- Calcium Note: An excellent source of calcium from the generous amount of cheese.
Common Mistakes to Avoid: From Goo to Glue
Protect your precious loaf from these cheesy errors.
- The Overmixing Trap: Overmixing is the number one cause of tough, dense quick bread. Mix only until the streaks of flour disappear. A lumpy batter is desired!
- Using Pre-Shredded Cheese: Pre-shredded cheese is coated with starches that prevent clumping, but they also prevent a good melt. Shred your own cheese for the ultimate gooey pull.
- Baking Without Topping Cheese: The cheese on the outside seals the deal! It gets perfectly crispy and golden. Don’t skip that final sprinkle.
- Cutting Too Soon: The molten cheese needs time to cool and set. Cutting a hot loaf means the cheese will ooze out everywhere (a tragedy!) and the bread itself will be gummy. Wait the 10 minutes.
- Cold Butter Disaster: Using softened or partially melted butter makes the texture uneven. Use fully melted and slightly cooled butter for the wet ingredients.
Variations & Customizations: Your Cheesy Masterpiece
You’ve got the base. Now personalize it!
- Spicy Jalapeño Bacon: Mix in ¼ cup crispy crumbled bacon and 2 tablespoons of finely diced pickled jalapeños (blot these dry!) with the cheese in Step 1.
- Sun-Dried Tomato & Basil: Substitute the garlic powder for 1 teaspoon of dried basil and fold in ¼ cup of chopped, oil-packed sun-dried tomatoes (drained well).
- Focaccia Flatbread Style: Instead of a loaf pan, spread the batter into an 8×8-inch square baking dish. Top with a generous amount of olive oil, flaky salt, and Parmesan before baking.
FAQ Section: The Cheesy Conundrums
We know you’ve got questions about this beloved comfort food.
Q1: What is the best cheese blend for ultimate melt and flavor?
A: A 50/50 blend of sharp cheddar (for strong flavor) and Monterey Jack or Mozzarella (for superior melt and stretch) provides the best results.
Q2: Can I substitute yeast for the baking powder in this recipe?
A: No! This is a quick bread. Substituting yeast requires changing the liquid ratio, the kneading method, and adding 1-2 hours for rising time. Stick to the quick bread leaveners here.
Q3: How do I store homemade cheese bread?
A: Store the cooled bread wrapped tightly in plastic wrap or in an airtight container at room temperature for up to 3 days. Reheat sliced pieces in the toaster or oven for a crispy crust.
Q4: Why is my cheese bread dense?
A: You most likely overmixed the batter (developing gluten), or your baking powder/soda is old and inactive. Test your leaveners by dropping a pinch of baking soda into vinegar—it should bubble vigorously!
Q5: Can I make this cheese bread gluten-free?
A: Yes, substitute the all-purpose flour with a 1-to-1 gluten-free baking blend that contains xanthan gum. The texture will be slightly different but still delicious.
Q6: Should I slice the cheese or shred it?
A: Shredding is always best because it melts faster and more evenly throughout the dough. Thickly sliced cheese might not melt completely before the bread is done.
Q7: Can I freeze the leftovers?
A: Yes! Slice the cooled bread and wrap the slices tightly in plastic wrap, then place them in a freezer bag. Freeze for up to 3 months. Thaw or toast straight from the freezer.
Final Thoughts: The New Comfort Standard
You just baked a loaf of the softest, gooiest, most intensely flavorful Cheese Bread. You conquered the quick bread method and achieved cheesy perfection without even breaking a sweat. Never again will you look at a plain slice of bread the same way. Now, slice that warm loaf, slather it with butter, and acknowledge that you are officially a comfort food master.