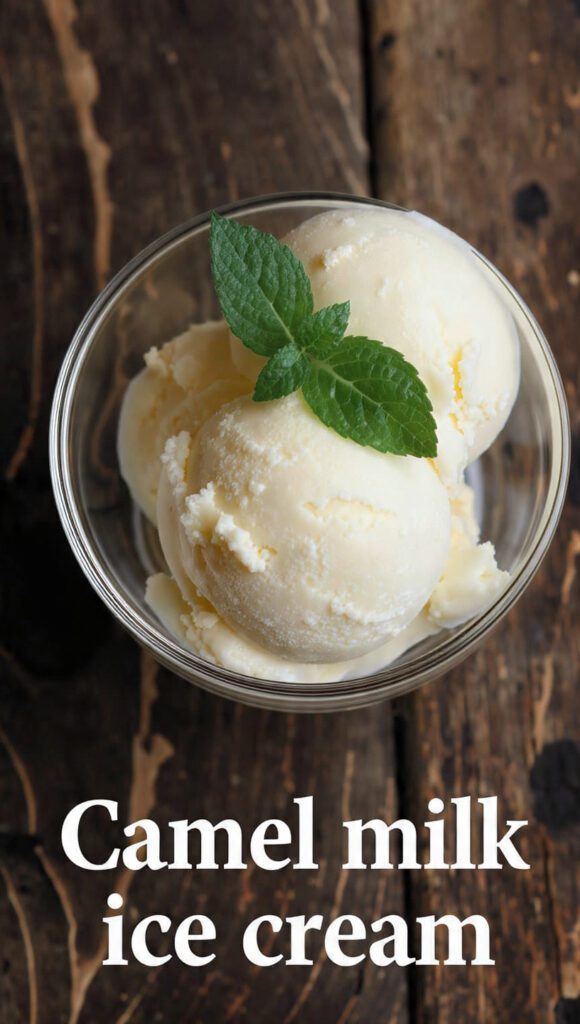
🐪 Desert Delight: The Ultimate Recipe for Creamy, Exotic Camel Milk Ice Cream
Remember that time you promised yourself you’d stop being boring in the kitchen? Well, today is that day, friend. We’re going totally rogue. Forget the sad, freezer-burned vanilla you bought last week. We’re making Camel milk ice cream, and I promise you, this is the most exciting thing you’ll churn all year.

I know, I know. You’re thinking, “Camels? Isn’t that what they drink in the desert?” Yep. But let me tell you, this isn’t some dusty, acquired-taste health food. We’re talking about a scoop so creamy, so subtly sweet, it will make regular cow’s milk ice cream look like a sad, watery mistake. Seriously, prepare for your mind to be blown.
Why This Exotic Ice Cream Recipe Is Your New Kitchen Flex
Why bother hunting down camel milk for a dessert? Because you are awesome, and your taste buds deserve an adventure, that’s why!

First off, the flavor is incredible. Camel milk has a distinct, slightly salty, almost naturally sweet profile. It gives the ice cream an exotic depth that vanilla or chocolate alone can never touch. It’s truly gourmet stuff, without the fuss.
Secondly, you want to impress people, right? Imagine serving this at your next dinner party. “Oh, this? It’s just a little homemade camel milk ice cream.” Instant culinary rock star status. Your guests won’t stop talking about it.
And third—and this is the best part—camel milk boasts a slightly lower fat content than cow’s milk, and it’s naturally high in insulin, making it a surprisingly smarter dessert choice. So, you basically eat ice cream for your health. You’re welcome.
The Secret Stash: Ingredients
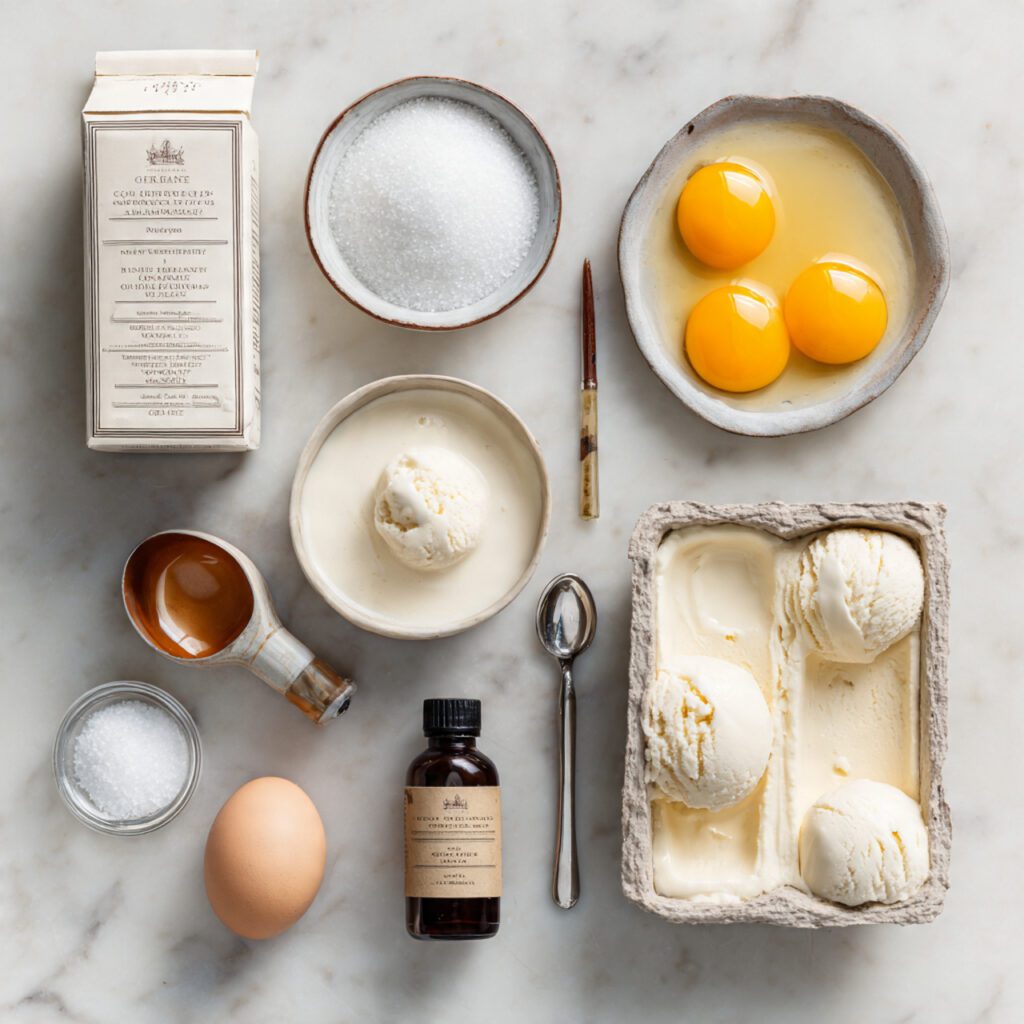
You don’t need a caravan of supplies, just a few key players. Finding the camel milk might be the hardest part, but you can totally find it online or at specialty food stores. Don’t cheap out on the quality, okay?
- 2 cups Fresh Camel Milk: This is the star, don’t substitute it with goat milk and think you’ve achieved peak exoticism.
- 1 cup Heavy Cream: Yes, we need a little traditional richness. It helps keep the texture smooth and scoopable.
- 3/4 cup Granulated Sugar: Adjust this to your camel milk’s natural sweetness. You want it sweet, but not cloyingly so.
- 2 large Egg Yolks: These are your secret weapon for that velvety custard base. Don’t skip them!
- 1 tablespoon Vanilla Extract: Good quality, please! None of that clear, chemically-tasting stuff.
- 1/4 teaspoon Sea Salt: This tiny bit of salt enhances the camel milk’s unique flavor. It’s a game-changer.
Key Substitution Notes
If you absolutely can’t find camel milk, you can try this with full-fat goat milk for a similar, slightly tangy kick, but TBH, you lose the bragging rights. For a richer, more indulgent scoop, swap the granulated sugar for sweetened condensed milk—it’s a cheater’s way to get a creamier base, IMO.
Tools & Kitchen Gadgets Used
You need a few essential items to go from liquid to lovely frozen dessert. Time to dust off the gear!
- Ice Cream Maker: Non-negotiable unless you enjoy stirring a bowl every 30 minutes for six hours (you don’t). Make sure you freeze the bowl for at least 24 hours beforehand!
- Medium Saucepan: For gently heating and whisking your custard base.
- Whisk: Get a sturdy one. You’ll be doing some serious whisking to temper those yolks.
- Fine-Mesh Sieve: Use this to strain the base and ensure no sneaky cooked bits of egg make it into your final product.
- Airtight Freezer Container: For storing your magnificent creation. Don’t use a regular bowl; you want to prevent freezer burn.
- Rubber Spatula: For scraping every last drop of the precious liquid gold into the churner.
The Churning Chronicles: Step-by-Step Instructions
This process is simpler than you think. You’re essentially making a fancy custard and then letting a machine do the heavy lifting. Easy peasy.
Step 1: Warm the Milks
Pour the camel milk and the heavy cream into your saucepan. Heat this mixture over medium-low heat. You want it barely simmering, just until tiny bubbles form around the edge. Don’t boil it! We are making ice cream, not stew.
Step 2: Whisk the Yolks and Sugar
In a separate medium bowl, whisk the egg yolks and sugar together like your life depends on it. Whisk until the mixture is pale yellow and thick—we call this ribbon stage. It takes about 2 minutes. This incorporates air and makes for a super-creamy final product.
Step 3: Temper the Base (Don’t Cook the Eggs!)
This is the most crucial part. Slowly pour about one cup of the warm milk mixture into the egg/sugar bowl while whisking vigorously. Pour slowly! This “tempers” the eggs, bringing them up to temperature without scrambling them. Nobody wants ice cream with scrambled eggs.
Step 4: Combine and Cook
Pour the tempered egg mixture back into the saucepan with the rest of the milk. Stir constantly over low heat with a rubber spatula until the mixture thickens slightly. It should coat the back of your spoon (the technical term is nappe). DO NOT let it boil. This usually takes about 5-8 minutes.
Step 5: Chill Out
Remove the mixture from the heat and immediately pour it through the fine-mesh sieve into a clean bowl. This catches any stray bits and ensures a silk-smooth base. Now, cover it and refrigerate it for at least 4 hours, but ideally overnight. A super-cold base churns much better.
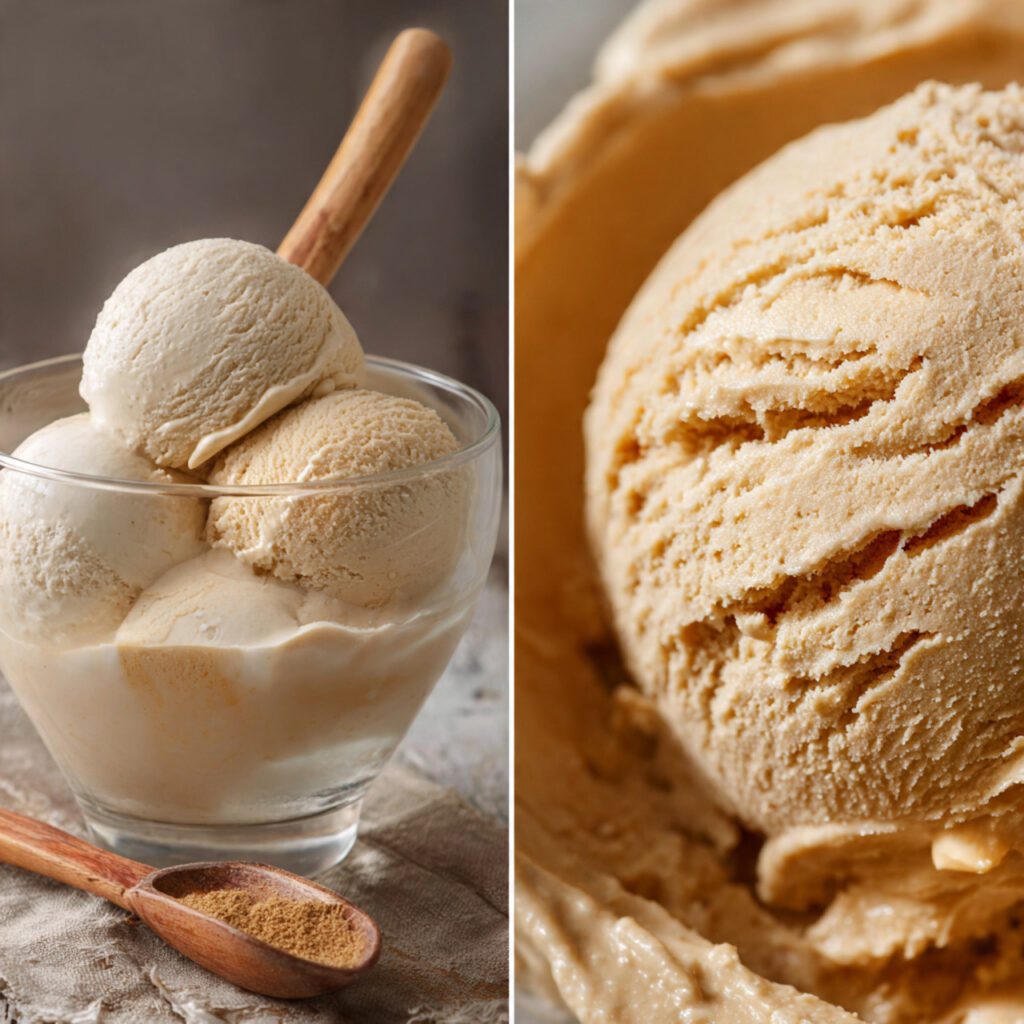
Step 6: Churn, Baby, Churn!
Once the mixture is fully chilled (and I mean cold), stir in the vanilla extract and sea salt. Pour the base into your pre-frozen ice cream maker bowl and churn according to your machine’s instructions. This usually takes 20–30 minutes until it looks like soft-serve.
Step 7: The Final Freeze
Transfer the churned, soft ice cream to your airtight freezer container. Press a piece of parchment paper or plastic wrap directly onto the surface to prevent ice crystals (freezer burn’s evil cousin). Freeze for another 4-6 hours until it’s perfectly firm and scoopable. Go ahead, taste it. Are you a dessert genius? Yes, you are.
🍦 Calories & Nutritional Info (The ‘I Feel Good About This’ Section)
Since camel milk is naturally a little lighter than traditional whole milk, you can feel slightly less guilty about eating the whole batch. This is all estimated, BTW, so don’t fire your nutritionist.
- Estimated Calories Per Serving (1/2 cup): Around 250–300 calories.
- High in Vitamin C: Camel milk surprisingly contains significantly higher levels of Vitamin C than cow’s milk.
- Lower Fat Content: Camel milk is naturally lower in saturated fat than most dairy milks, which makes us feel better.
- Source of Immunoglobulins: Some studies suggest it has immune-boosting properties. So, this is basically a healthy dessert. See?
- Lactose Friendly (Usually): Many people with lactose intolerance find camel milk much easier to digest. FYI!
Common Mistakes to Avoid (Don’t Be That Person)
Look, we all mess up. But let’s skip the avoidable fails, shall we?
- Don’t Rush the Chill Time: If your base isn’t ice-cold before churning, it won’t freeze properly in the machine. You’ll end up with a milkshake disaster, not ice cream. Patience, grasshopper.
- Never Boil the Base: If you crank the heat and boil the milk and egg mixture, you’ve just made sweet scrambled eggs. Keep the heat low and stir constantly.
- Don’t Overfill the Ice Cream Maker: The mix expands as it churns! Follow your machine’s volume limit religiously, or you’ll have a delightful, creamy mess all over your counter.
- Skip the Air-Tight Container: Putting your perfectly churned ice cream into a flimsy container is a recipe for nasty freezer burn. Use a proper, sealed container and press plastic wrap directly onto the surface.
🌶️ Variations & Customizations (Because You’re an Artist)
Once you master the basic camel milk ice cream base, feel free to unleash your inner mad scientist.
1. The Cardamom Kick
Camel milk pairs beautifully with aromatic spices. Stir in 1 teaspoon of ground cardamom and 1/2 teaspoon of rosewater right before churning. This gives it a luxurious, Middle Eastern dessert vibe.
2. Keto-Friendly Swap
Ditch the sugar! Replace the granulated sugar with 1/2 cup of your favorite granulated monk fruit or erythritol blend. Also, swap out the heavy cream for full-fat coconut cream to boost the fat and creaminess. Deliciously guilt-free.
3. Date & Walnut Delight
In the last 5 minutes of churning, add in 1/2 cup of finely chopped Medjool dates and 1/4 cup of toasted, chopped walnuts. The dates add a caramel-like chewiness that complements the slightly salty camel milk perfectly.
🤔 FAQ Section: Burning Questions Answered
You have questions. I have slightly sarcastic answers. Let’s do this.
Q: Is camel milk safe to consume?
A: Yes, absolutely! People have been drinking it for thousands of years. It’s widely consumed across the Middle East and parts of Africa. Did you think I was making you eat something questionable? Please.
Q: Where can I buy camel milk?
A: You can often find it frozen or powdered online from specialty dairy farms. Some high-end grocery stores or international markets also carry it. You might have to hunt a little, but it’s totally worth the quest.
Q: Does camel milk ice cream taste like cow’s milk ice cream?
A: Not exactly. It’s often described as tasting subtly saltier, slightly sweeter, and more “clean” than traditional ice cream. It has a beautiful, natural tanginess that you just don’t get with standard dairy.
Q: Why do I need to use egg yolks?
A: Egg yolks are emulsifiers and stabilizers. They give the ice cream that rich, dense, and creamy texture that defines gourmet ice cream. Without them, your ice cream will be icier and less smooth.
Q: Can I make this recipe without an ice cream maker?
A: You can, but it’s a huge pain. You pour the mix into a shallow pan, freeze it, and then scrape/stir it every 30 minutes for 3-4 hours to break up ice crystals. Do yourself a favor and get a machine.
Q: Is camel milk ice cream healthier than regular ice cream?
A: While it still has sugar and cream, camel milk itself is lower in fat and cholesterol than cow’s milk and has more Vitamin C and iron. So, is it a superfood? No. Is it a smarter choice? Arguably, yes!
Q: How long does homemade camel milk ice cream last in the freezer?
A: Stored properly in an airtight container, it will keep for about 1 to 2 months. But TBH, it’s so good, it won’t make it past a week. Trust me on this.
🎉 Final Thoughts: Go Forth and Churn
There you have it. You’ve now elevated your dessert game from “meh” to “Mouth-watering, worldly wonder.” Stop settling for boring desserts that taste like freezer burn and make this camel milk ice cream. It’s creamy, it’s exotic, and it makes you look like a total culinary genius.
Now go make a batch! And when your friends ask how you did it, just smile mysteriously. Will you share your amazing creation with the world? Tag me in your photos—I want to see your desert delight! I’m pretty sure you’ll never look at store-bought ice cream the same way again. 😉