

The Ultimate Freezer Breakfast Burritos (A Love Letter to Your Future Self)
Let’s take a walk down the freezer aisle of any grocery store. What do you see? A sad landscape of frosty boxes promising a “quick and easy breakfast.” You’ve been tempted. You’ve bought the box of breakfast burritos that looked so promising, only to microwave one on a frantic Tuesday and be met with a lukewarm, soggy tube of disappointment. It doesn’t have to be this way. I’m here to tell you that you can have it all: a delicious, hearty, and convenient breakfast that doesn’t taste like cardboard. All it takes is a little prep work to make your own freezer breakfast burritos.

This isn’t just a recipe; it’s a gift to your future, sleep-deprived self. It’s a Sunday project that pays dividends all week long, saving you from the tyranny of the toaster or the drive-thru. We’re talking fluffy eggs, savory sausage, crispy potatoes, and melty cheese, all wrapped in a warm, toasty tortilla, ready in minutes. It’s time to break up with sad freezer breakfasts for good.
Why This Recipe Is Your Morning Savior
If the thought of a delicious, hot breakfast on a busy Wednesday morning isn’t enough to convince you, let me break down the sheer brilliance of this meal-prep masterpiece.

First, they are the undisputed champion of convenience. This is the ultimate grab-and-go meal. You make a big batch once, and you’re set for weeks. Imagine a world where your biggest breakfast decision is choosing which hot sauce to douse your burrito in. That world can be yours.
Second, they are infinitely customizable and a budget-friendly hero. This is the perfect “clean out the fridge” recipe. Got a handful of leftover veggies, a bit of bacon, or a different kind of cheese? Throw it in! You can create a variety of flavors in one batch, so you never get bored. Plus, making your own is way cheaper than buying those sad, expensive ones from the store.
Finally, it’s a truly satisfying, hearty meal. We’re not talking about a light snack that will leave you hungry in an hour. These burritos are packed with protein, carbs, and flavor to keep you full, focused, and energized all the way until lunch. It’s a real breakfast for real, busy people.
The Dream Team (Your Ingredients)
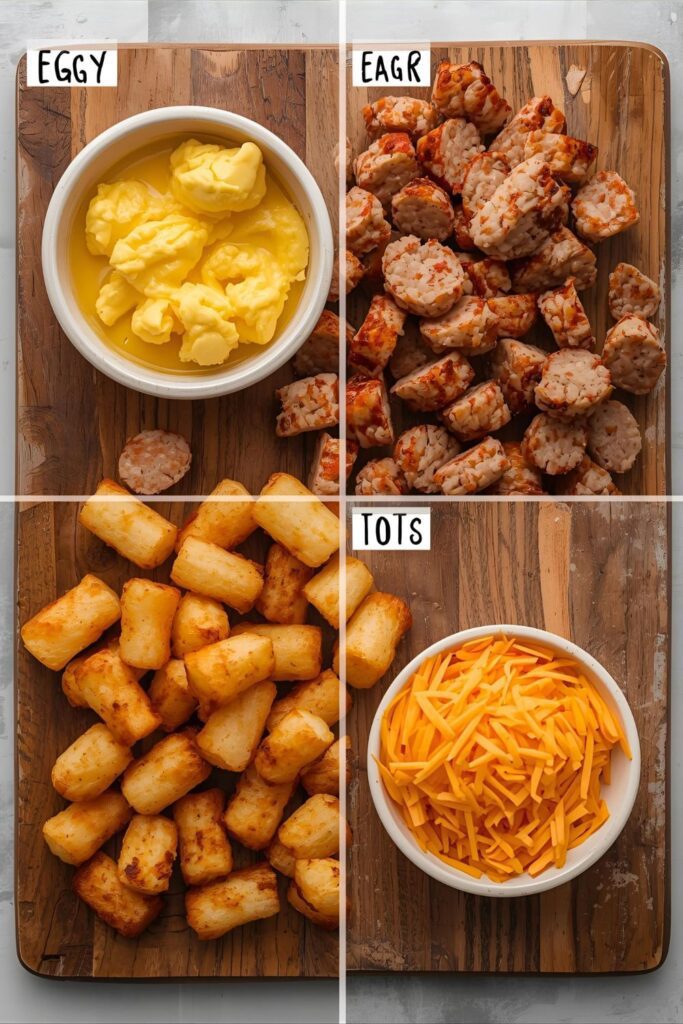
This is a classic, crowd-pleasing combination, but remember, you are the artist and the burrito is your canvas.
- 12 large flour tortillas (10-inch “burrito size”): Don’t skimp and get the small taco-sized ones!
- 1 lb breakfast sausage: Or bacon, or chorizo. Your call.
- 1 dozen large eggs
- 1/4 cup milk or heavy cream
- 1 (16-ounce) bag frozen hash browns or tater tots: The tots get extra crispy and are, IMO, a superior choice.
- 1 small onion, chopped
- 1 bell pepper (any color), chopped
- 2 cups shredded cheese: A mix of cheddar and Monterey Jack is perfect.
- Salt and pepper to taste
- For wrapping: Parchment paper and aluminum foil.
Key Substitutions:
- Make it Vegetarian: Swap the sausage for a can of rinsed black beans, some sautéed mushrooms, or your favorite plant-based meat crumbles.
- Tortilla Swap: Whole wheat or low-carb tortillas work great. Just make sure they’re large and flexible.
- Potato Power: Instead of frozen potatoes, you can dice and roast 2-3 medium potatoes until crispy.
Your Burrito-Building Toolkit
This is an assembly line operation, so having the right tools makes it a breeze.
- A Large Non-Stick Skillet: You’ll need this for cooking all your delicious fillings.
- A Large Baking Sheet: This is the secret weapon for cooling your fillings to prevent sogginess.
- A Large Mixing Bowl: For whisking your eggs into fluffy perfection.
- A Spatula: For scrambling, sautéing, and general food-moving purposes.
- Parchment Paper and Aluminum Foil: Essential for the wrapping and freezing process.
- Your Hands: For the noble art of burrito rolling.
Step-by-Step to Breakfast Burrito Glory
Think of this as a Sunday afternoon project. Put on some music, and let’s build some burritos.
Step 1: Cook Your Components (Separately!)
This isn’t a one-pan scramble. Cooking the ingredients separately is key to the perfect texture.
- The Meat: In your large skillet, cook the sausage over medium-high heat, breaking it up, until it’s browned and cooked through. Drain the grease and spread the sausage on one-third of your large baking sheet.
- The Veggies: In the same skillet, sauté the chopped onion and bell pepper until soft, about 5-7 minutes. Spread them on another third of the baking sheet.
- The Potatoes: Cook the frozen hash browns or tater tots according to the package directions until they are golden brown and crispy. Spread them on the final third of the baking sheet.
Step 2: The Most Important Step of All!
Now, take your baking sheet full of delicious, cooked fillings and LET EVERYTHING COOL COMPLETELY. I’m talking room temperature. You can even pop the sheet pan in the fridge for 15-20 minutes to speed it up. Putting hot fillings into a tortilla is a one-way ticket to a soggy, steamy mess. Patience is the key to a non-soggy burrito.
Step 3: Scramble the Eggs
While the fillings cool, whisk your eggs, milk, salt, and pepper in a large bowl until light and frothy. Cook them in your skillet over medium-low heat, stirring gently, until they are just set. You want soft, fluffy curds, not dry, rubbery ones. Remove from the heat and let them cool slightly.
Step 4: The Assembly Line
It’s time. Create your assembly station: a stack of warm tortillas (warm them in the microwave for 30 seconds to make them pliable), your cooled fillings, the scrambled eggs, and the shredded cheese.
Step 5: Fold Like a Pro
Lay a warm tortilla flat. In the center, layer a bit of everything: eggs, sausage, veggies, potatoes, and a generous sprinkle of cheese. Do not overstuff! Now, for the fold:
- Fold the two sides of the tortilla in towards the center, over the filling.
- Holding the sides in, take the bottom edge of the tortilla (the one closest to you) and fold it up and over the filling, tucking it in tightly.
- Roll the burrito away from you into a tight, neat little package.
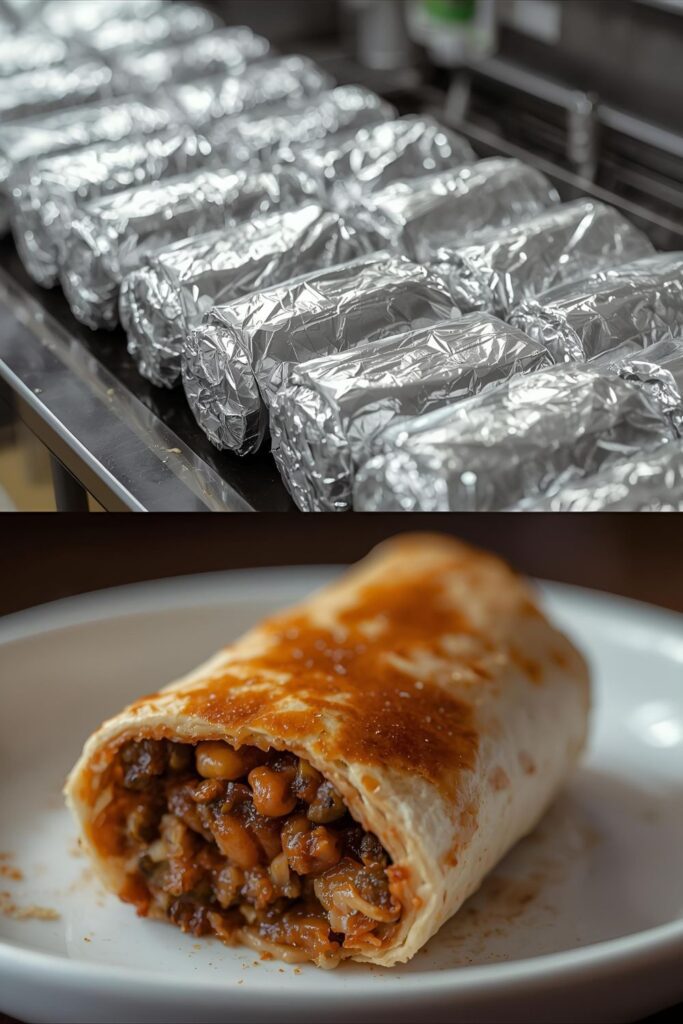
Step 6: Wrap for Hibernation
Tear off a sheet of parchment paper and a sheet of aluminum foil for each burrito. First, wrap the burrito tightly in the parchment paper. Then, wrap that tightly in the aluminum foil. Label them with the date and contents (trust me, you’ll thank me later). Pop your beautiful burrito babies into the freezer.
Step 7: Reheat and Enjoy
- The Fast Way (Microwave): Unwrap the foil, but leave the parchment paper on (or wrap in a damp paper towel). Microwave for 2-3 minutes, flipping halfway through.
- The Best Way (Oven/Air Fryer): For a crispy tortilla, unwrap completely and bake at 375°F (190°C) for 15-20 minutes, or until heated through.
Calories & Nutritional Info (The Fuel Specs)
This is a hearty breakfast designed to keep you going. The numbers will vary based on your specific fillings.
- Estimated Calories per Burrito: 400-550 calories
- Protein Powerhouse: Packed with 20-30g of protein to build muscle and keep you full.
- Balanced Meal: A great combination of protein, carbohydrates, and fats for sustained energy.
- Customizable Fuel: You control the ingredients, so you can make it as lean or as indulgent as you like.
Common Mistakes to Avoid (How to Dodge Burrito Disaster)
A few common errors can lead to a less-than-perfect freezer burrito experience.
- The Soggy Bomb: This is the ultimate tragedy, and it’s caused by one thing: not cooling your fillings completely before rolling. Hot fillings create steam, which gets trapped in the tortilla and turns it into a mushy mess in the freezer.
- The Burrito Explosion: We’ve all been there. You get greedy and overstuff the tortilla. The result is a burrito that you can’t close, or one that bursts open during reheating. Be realistic about how much can fit.
- The Freezer Burn Betrayal: If you just toss the rolled burrito in a bag, it will get freezer burn and taste like the inside of your freezer. The double-wrap method (parchment then foil) is crucial for protecting your burritos and keeping them fresh.
- Using Wet Ingredients: Avoid adding fresh salsa, sour cream, or fresh tomatoes inside the burrito before freezing. They will release too much water and create sogginess. Add those fresh toppings after reheating.
Variations & Customizations (The Burrito Universe)
The classic is great, but the possibilities are endless.
The Californian Burrito
Use carne asada or leftover steak instead of sausage. Add crispy French fries instead of hash browns, and a handful of shredded cheddar. Serve with pico de gallo and guacamole on the side after reheating.
Spicy Chorizo & Black Bean Burrito
Use 1 lb of cooked and drained chorizo instead of sausage. Add a can of rinsed and drained black beans to the filling mixture and use pepper jack cheese for an extra kick of heat.
The Veggie Powerhouse (Vegetarian)
Skip the meat. Sauté a mix of mushrooms, onions, and bell peppers. Add a can of rinsed black beans and a handful of wilted spinach. Use your favorite cheese or a vegan alternative.
FAQ: Your Burning Burrito Questions, Answered
Let’s get all your burrito-building questions wrapped up.
1. How do you really keep freezer breakfast burritos from getting soggy?
The three golden rules are: 1) Cook your fillings separately. 2) Cool all fillings completely before rolling. 3) Avoid “wet” ingredients like fresh tomatoes or salsa inside the burrito before freezing.
2. What’s the absolute best way to reheat them?
For speed, the microwave (wrapped in a paper towel) is king. For the best texture (a crispy tortilla), the oven, toaster oven, or air fryer is the way to go. A pro move is to microwave it for 90 seconds to heat the inside, then finish it in a hot pan or air fryer for a minute to crisp up the outside.
3. What ingredients should I avoid putting in a freezer burrito?
Avoid anything with a super high water content that doesn’t freeze well. This includes things like fresh lettuce, fresh tomatoes, raw onions, and sour cream or guacamole. Add these as fresh toppings after you reheat.
4. Can you explain how to fold a burrito again?
Of course! Lay the tortilla flat. Place your filling in the lower third of the center. Fold the left and right sides in over the filling. Take the bottom flap (closest to you), pull it up and over the filling, tucking it in tightly. Then, roll it forward into a snug cylinder.
5. How long do they last in the freezer?
When wrapped properly (parchment then foil), they will stay fresh and delicious in the freezer for up to 3 months.
6. What kind of tortillas are best for freezer burritos?
Large (10-inch or “burrito size”) flour tortillas are the best. They are flexible and sturdy enough to hold all the fillings without tearing. Corn tortillas will crack and fall apart.
7. Do I need to cook the eggs all the way?
Cook them until they are “soft scrambled” or just set. They will cook a little more when you reheat the burrito, so slightly undercooking them can help prevent them from becoming rubbery.
Final Thoughts
You are now officially a breakfast burrito meal-prep master. You have unlocked the secret to a delicious, convenient, and infinitely better-than-store-bought breakfast that will be waiting for you on those chaotic mornings. It’s a small act of kindness you do on a Sunday that pays off all week long.
So go forth and roll. Your future self is already thanking you. They might even build a small shrine in your honor. At the very least, they’ll be well-fed and on time for work.

