Fluffy Cloud Mastery: The Ultimate Guide to Homemade Bao Buns
Have you ever sat in a trendy fusion restaurant, paid fifteen dollars for two tiny sliders, and thought, “I am essentially paying for fancy air”? We have all been there. But let’s be honest—that “air” is delicious, pillowy, and addictive. Today, we are putting an end to the overpriced appetizer cycle by mastering the art of bao buns in your very own kitchen.

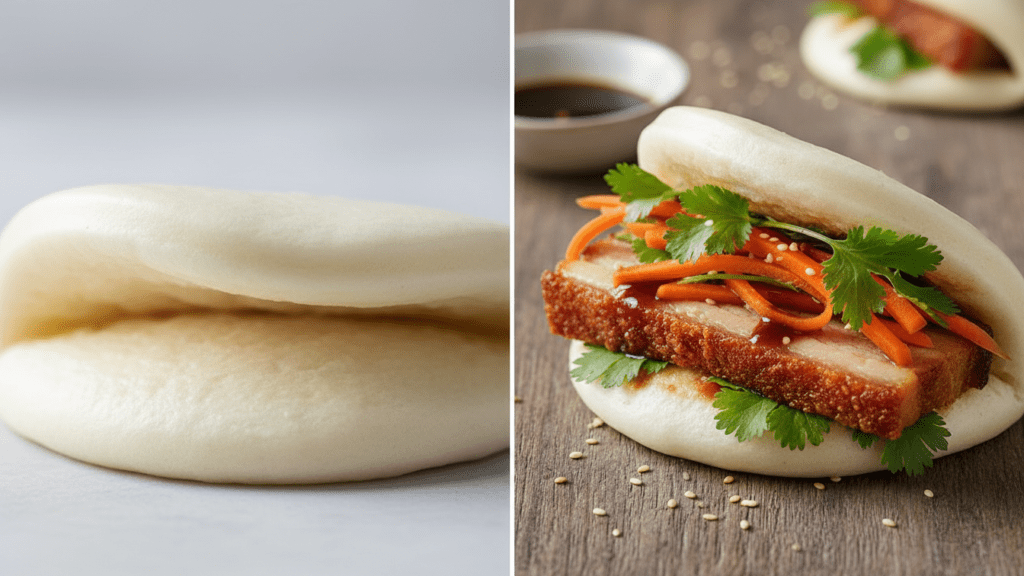
Imagine pulling a bamboo steamer lid away to reveal perfectly smooth, snow-white buns that look like they belong on a food stylist’s Instagram feed. You probably think you need years of training in a dim sum kitchen to pull this off, right? Wrong. If you can mix flour and water without causing a kitchen fire, you are halfway to becoming a legend. Ready to make your friends question why they ever go out to eat?
Why This Recipe is Awesome
Why should you bother making these from scratch instead of buying the frozen ones that taste like wet cardboard? Because these are the softest, fluffiest things you will ever put in your mouth. Making bao buns at home allows you to control the texture, ensuring they don’t turn into rubber the second they hit the air.

This recipe also doubles as the ultimate kitchen flex. There is something deeply satisfying about watching yeast do its job and seeing flat circles of dough puff up into little edible clouds. Plus, they are the perfect vessel for literally any leftovers in your fridge. Got some pulled pork? Put it in a bao. Leftover crispy tofu? Bao it.
Whether you want to impress a date or just want to treat yourself to a gourmet snack while wearing pajamas, this is the move. It is surprisingly low-effort for such a high-reward result. IMO, once you taste a fresh one, the grocery store version is dead to you. 🙂
Ingredients
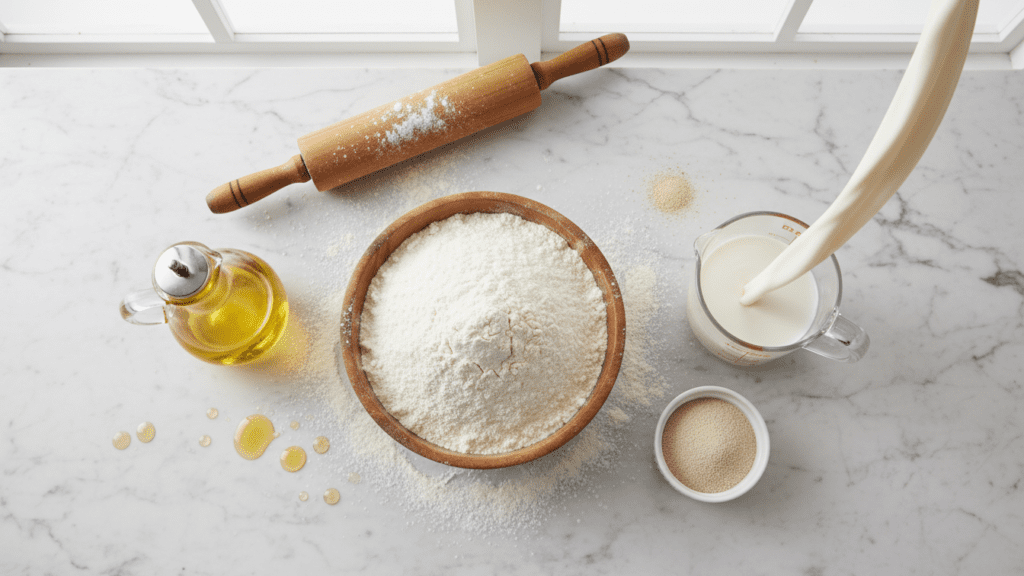
Don’t panic—you don’t need to hunt down rare herbs from a mountaintop. You likely have most of these staples in your pantry. If not, a quick trip to the store will set you up for multiple batches.
- 3 ½ cups All-Purpose Flour (Low-protein “Hong Kong” flour makes them whiter, but AP works perfectly)
- 2 teaspoons Instant Yeast (The fast-acting kind is your best friend here)
- 3 tablespoons Granulated Sugar (This feeds the yeast and adds that classic subtle sweetness)
- 1 cup Whole Milk (Luke-warm! Cold milk makes the yeast grumpy)
- 2 tablespoons Vegetable Oil (Plus a little extra for brushing)
- 1 teaspoon Baking Powder (This gives that extra “oomph” during steaming)
- ½ teaspoon Salt
Tools & Kitchen Gadgets Used
While you could theoretically do this with a pot and a prayer, these specific tools turn the process from a “DIY disaster” into a “culinary triumph.”
- KitchenAid Stand Mixer – Save your arm muscles for the gym; let the dough hook do the kneading.
- Bamboo Steamer Basket – The GOAT of bao making. It absorbs excess moisture so your buns don’t get soggy.
- Adjustable Rolling Pin – Essential for ensuring every bun has the same thickness.
- Parchment Paper Squares – These prevent your buns from bonding permanently to the steamer.
- Large Wok or Deep Pan – This holds the water that creates the magic steam.
- Silicone Pastry Brush – For that crucial oil coating that prevents the buns from sticking shut.
Step-by-Step Instructions
Alright, put on your favorite playlist and let’s make some dough. Follow these steps, and don’t overthink it—it’s just flour and water, not rocket science.
Step 1: The Mix and Knead
Whisk your flour, sugar, yeast, baking powder, and salt in your mixer bowl. Pour in the warm milk and oil. Attach the dough hook and let it run on low speed for about 8-10 minutes. You want the dough to look smooth, elastic, and as soft as an earlobe (weird comparison, but trust me on the texture).
Step 2: The First Nap
Place the dough in a lightly oiled bowl and cover it with a damp cloth. Let it sit in a warm spot for about 90 minutes or until it doubles in size. If your house is freezing, put it in the oven with just the light turned on. It needs a cozy environment to grow.
Step 3: Punch and Portion
Once the dough has risen, punch it down to release the air. This is great stress relief. Divide the dough into 12 to 15 equal pieces. Roll each piece into a smooth ball. Keep the balls covered with a towel while you work so they don’t develop a “skin.”
Step 4: The Fold
Roll each ball into an oval shape about ¼ inch thick. Lightly brush the top with oil and fold it in half over a piece of parchment paper. The oil is the secret to making sure they actually open up later instead of becoming a solid bread roll.
Step 5: The Second Rise
Place your folded buns into the steamer baskets. Cover them and let them rest for another 30 minutes. They should look puffy and slightly delicate. If you skip this step, your buns will be dense and sad, and we don’t do sad buns in this house.
Step 6: The Steam
Bring water to a simmer in your wok. Place the steamer baskets on top. Steam on medium heat for exactly 10 minutes. Here is the most important part: do not open the lid immediately. Turn off the heat and wait 5 minutes. If you open it too fast, the temperature shock will make your buns wrinkle like a raisin.
Calories & Nutritional Info
You’re eating a steamed bun, not a stalk of celery, so let’s manage expectations. However, since we steam them instead of frying, they are actually a lighter option than many breads.
- Calories: Approximately 160 kcal per bun (without fillings).
- Fat: 3g (Mostly from the oil and milk).
- Carbohydrates: 28g (The fuel for your soul).
- Protein: 4g (A nice little bonus).
- Sugar: 4g (Just enough to keep things interesting).
- FYI: These are surprisingly filling, so you’ll likely stop at two… or six. No judgment.
Common Mistakes to Avoid
Don’t let your hard work go to waste. Avoid these classic blunders to ensure your bao buns are peak perfection.
- Using Boiling Water: If your milk is too hot, you will kill the yeast. Think “baby bath water” temperature.
- The Dreaded Wrinkle: Opening the steamer lid too early causes the buns to collapse. Patience is a virtue; give them those extra 5 minutes to cool down.
- Forgetting the Oil: If you don’t oil the fold, you won’t be able to open the bun to put the filling in. You’ll just have a very thick taco. Oil is mandatory.
- Overcrowding: These buns grow in the steamer. If they touch, they will merge into one giant “Mega-Bao.” Give them space.
- Expired Yeast: If your yeast doesn’t bubble or make the dough rise, it’s dead. Check the date before you start.
Variations & Customizations
Once you have the base down, you can start experimenting. Here are three ways to flip the script:
- The Whole Wheat Swap: Replace half of the AP flour with whole wheat flour for a nuttier flavor. They won’t be as white, but they’ll feel “healthy-ish.”
- The Sweet Bao: Add an extra tablespoon of sugar to the dough and fill the steamed buns with Nutella and sliced strawberries for a dessert version.
- Spicy Infusion: Add a teaspoon of chili flakes directly into the dough for a bun that has a built-in kick before you even add the filling.
FAQ Section
Why are my bao buns yellow instead of white? This usually happens because of the type of flour or the pH of your water. To get that bleached white look, use specialized “Bao Flour” or “Hong Kong Flour,” which is highly refined and lower in protein.
Can I make the dough in advance? Yes! You can let the dough do its first rise in the fridge overnight. The slow ferment actually develops a better flavor. Just let it come to room temperature before shaping.
What do I do if I don’t have a bamboo steamer? You can use a metal steamer insert, but wrap the lid in a kitchen towel. This prevents condensation from dripping onto the buns and causing soggy spots.
Can I freeze homemade bao buns? Absolutely. Steam them first, let them cool completely, and freeze them in a zip-top bag. Re-steam them for 2-3 minutes when you’re ready to eat.
Why did my buns turn out flat? Your yeast might be old, or you didn’t give them enough time for the second rise. That 30-minute rest after shaping is non-negotiable for fluffiness.
Can I use water instead of milk? You can, but the milk provides the fat and lactose that make the buns tender and slightly creamy. Water will result in a chewier, more “bread-like” texture.
How do I stop the buns from sticking to the parchment? Make sure you use non-stick parchment paper. If you’re still having trouble, a tiny spray of oil on the paper before placing the dough will solve it.
Final Thoughts
There you have it—the path to becoming a bao buns master. No more crying over twenty-dollar takeout bills. You now possess the power to create edible clouds that can hold anything from fried chicken to chocolate.
The first time you pull apart a warm bun and see that perfect crumb, you’ll never want to go back to the store-bought stuff. Go ahead, fill them up, take a photo, and make everyone on your feed jealous. Just don’t forget to save a couple for yourself before the vultures (your family) descend. Happy steaming!