

No Drama Mama: The Ultimate Baby Shower Board Recipe for Stress-Free Hosting
Let’s be real, throwing a baby shower is a delicate balance. You need cute décor, fun games (that hopefully aren’t too cringe), and—most importantly—food that is beautiful, plentiful, and safe for the guest of honor. You have enough to worry about without spending three hours fussing over tiny quiches. That’s why the baby shower board is the viral sensation you need. It’s a gorgeous, customizable grazing platter that handles your appetizer and dessert duties in one stunning, easy-to-assemble swoop. Why cook when you can curate a masterpiece?
Why This Recipe Is Awesome (And Makes You a Hosting Legend)

A grazing board is basically a guaranteed win, but a themed baby shower board? That’s next-level genius. It serves as both the centerpiece and the primary source of nourishment for your hungry guests. It truly does the heavy lifting.
First, the aesthetic appeal is off the charts. You customize the colors (pink, blue, or gender-neutral yellow/green) and shapes (using baby-themed cookie cutters!) to match the party décor. It looks high-effort, but only we know the truth. Secondly, the ease of assembly is ridiculously low. You buy, slice, and arrange. No cooking required, except maybe popping some meatballs in a slow cooker, if you feel like showing off. Less time in the kitchen means more time socializing, IMO.

Thirdly, this impresses guests because it provides variety and abundance. People love having choices, and this board offers something for everyone—sweet, savory, and plenty of safe options for expectant mothers. A beautiful, overflowing board always says, “I have my life together.” Prepare for the compliments; you earned them with your superior shopping skills.
Ingredients: Pink, Blue, and Everything Safe
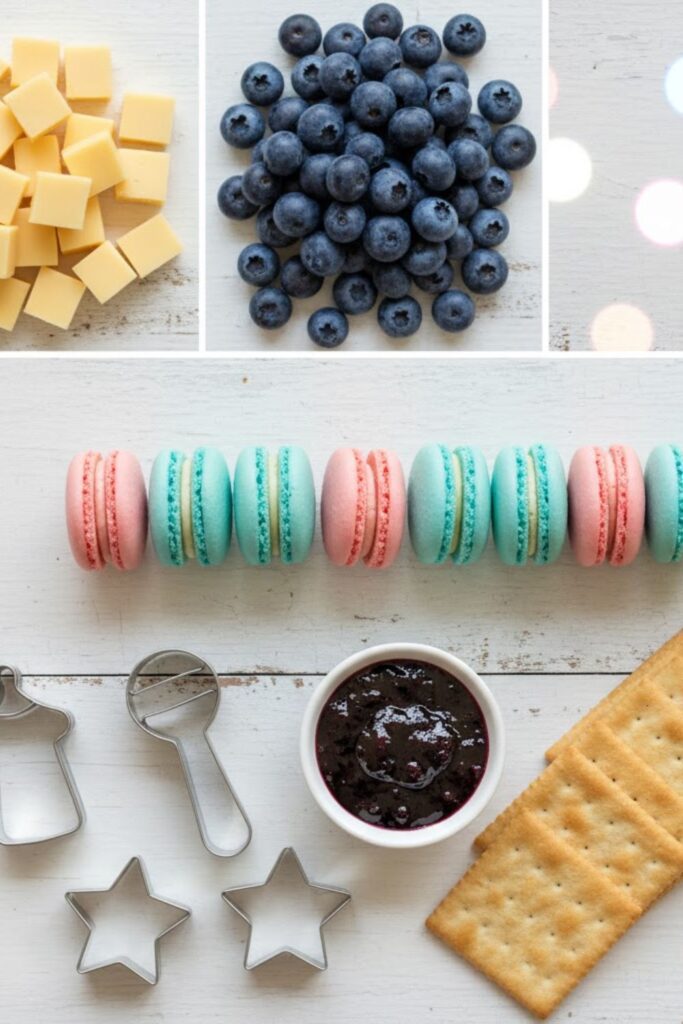
The key here is avoiding items on the “no-go” list for pregnant guests. Safety first, fun second.
H3: The Savory Core (Keep it Mama-Safe!)
- Cheese Selection (3-4 types): Hard cheeses only! Cheddar (cubed), Aged Gouda, Gruyère. Crucially, ensure all cheeses are pasteurized.
- Charcuterie (2 types): Cured, shelf-stable meats only (like salami or pepperoni). Avoid soft, unpasteurized cheeses and raw/deli counter meats. Use pre-cooked ham cubes as a safer option.
- Carrot Sticks & Cucumber Slices: Fresh, crunchy green and orange veggies.
- Hummus or Spinach Dip: Use a store-bought, fully cooked dip for safety.
- Crackers & Pretzel Sticks: A variety of neutral crackers and pretzel rods (for the “trunk” or border).
H3: The Sweet Baby Bites (The Color Pop)
- Fresh Fruit: Blueberries and raspberries (or strawberries/pink grapes for a girl). Wash well!
- Sweet Dips: Vanilla yogurt dip or a small jar of lemon curd.
- Small Sugar Cookies: Cut with baby-themed cookie cutters (bottles, rattles).
- Macarons or Meringues: Choose blue, pink, or yellow for a color pop.
- White Chocolate Pretzels: Drizzle white chocolate on pretzels for a homemade touch.
Key Substitutions (The Flexible Feast)
- Meat: For maximum safety, substitute all charcuterie with smoked salmon (if pregnant guest eats cooked fish) or fully cooked chicken salad served in a small cup.
- Veggies: Add snap peas or blanched green beans for more green color.
- Cheese: Replace a hard cheese with a fun, pasteurized Boursin or a whipped feta dip for a softer texture.
Tools & Kitchen Gadgets Used
Minimal cooking, maximum assembling. These tools will ensure your board is Instagram-ready.
- Large Wooden Board or Platter: The bigger your guest list, the bigger the board!
- Small Bowls or Ramekins (3-4): Essential for containing dips, jams, and messy fruits.
- Small Baby-Themed Cookie Cutters: For shaping cheese, fruit, or small sandwiches.
- Cheese Knives and Spreaders: Clearly mark them for safe use.
- Paring Knife: For slicing cheeses and trimming fruits.
- Small Tongs and Appetizer Forks: For sanitary serving.
Step-by-Step Instructions: Assembling the Aww-Worthy Platter
This is less of a recipe and more of an architectural lesson. Build outward, fill every gap, and focus on the theme colors.
H3: Phase 1: Anchors and Color (Setting the Scene)
- Map and Place Ramekins: Place your ramekins (dips, jams) first. This creates the structural anchor for your baby shower board.
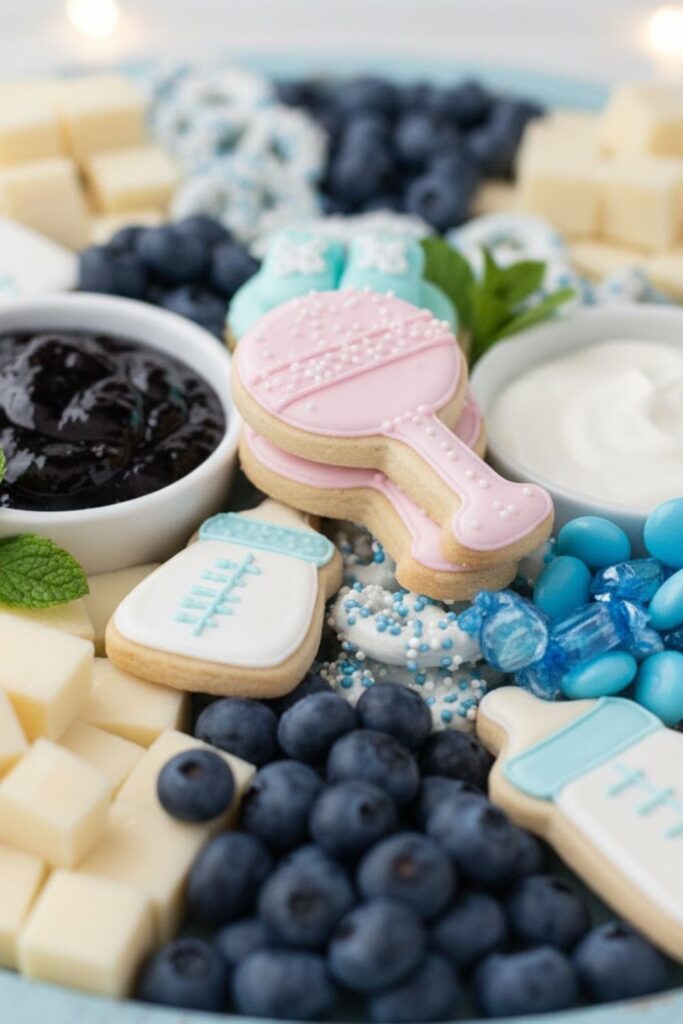
- Define the Color Blocks: Group your color-themed sweets and fruits (like the blue macarons/blueberries and pink cookies/raspberries) strategically near the ramekins. This defines the overall aesthetic.
- Cheesy Foundations: Arrange the cubed, hard cheeses and any pre-sliced meats in small, inviting piles. Use a baby bottle cookie cutter to cut out a few cheese shapes for a fun touch.
H3: Phase 2: Flow and Fill (The Abundance Factor)
- The River of Crunch: Lay down a flowing line of crackers and pretzel sticks. Have them snake around the dips and cheese piles. Crackers are bulky; use them wisely!
- Add the Greens: Distribute the cucumber and carrot sticks in fanned patterns. The veggies act like the “filler” and provide necessary texture contrast.
- Tuck and Sprinkle: Fill all the remaining gaps with the small, loose items—the nuts, small cookies, and the overflow of berries. The goal is zero empty board space. Abundance looks best!
H3: Phase 3: The Finishing Touch (Pure Cuteness)
- The Centerpiece: If you use a small baby toy (like a rattle or pacifier) for decoration, ensure it is new and clean, and place it prominently near the center. Do not put it directly on the food.
- The Drizzle: Drizzle a bit of honey or maple syrup over the brie or one of the hard cheeses right before serving. This adds a beautiful sheen and a sticky, sweet surprise.
- Labels and Signs: Add small, simple signs for items, especially for the pasteurized cheeses. This helps guests (and the mama-to-be) feel safe about their choices. Serve immediately!
Calories & Nutritional Info (A Little Bit of Everything)
This board is a mix of simple carbs, fats, and protein. We aim for delicious variety, not dieting. This is a very rough estimate per snack-sized serving (e.g., 2 crackers, 1 oz cheese, a few berries).
- Estimated Calories per Serving: Approximately 200-300 calories. (It’s easy to lose track, so graze responsibly!)
- Protein & Calcium: High, thanks to the hard cheeses. Good for the mama-to-be!
- Simple Sugars: Found in the macarons, cookies, and jams. Enjoy the treats!
- Fiber Boost: Comes from the fresh fruits and vegetables. Don’t skip the cucumber!
- Safety First: Focus is on pasteurized dairy and well-washed produce.
Common Mistakes to Avoid (The Hostess No-Gos)
A baby shower board requires unique considerations. Don’t make these gaffes!
- Unsafe Cheese/Meat Choices: AVOID soft cheeses (like unpasteurized Brie/Feta), deli meats, and anything raw. Only use hard, pasteurized cheeses and cooked meats. Safety is the priority here!
- Serving Cold Cheese: Cheese tastes best at room temperature. Take the hard cheeses out of the fridge about 30 minutes before assembling. Cold cheese is flavorless.
- Wet Foods Without Ramekins: Dips, jams, and juicy fruits must go in small bowls. Otherwise, the cracker river becomes a soggy, sticky mess.
- Pre-Cutting All Fruit: Slice fruits like apples or pears only right before serving, or toss them with a little lemon juice to prevent immediate browning. Nobody wants sad brown fruit.
- Forgetting the Dipping Utensils: A beautiful board is ruined if everyone has to use their fingers. Provide plenty of tongs, spoons, and spreaders for hygienic grazing.
Variations & Customizations: Themed Board Life
Ready to customize your creation beyond just pink and blue? Get creative!
1. The Brunch Board
Instead of charcuterie, feature breakfast elements. Add mini croissants, small stacks of silver dollar pancakes (skewered with fruit), mini muffins, and a cream cheese frosting dip. Keep the fruit fresh and vibrant.
2. Mocktail Mixer Board
This board focuses on garnish and drink mixers. Arrange lime wedges, sliced oranges, fresh mint, sugar cubes, and beautiful edible flowers around a central grouping of champagne flutes (for sparkling water/mocktails). It’s chic and interactive.
3. Savory Comfort Board (The Anti-Sweet)
Skip the cookies and macarons. Focus on comfort. Include mini quiches (fully cooked!), a hot pimento cheese dip (served warm in a small slow cooker), mini meatballs, and plenty of crusty bread slices. It’s hearty, savory, and very satisfying.
FAQ Section: Your Boarding Pass to Success
Still have questions about how to handle this viral party concept? Let’s answer them!
Q1: How much time should I allocate for assembly?
A: Plan for 30-45 minutes of pure assembly time. Prep (slicing cheese, washing fruit) should happen beforehand. The actual layering is the quickest part.
Q2: How much food do I need per person?
A: Aim for about 3-4 ounces of total food per guest (combined weight of cheese, meat, fruit, etc.). Since this is a shower, guests will likely be mingling and having a full meal later, so lean toward the lighter side.
Q3: What is the safest meat for a pregnant guest?
A: Fully cooked, hot items (like baked ham cubes or meatballs) are safest. If serving cold, stick to shelf-stable, fully cured meats like hard salami (avoid deli turkey/ham slices unless you know the source/temperature control is flawless).
Q4: Can I use store-bought cookie dough for the small cookies?
A: Yes! Store-bought sugar cookie dough is your best friend here. Roll it out, use your baby-themed cookie cutters, bake, and quickly frost or dust with sprinkles. Easy peasy.
Q5: How do I transport the board to a different location?
A: Assemble the board fully at home, cover it tightly with plastic wrap (or a large cake dome), and transport it flat in your car. Assemble the tiny garnishes and dips on-site.
Q6: What size board should I use for 20 guests?
A: For 20 guests, you’ll need a very large board or platter, likely 30 inches or more in length, or use two separate, large boards to ensure enough variety and visual impact.
Q7: Where should I place the crackers? On or off the board?
A: You need a mix. Place a few flowing lines of crackers on the board to fill gaps. Then, place the bulk of the crackers in baskets or bowls adjacent to the board. This saves valuable real estate on the platter.
Final Thoughts: Welcome to the Foodie Family!
You created a stunning, safe, and wildly impressive baby shower board. You dodged the drama of fussy cooking and created a centerpiece that celebrates the mama-to-be perfectly. You just proved that hosting a flawless event is all about smart shopping and strategic arranging, not complex recipes. Now go enjoy the party—you earned that macaroon!

