
Seriously Easy Asian-Inspired Sesame Chicken: Better Than Takeout (And Faster!)
Listen, we’ve all been there. It’s Friday night, you’ve had a week that felt longer than a Tolkien novel, and the thought of cooking makes you want to crawl under the covers. But then you look at your bank account and realize that $50 takeout order is just not happening. Enter this Asian-inspired Sesame Chicken recipe—the glorious weeknight hero. This dish delivers that irresistible, sticky-sweet, savory punch you crave, and you make it in less time than it takes the delivery guy to find your front door. How’s that for a viral hook?
Why This Recipe is Your New Dinner MVP

Why bother making your own when you can just dial for delivery? Because, my friend, this homemade version tastes exponentially better, doesn’t leave you feeling greasy, and you control all the ingredients. Plus, the smell alone as that sauce thickens is enough to make you feel like a culinary genius. This recipe is awesome for three simple reasons:
First, it’s ridiculously flavorful. We’re talking about a glossy, thick sauce that perfectly balances sweet, salty, and a hint of zing. Second, it’s fast. Seriously, 20 minutes from prep to plate. Third, and most importantly, it’s a huge crowd-pleaser. Who doesn’t love crispy chicken coated in a sticky sauce? You’ll impress your dinner guests (or just yourself) without breaking a sweat.
Ingredients: The Pantry Powerhouses


You probably have most of the sauce ingredients lurking in your pantry already. No need for a frantic specialty store run!
H3: For the Chicken and Coating
- 1.5 lbs Boneless, skinless chicken breasts or thighs: Cut them into 1-inch pieces. Thighs stay moister, IMO!
- ½ cup Cornstarch: This is the key to our crispy (not soggy) coating.
- 1 large Egg: Whisk it up for the dredge.
- 1 teaspoon Salt and ½ teaspoon Pepper: Essential seasoning.
- Vegetable oil or canola oil: For pan-frying. We need enough for a decent shallow fry.
H3: For the Sticky Sesame Sauce
- ½ cup Soy Sauce (low sodium preferred): The base of our savory goodness.
- ½ cup Honey or Maple Syrup: Provides that perfect sticky sweetness.
- ¼ cup Rice Vinegar: Adds a necessary bright tang.
- 2 cloves Garlic, minced: Don’t use the pre-minced jar stuff; fresh is always better.
- 1 tablespoon Fresh Ginger, grated: That essential aromatic punch!
- 1 tablespoon Sesame Oil (toasted): Add this after cooking for maximum aroma.
- 1 teaspoon Sriracha or Chili Garlic Sauce (optional): For a little kick.
- 2 teaspoons Cornstarch mixed with 2 tablespoons Water: Our thickening slurry—don’t forget this!
Key Substitutions:
- Gluten-Free Swap: Use Tamari or Coconut Aminos instead of soy sauce, and swap the cornstarch for tapioca starch for the coating.
- Sweetener Swap: Don’t have honey? Agave or light brown sugar work just fine.
- Protein Swap: Tofu, shrimp, or even firm white fish can easily substitute the chicken.
Tools & Kitchen Gadgets Used: Your Arsenal for a Speedy Stir-Fry
You don’t need a fancy wok (though it’s a nice-to-have). Basic kitchen essentials get this job done.
- Large mixing bowl: For tossing the chicken in the coating.
- Shallow dish or plate: For the cornstarch dredging station.
- Whisk: For making the sauce slurry smooth and lump-free.
- Large skillet or Wok: You need something with high sides that holds heat well for frying and saucing.
- Tongs or Spider strainer: For safely turning and removing the chicken from the oil.
- Cutting board and sharp knife: For prepping the chicken and aromatics.
- Measuring cups and spoons: Precision is vital for that perfect sauce balance.
Step-by-Step Instructions: Achieve Takeout Nirvana in Minutes
Get ready to move fast. Stir-frying is a high-heat, quick-cook method!
H3: Step 1: The Chicken Prep
Pat your chicken pieces thoroughly dry with paper towels. This is crucial for achieving crispiness! Place the cornstarch on a shallow plate. Lightly whisk the egg in a separate bowl. Toss the chicken pieces in the egg until lightly coated, then immediately dredge them in the cornstarch, pressing to make sure every piece is fully coated.
H3: Step 2: The Sauce Voodoo
In a small bowl, whisk together the soy sauce, honey (or maple syrup), rice vinegar, minced garlic, grated ginger, and sriracha. Now, in a separate tiny cup, whisk the 2 teaspoons of cornstarch with the 2 tablespoons of water until completely smooth. Don’t add the cornstarch slurry to the main sauce yet!
H3: Step 3: Fry the Gold
Pour about ½ inch of oil into your skillet and heat it over medium-high heat until shimmering. Use tongs to gently place the chicken pieces in the hot oil, ensuring you do not overcrowd the pan. Fry in batches if necessary. Fry each side for 3-4 minutes until they are golden brown and perfectly crisp. Remove the chicken and place it on a paper towel-lined plate to drain excess oil.
H3: Step 4: Sauce Gloriously
Drain most of the oil from your pan, leaving about a tablespoon (or just wipe it clean, TBH). Pour the main sauce mixture into the pan and bring it to a simmer over medium heat. Whisk continuously for about 30 seconds.
H3: Step 5: The Magic Thickens
Give your cornstarch slurry one last whisk (it settles quickly!) and slowly pour it into the simmering sauce while constantly stirring. The sauce will thicken almost instantly and become glossy. Remove the pan from the heat immediately. Stir in the toasted sesame oil now.
H3: Step 6: Toss and Serve
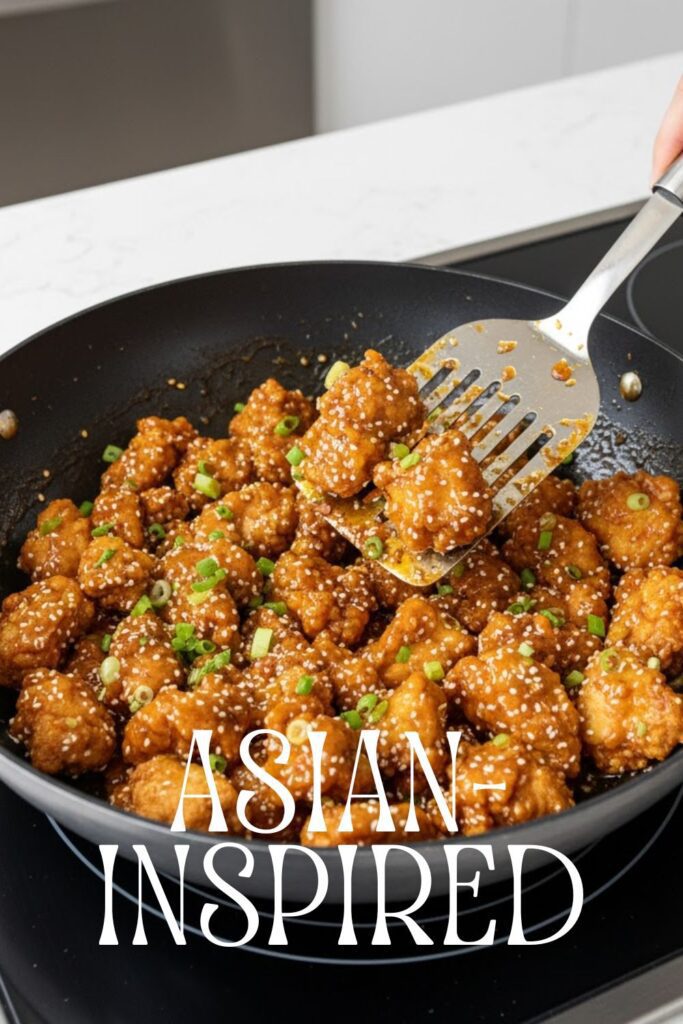
Return the crispy chicken to the pan and gently toss it until every piece is completely coated in that sticky, beautiful glaze. Sprinkle with sesame seeds and chopped green onions. Serve immediately over rice or noodles. You’ve earned this!
Calories & Nutritional Info: The Inside Scoop

These are estimated figures per serving, assuming 4 servings for the entire recipe and serving over plain white rice (which adds carbs).
- Estimated Calories per serving (excluding rice/noodles): 400-450 calories
- Protein: 35-40g (hello, chicken!)
- Fat: 15-20g (from the oil and coating)
- Carbohydrates: 30-35g (mostly from the honey/syrup and cornstarch)
- High Sodium: Yes, soy sauce brings the salt. Opt for low-sodium soy sauce to manage this.
- Good source of Ginger and Garlic: Provides natural anti-inflammatory benefits. So, it’s basically health food, right? 🙂
Common Mistakes to Avoid: Don’t Ruin Dinner, Okay?
We’re going for restaurant quality here, not a soggy disappointment. Avoid these classic slip-ups.
- Wet Chicken Syndrome: Do not skip patting the chicken dry. Moisture is the enemy of a crispy coating. Wet chicken = steamy, soggy coating. Nobody wants that.
- Overcrowding the Pan: Frying too much chicken at once dramatically drops the oil temperature. The result? Greasy, pale, sad chicken. Fry in batches, even if you feel impatient.
- Ignoring the Cornstarch Slurry Rule: Adding the slurry too quickly or without whisking it first guarantees a lumpy sauce that never properly thickens. Whisk thoroughly and add slowly.
- Burning the Garlic and Ginger: These aromatics burn quickly in high heat. Add them to the sauce after you remove it from the heat or incorporate them into the cold sauce mixture beforehand, as we did in Step 2.
Variations & Customizations: Be Your Own Chef
Now that you’ve mastered the basic technique, feel free to remix this dinner.
- Keto-Friendly Low-Carb Swap: Use coconut aminos for the soy sauce, and substitute the honey with a liquid erythritol or allulose sweetener. Skip the cornstarch in the coating and use almond flour or a blend of almond flour and baking powder for a lighter crust.
- Spicy Firecracker Chicken: Double the amount of Sriracha in the sauce (or even triple it—you daredevil!). For extra heat, toss in ½ teaspoon of crushed red pepper flakes when simmering the sauce. This is for the spice fanatics out there.
- Vegetarian Tofu Power-Up: Use extra-firm tofu, pressed well to remove excess water. Cut into cubes, toss in the cornstarch, and fry until golden. Follow all the sauce steps exactly. You can also add some vibrant steamed broccoli or bell peppers to the sauce before tossing the tofu.
FAQ Section: Solving Your Sticky, Savory Dilemmas
Got questions about your new favorite weeknight meal? I have answers!
H3: Q1: Can I bake or air-fry the chicken instead of pan-frying?
A1: Yes! For a healthier option, air-fry the cornstarch-coated chicken at 400°F (200°C) for 10-12 minutes, flipping halfway. You can also bake it at 425°F (220°C) for 15-20 minutes. You’ll lose a little crunch, but the flavor remains!
H3: Q2: How do I prevent the sauce from becoming too sweet?
A2: Increase the rice vinegar by a teaspoon or add a very small squeeze of lime juice at the end. The acid will cut through the sweetness and brighten the flavor profile.
H3: Q3: Can I make the sauce ahead of time?
A3: Definitely! Whisk all the sauce ingredients (except the cornstarch slurry and sesame oil) together and store them in the fridge for up to three days. Make the cornstarch slurry right before you need to thicken the sauce on the stovetop.
H3: Q4: Why did my sauce turn out lumpy?
A4: Lumps happen when you add the cornstarch slurry to the hot liquid too quickly or without properly whisking the slurry first. Always mix the cornstarch and water until smooth before pouring, and pour slowly while stirring constantly.
H3: Q5: What is toasted sesame oil, and can I use regular sesame oil?
A5: Toasted sesame oil is pressed from toasted sesame seeds, giving it a deep, nutty, and highly fragrant flavor. Use it only as a finishing oil. Regular sesame oil is neutral and often used for cooking, but it lacks the intense flavor needed here. Stick to the toasted kind!
H3: Q6: How long do leftovers last?
A6: Store leftover Sesame Chicken in an airtight container in the refrigerator for up to 3-4 days. Reheat in a skillet or air fryer to help crisp up the coating again.
H3: Q7: What are the best side dishes to serve with this?
A7: Serve this over fluffy white rice, brown rice, or lo mein noodles. You can also add a side of steamed green beans, sautéed bok choy, or a quick cucumber salad for a fresh contrast.
Final Thoughts: Ditch the Delivery App Forever
Seriously, you just made an Asian-inspired dish that rivals your favorite takeout spot. Feel that sense of superiority? You should. You saved money, you ate fresher food, and you now have a killer weeknight recipe in your back pocket. Now go pour yourself a glass of something nice and enjoy the fruits of your very minimal labor. Send me a pic of your perfectly coated chicken, or I won’t believe you actually made it. 😉

