Get That Coconut Fix: The Ultimate Homemade Almond Joy Copycat Recipe
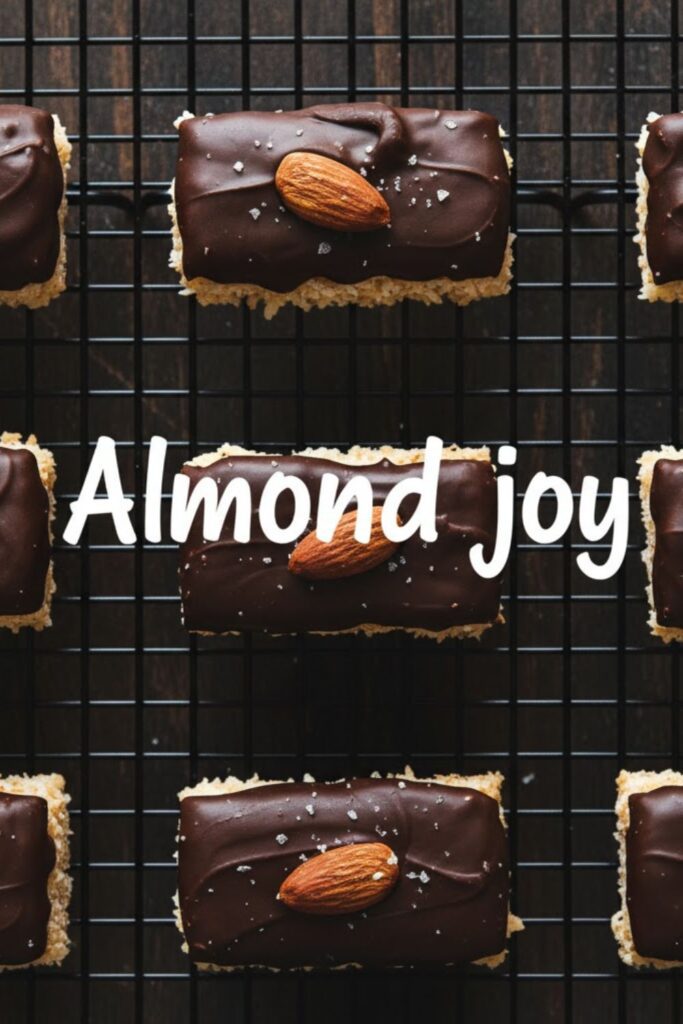
Let’s talk about candy bar supremacy. There’s one bar that perfectly balances three incredible textures: the chewy, sweet coconut center; the crunchy, savory whole almond; and the rich, snappy chocolate coating. You know I’m talking about Almond Joy (or Mounds, if you ditch the almond—you do you!). You could buy a pre-packaged bar, but it often tastes suspiciously waxy. I’m here to hand you the keys to making the ultimate, no-bake, truly decadent Almond joy copycat that will absolutely blow the original out of the water. Get ready for homemade tropical bliss!
Why This Homemade Almond Joy Recipe Is Pure Genius

Why bother making candy bars when the wrapper is half the fun? Because this recipe is awesome, that’s why. It delivers a moist, intense coconut flavor and a thick, high-quality chocolate coating that tastes ridiculously superior to the commercial version.
First, the texture is perfection. We use condensed milk to keep the coconut filling incredibly soft and chewy, not dry or crumbly. Second, it’s ridiculously easy and no-bake—you just mix, shape, and dip. Third, you control the chocolate. We recommend high-quality dark chocolate for a grown-up flavor, but milk chocolate works too. Plus, homemade candy is the ultimate holiday gift or party treat. Who needs complicated truffles when you can master this iconic, three-ingredient wonder?
Ingredients: The Tropical Triple Threat

The secret to this recipe is the ultra-sweet, moist coconut filling and the snappy chocolate shell.
H3: For the Sweet Coconut Center
- 1 can (14 oz) Sweetened Condensed Milk (SCM): Crucial! This is the binding and sweetening agent that keeps the filling soft.
- 4 cups Sweetened Flaked Coconut: The main attraction!
- 1 teaspoon Vanilla Extract: Rounds out the flavor.
- Pinch of Salt: Cuts the sweetness.
H3: For the Nuts and Coating
- 24 Whole Almonds (Raw or Roasted): One almond per bar.
- 10-12 ounces Semi-Sweet or Dark Chocolate Chips: High quality makes a huge difference.
- 1 tablespoon Coconut Oil or Vegetable Shortening: CRUCIAL! Helps thin the chocolate for smooth dipping and gives a glossy, snappy finish.
Key Substitutions:
- Chocolate Swap: Use milk chocolate chips for a sweeter bar, or high-quality dark chocolate (70%+) for a richer, less sweet bar.
- Coconut Swap: Use unsweetened coconut flakes if you prefer less sugar, but you may need to add a few tablespoons of extra sugar to the SCM mixture.
- Nut Swap: Substitute the almond with a pecan half for a new texture, or simply omit the almond for a Mounds bar copycat!
- Dairy Swap: Use sweetened condensed coconut milk for a dairy-free version.
Tools & Kitchen Gadgets Used: Your Candy Assembly Line
No deep fryer or candy thermometer needed! Keep it cool.
- Large Mixing Bowl: For combining the coconut filling.
- Rubber Spatula: For mixing and scraping.
- 9×13 inch Baking Pan: Lined with parchment paper.
- Small Microwave-Safe Bowl or Double Boiler: For melting the chocolate coating.
- Fork or Dipping Tool: CRUCIAL for dipping! A two-pronged fork works best.
- Wire Cooling Rack: For setting the dipped candies.
- Measuring Cups and Spoons: For accurate proportions.
Step-by-Step Instructions: Mix, Chill, Dip, Done!
This is a no-bake wonder. The longest step is the chilling!
H3: Step 1: Make the Coconut Base
In your large mixing bowl, combine the sweetened condensed milk, flaked coconut, vanilla extract, and salt. Stir vigorously with a rubber spatula until the mixture is completely uniform and sticky.
H3: Step 2: Shape and Chill (The Structure)
Press the entire coconut mixture evenly into the parchment-lined 9×13 inch baking pan. The mixture should be about ½ inch thick. Cover the pan and refrigerate for at least 1 hour (or until firm). This chilling makes the shaping much easier!
H3: Step 3: Cut and Place the Almonds
Remove the chilled coconut mixture from the pan using the parchment paper sling. Using a sharp knife, cut the coconut block into 24 even rectangular bars (or whatever shape you prefer). Press one whole almond firmly into the top center of each bar. Place the bars back on the parchment-lined pan or a wire rack.
H3: Step 4: Chill Again (The Firmness Factor)
Place the coconut bars back into the freezer for 15-20 minutes. This is CRUCIAL! Freezing ensures the coconut filling holds its shape and prevents it from crumbling or dissolving when dipped into the warm chocolate.
H3: Step 5: Melt the Chocolate Coating
In your small microwave-safe bowl, combine the chocolate chips and coconut oil (or shortening). Microwave in 30-second intervals, stirring well after each interval, until the chocolate is completely smooth and glossy. The coconut oil makes the chocolate thin, glossy, and snappy.
H3: Step 6: Dip and Drain (The Final Coat)
Working quickly, drop one frozen coconut bar into the melted chocolate. Use a fork or dipping tool to turn it gently to fully coat it. Lift the bar out, let the excess chocolate drip off, and place it back on the wire cooling rack or clean parchment paper. Repeat with the remaining bars.
H3: Step 7: Set and Serve!
Let the bars sit at room temperature for 30 minutes (the chocolate will set faster since the coconut center is frozen), or chill them in the refrigerator for 15 minutes until the chocolate is firm and snappy. Serve and watch them disappear!
Calories & Nutritional Info: The Sweet Details

These are rich, high-fat candies, but packed with satisfying coconut and almond. These estimates are approximate per single bar (1/24th of the recipe).
- Estimated Calories per bar (1/24th): 120-150 calories
- Fat: 8-12g (from coconut, condensed milk, and chocolate)
- Carbohydrates: 10-15g (from SCM and sugar)
- Sugar: 8-12g
- Protein: 2-3g (from almond)
- Fiber: Good source from coconut.
- The Bottom Line: A satisfying, indulgent treat that’s better than the wrapper version!
Common Mistakes to Avoid: Don’t Let it Crumble!
The dipping stage is where most people fail. Follow these rules for success.
- Skipping the Freezer Step: Do NOT skip freezing the bars! If the filling isn’t rock solid, it will crumble and dissolve into the warm chocolate, creating a messy, unworkable chocolate sludge.
- Using Too Much Coconut Oil: While necessary, too much coconut oil will make the chocolate coating soft and oily, preventing it from hardening properly at room temperature. Stick to 1 tablespoon.
- Using Oily Chocolate: The melted chocolate must be smooth and thin. If it looks thick or grainy, you need to add a little more coconut oil or shortening and stir until glossy.
- Adding Liquid to Chocolate: If a single drop of water gets into your melted chocolate, it will instantly seize and become grainy. Use dry bowls and utensils only!
Variations & Customizations: Your Candy Bar Remix
You’ve mastered the classic; now remix your favorite candy bar!
- Peanut Butter Cup Coconut: Replace the almond on top with a small peanut butter cup before dipping. Substitute half the vanilla extract with almond extract in the filling.
- Keto/Sugar-Free Version: Use unsweetened flaked coconut and a sugar-free sweetened condensed milk alternative. Use keto-friendly chocolate chips for the coating. The chilling time remains the same!
- Mocha Coconut Filling: Add 1 tablespoon of cocoa powder and 1 teaspoon of cooled, strong espresso powder to the coconut filling mixture. The mocha flavor elevates the richness beautifully.
FAQ Section: Answering Your Sweetest Queries
You’ve got questions about this tropical treat. I’ve got answers.
H3: Q1: How do I store homemade Almond Joy bars?
A1: Store your bars in an airtight container in the refrigerator for up to 2 weeks. They taste best when chilled. You can also freeze them!
H3: Q2: Can I freeze the finished bars?
A2: Yes! Homemade Almond Joy bars freeze beautifully. Place them in an airtight, freezer-safe container, separating layers with parchment paper. Freeze for up to 3 months. Thaw in the fridge or enjoy frozen!
H3: Q3: What is the secret to a soft, moist coconut filling?
A3: Sweetened Condensed Milk (SCM) is the secret! Unlike recipes using powdered sugar, SCM binds the coconut and keeps it moist and soft, preventing a dry, crumbly center.
H3: Q4: Why is my chocolate coating thick and clumpy?
A4: This usually means the chocolate seized (got water in it) or it overheated and scorched. You can try adding a teaspoon of vegetable oil or shortening at a time and stirring vigorously, but often, seized chocolate requires starting over.
H3: Q5: What is the difference between Almond Joy and Mounds?
A5: Almond Joy has a whole almond on top and is coated in milk chocolate. Mounds has no almond and is coated in dark chocolate. You can make both with this recipe!
H3: Q6: Do I need to toast the coconut flakes first?
A6: No, you don’t need to, but toasting the coconut flakes briefly before mixing adds a deeper, nuttier flavor and a slightly chewy texture. If you don’t toast, your filling will be paler and softer.
H3: Q7: Can I use coconut oil instead of cocoa butter for a coating?
A7: Yes, for this recipe, coconut oil is used to thin the chocolate for dipping. You melt it with the chocolate chips for a glossy, snappy coating.
Final Thoughts: Tropical Victory Achieved!
You did it! You created a flawless, decadent, and incredibly satisfying batch of Almond joy copycat bars. Go ahead, take a proud bite. Doesn’t that creamy coconut and crunchy almond taste exactly like homemade victory? I knew it would. You are now the undisputed monarch of no-bake candy. Are you ever buying waxy, store-bought candy bars again? I highly doubt it. Enjoy your tropical triumph!