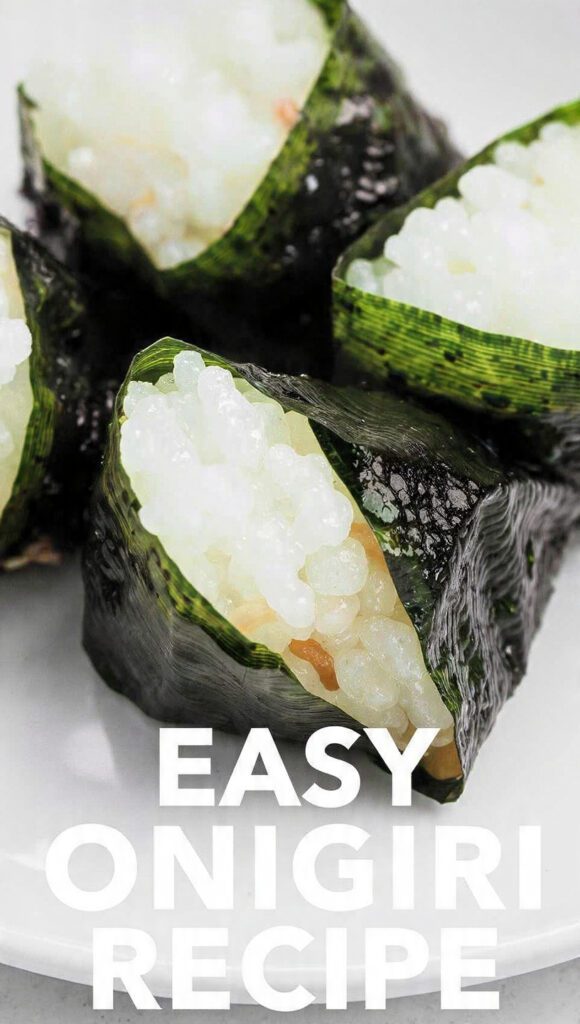
The Ultimate Guide to Authentic Onigiri: More Than Just a Rice Ball
We have all been there. You’re watching your favorite anime, and the main character pulls out a perfectly triangular, seaweed-wrapped mystery snack that looks infinitely more satisfying than your crushed granola bar. You think, “It’s just a rice ball, how hard can it be?” Then you try to make one, and suddenly your kitchen looks like a rice-based explosion, and you’re left holding a sticky, shapeless blob. Today, we are reclaiming our kitchen dignity with the perfect onigiri, the Japanese comfort food that is basically a hug you can carry in your pocket.

Seriously, why settle for a boring sandwich when you can eat a portable masterpiece? I once tried to explain to my traditionalist grandmother that these weren’t just “salty rice clumps,” but the pinnacle of snack engineering. After one bite of a spicy tuna filling, she actually stopped asking when I’d get a “real” hobby. Are you ready to become the MVP of the lunchroom without actually having to turn on an oven?
Why This Recipe is Awesome
This recipe functions as a culinary cheat code. It looks incredibly sophisticated, tastes like a vacation in Kyoto, and essentially costs about twelve cents in ingredients. If you can boil water and wash your hands, you have already mastered the hard part.

The versatility is truly elite. You get the clean, comforting taste of seasoned rice, the salty crunch of nori, and whatever surprise filling your heart desires. It hits every single taste bud like a well-coordinated flash mob. TBH, it’s the most efficient way to feel like a “global traveler” while eating at your desk. 🙂
Our Top Pick

Papier Herb Garden Recipe Journal - Hardback Design
Capture your culinary ideas and favorite memories with this beautifully designed recipe journal. Organized sections for breakfast, lunch, dinner, and treats make it easy to record recipes, ratings, dietary notes, and cooking tips, along with measurement and conversion guides. Extra pages let you list favorite restaurants, shops, and places to try. Crafted with a premium hardback cover, luxurious 100gsm paper, and a gold foil accent, it’s both durable and stylish. Thoughtfully designed to suit any kitchen, it makes a practical, timeless gift for family, friends, or yourself.
Plus, it serves as the ultimate “wow” factor for guests. Put a platter of these on a table, and suddenly everyone thinks you’re a Michelin-star chef. Who doesn’t love a high-reward, low-effort situation that also happens to be naturally gluten-free?
Ingredients
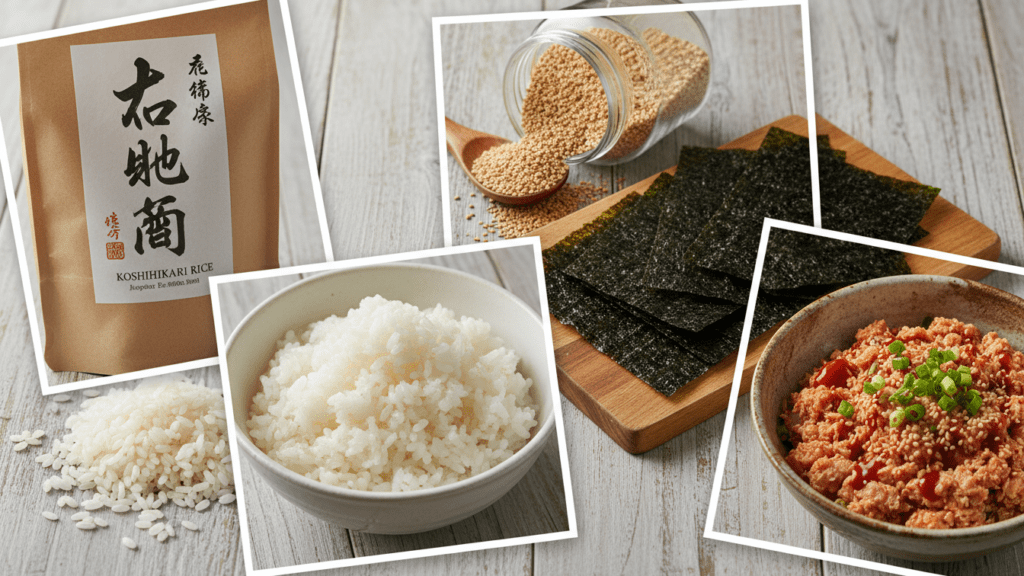
Gather your supplies, but don’t overthink it. Quality matters more than quantity here. If you try to use long-grain Uncle Ben’s rice, please stop reading and go buy some actual short-grain rice.
- 2 cups Japanese Short-Grain Rice (Look for “Sushi Rice”—this is non-negotiable)
- 2.5 cups Filtered Water (Good water makes good rice, FYI)
- 2 sheets Nori (Seaweed) (Cut into strips or full wraps)
- 1 tablespoon Sea Salt (For your hands, not just the rice)
- Toasted Sesame Seeds (For that “I know what I’m doing” aesthetic)
- Fillings: Spicy tuna (canned tuna + kewpie mayo + sriracha), pickled plum (Umeboshi), or salted salmon.
Tools & Kitchen Gadgets Used
You don’t need a professional sushi bar, but a few specific tools make this process feel like a professional operation.
- Japanese Rice Cooker – The undisputed king of the kitchen for consistent, fluffy results.
- Onigiri Rice Molds – If you lack the “hand-eye coordination” for manual shaping, these are a lifesaver.
- Wooden Rice Paddle (Shamoji) – Essential for fluffing the rice without smashing the grains.
- Large Glass Mixing Bowl – To let the rice cool down enough that you don’t get third-degree burns.
- Sharp Kitchen Shears – For clean, crisp cuts on your nori sheets.
Step-by-Step Instructions
Alright, let’s get to work. Try to stay focused; the smell of steaming rice is a powerful distraction.
Step 1: The Rice Ritual
Wash your rice. No, seriously, wash it until the water runs clear. If you skip this, your onigiri will be a gummy, starchy mess. Cook the rice in your rice cooker using the “plain rice” setting. Once it’s done, let it steam for 10 minutes before opening the lid.
Step 2: The Cooling Phase
Transfer the hot rice to a large glass bowl. Use your shamoji to gently fluff it. Do not mash it like potatoes! We want individual grains, not a paste. Let it cool until you can handle it without screaming, but it must still be warm. Cold rice won’t stick together.
Step 3: The Salted Hand Technique
This is the secret sauce. Wet your hands with filtered water and rub a generous pinch of sea salt over your palms. This prevents sticking and seasons the outside of the ball. If you’re using a rice mold, dip the mold in water first.
Step 4: The Construction
Place a handful of rice in your palm (or mold). Make a small indentation in the center and add your filling. Cover the filling with another small bit of rice. You’re essentially burying a treasure.
Our Top Pick

LuBudingJoy Blank Recipe Book
B5 Blank Recipe Book – Create and organize your favorite recipes in one beautiful place. This hardcover recipe book (10" × 7.3") features 150 blank pages and includes DIY category stickers. Designed with conversion charts, content tables, and a back pocket for loose notes.
Step 5: The Shape-Shift
Gently but firmly press the rice into a triangle, ball, or cylinder. Do not squeeze too hard; you want the rice to be just compressed enough to hold its shape. If you’re using a mold, press the lid down firmly and pop the little guy out.
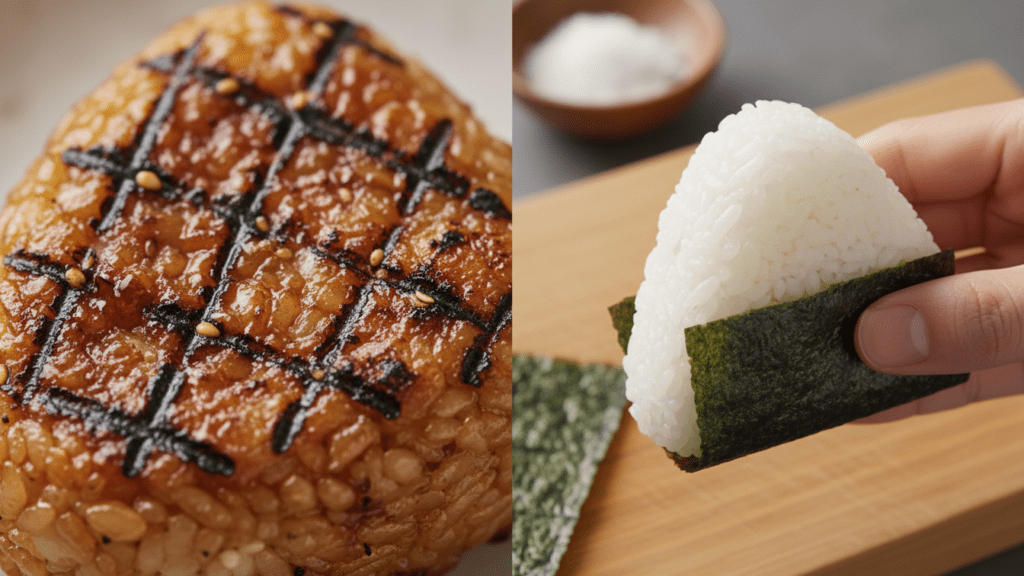
Step 6: The Seaweed Suit
Wrap a strip of nori around the base or cover the whole thing. The nori acts as a handle so your hands don’t get sticky. Sprinkle with sesame seeds for the final touch. Eat immediately while the nori is crispy, or wrap in plastic for later.
Calories & Nutritional Info
For the folks who like to know exactly what they’re doing to their bodies, here is the breakdown.
- Calories: ~180-250 kcal per ball (depending on your filling).
- Protein: 4-8g (Salmon and tuna give you a nice boost).
- Fats: 1-5g (Keep the mayo in check for a leaner snack).
- Carbs: 35-45g (The pure energy you need to survive a Monday).
- Notes: This dish is naturally low-fat and highly digestible. IMO, it’s the perfect pre-workout fuel.
Common Mistakes to Avoid
Don’t let your onigiri become a tragedy. Avoid these classic slip-ups:
- Using the Wrong Rice: If you use Jasmine or Basmati, the ball will fall apart the moment you look at it. Stick to short-grain.
- Dry Hands: If your hands aren’t wet, you will become a human rice-magnet. Keep a bowl of water nearby.
- Overfilling: Greed is a sin and it will cause your rice ball to explode. Use a teaspoon of filling, max.
- Cold Rice: Trying to shape cold rice is a recipe for frustration. Shape while warm.
- Wrapping Too Early: If you’re packing these for later, keep the nori separate until you eat, or it will get soggy and sad.
Variations & Customizations
Once you master the classic, feel free to branch out.
- Yaki Onigiri (The Grilled Hero): Brush your rice ball with soy sauce and butter, then pan-fry until crispy and golden. It’s a total game-changer.
- The Spicy Scandi: Mix canned salmon with sriracha and dill. It’s a fusion twist that will wake you up faster than a double espresso.
- The Vegetarian Swap: Use pickled ginger and avocado or seasoned shiitake mushrooms for a plant-based powerhouse.
FAQ Section
Do I have to use a rice cooker for onigiri? While a rice cooker is the gold standard for consistency, you can use the stovetop. Just be prepared to watch it like a hawk so you don’t burn the bottom.
Can I make onigiri the night before? Yes, but IMO, rice gets hard in the fridge. If you must, wrap them tightly in plastic and microwave for 20 seconds to soften the grains before eating. 🙂
Is onigiri the same as sushi? Not quite. Sushi uses rice seasoned with vinegar, sugar, and salt. Onigiri uses plain salted rice. It’s the rustic, blue-collar cousin of sushi.
What if I can’t find Umeboshi? No problem! Use chopped olives or sun-dried tomatoes for a similar salty, tangy kick. It’s not traditional, but it works!
Why does my nori get soggy? Nori absorbs moisture from the rice instantly. For the best crunch, wrap the seaweed right before you take a bite.
Can I use brown rice? You can, but it’s much harder to get it to stick. Look for Short-Grain Brown Rice specifically if you want to go the healthy route.
What is the best way to store leftovers? Keep them in an airtight container at room temperature if eating within a few hours. For longer storage, the fridge is necessary, but wrap each ball individually in plastic wrap.
Final Thoughts
There you have it—the onigiri recipe that will officially make you the most interesting person at the picnic. It’s fresh, it’s fancy, and it takes less time to make than it does to wait in line for a mediocre burrito.
Go ahead, pack a lunchbox and enjoy your masterpiece. Just try not to get too smug when your friends ask where you “imported” your snacks from. Ready to ruin boring sandwiches for yourself forever? Happy shaping!