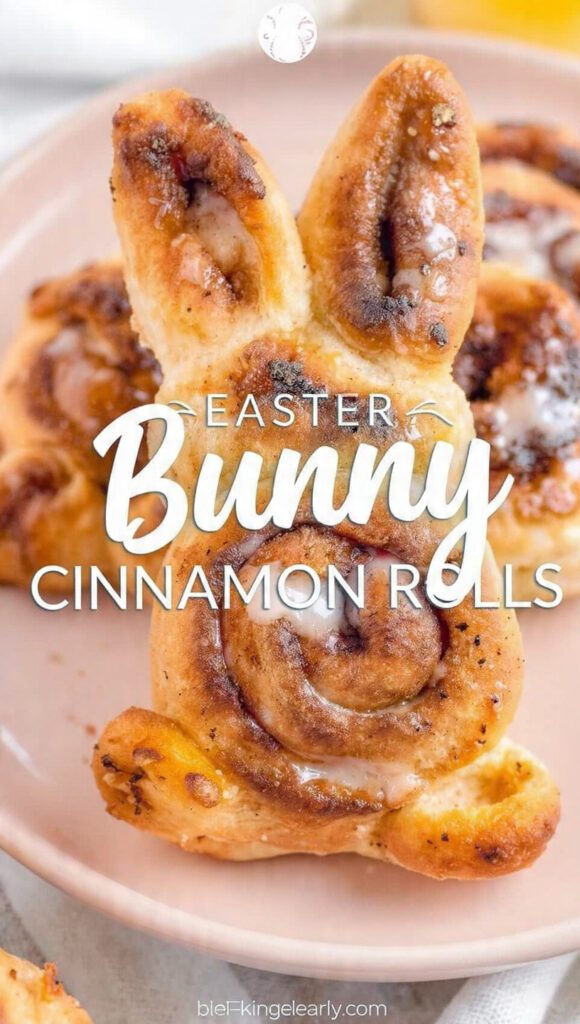
Fluffy and Festive: How to Make the Best Easter Bunny Cinnamon Rolls
Let’s be honest for a second: Easter brunch is basically a competitive sport where the person with the cutest pastry wins. You’ve seen those viral videos of perfect, golden-brown easter bunny cinnamon rolls and thought, “There is no way my clumsy hands can do that.” Well, I am here to tell you that you are wrong—mostly. While your first few might look more like abstract swamp monsters than woodland creatures, they will still taste like a sugary hug from the inside out.

Why settle for a plain round roll when you can have one with ears? I once tried to make these for a family gathering and accidentally made a batch that looked like angry llamas. Guess what? Everyone still ate them in under four minutes because, at the end of the day, it’s dough, butter, and cinnamon. Are you ready to dominate the dessert table and make everyone forget about the dry ham?
Why This Recipe is Awesome
Why should you bother with this recipe instead of just popping open a can of store-bought dough? Because the “can of doom” doesn’t have the soul-satisfying fluffiness of a homemade yeast dough. These rolls offer a texture that is light, pillowy, and practically melts the moment it hits your tongue.
This recipe also doubles as a great way to impress people you don’t even like. When you walk in with a tray of bunnies, people assume you have your life together. It’s a high-reward, medium-effort situation that makes you look like a professional pastry chef. Plus, who can resist a bunny with a cream cheese frosting face?
Best of all, this is a family-friendly activity. If you have kids, let them help “shape” the ears. If they turn out hideous, you can just blame the children. IMO, that is the ultimate win-win for a holiday morning. 🙂
Ingredients
Gather your supplies, but don’t panic. If you don’t have a stand mixer, you can do this by hand—just consider it your workout for the day.
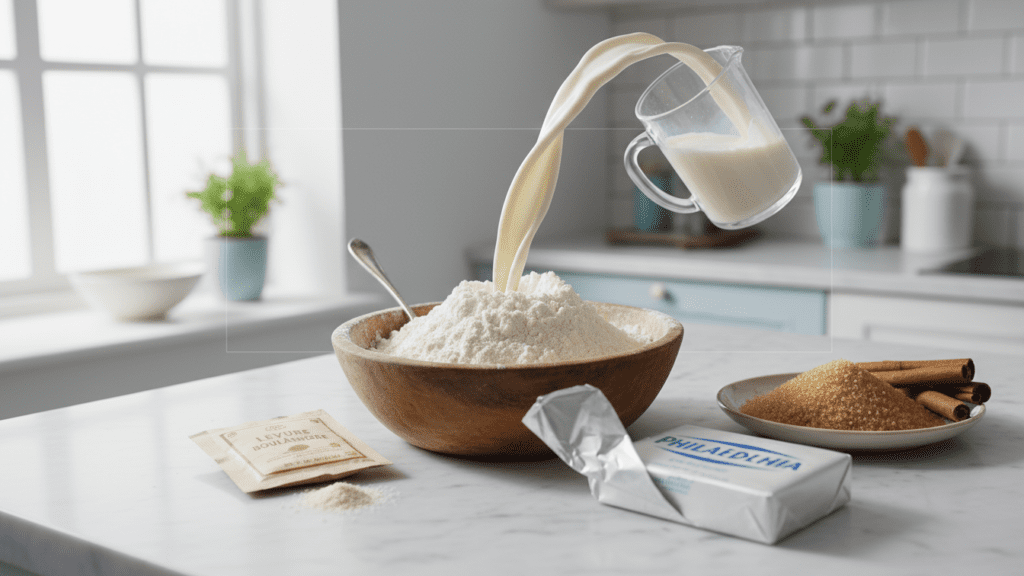
The Dough
- 4 cups All-Purpose Flour (plus a little extra for dusting your workspace)
- 1/4 cup Granulated Sugar
- 1 packet (2 ¼ tsp) Active Dry Yeast
- 1 cup Whole Milk (warm it up to about 110°F; don’t kill the yeast!)
- 1/3 cup Unsalted Butter (melted and slightly cooled)
- 1 Large Egg (at room temperature)
- 1/2 teaspoon Salt
The Filling
- 1/2 cup Unsalted Butter (softened to room temperature)
- 1 cup Brown Sugar (packed tight)
- 2 tablespoons Ground Cinnamon (don’t be stingy here)
The Cream Cheese Icing
- 4 oz Cream Cheese (softened—this is non-negotiable)
- 1/4 cup Unsalted Butter (softened)
- 1 1/2 cups Powdered Sugar
- 1 teaspoon Vanilla Extract
- Optional: Mini chocolate chips or pink sprinkles for the bunny faces
Tools & Kitchen Gadgets Used
You don’t need a commercial bakery, but these specific tools will prevent you from having a mental breakdown in the middle of your kitchen.
- KitchenAid Stand Mixer – This does the heavy lifting so your arms don’t fall off during the kneading process.
- Large Glass Mixing Bowl – You’ll need this to watch your dough double in size like a science experiment.
- Adjustable Rolling Pin – Ensures your dough is perfectly even so your bunnies aren’t lopsided.
- Silicone Baking Mat – Prevents the sugar from sticking to your pans and ruining your life.
- Unflavored Dental Floss – Believe it or not, this is the best way to cut dough without squishing the layers.
- Offset Spatula – Makes spreading the cream cheese icing feel like you’re painting a masterpiece.
Step-by-Step Instructions
Alright, put on your favorite playlist and let’s get to work. Try to stay focused; I know the smell of cinnamon is distracting.
Step 1: Bloom the Yeast
Start by pouring your warm milk into the mixer bowl. Sprinkle the sugar and yeast on top. Give it about five to ten minutes until it looks foamy and bubbly. If it doesn’t look alive, your yeast is dead—just like my motivation on a Monday—and you need to start over.
Step 2: Make the Dough
Add the melted butter, egg, and salt to the yeast mixture. Slowly add the flour while the mixer runs on low. Once the dough starts pulling away from the sides, let the machine knead it for about 5-7 minutes. You want the dough to be tacky, not sticky enough to trap a small fly.
Step 3: The First Rise
Grease a large bowl and plop your dough ball inside. Cover it with a damp cloth or plastic wrap. Place it in a warm, draft-free spot for about an hour. Does it look twice as big? Perfect. You are now a parent to a dough baby.
Step 4: Roll and Fill
Punch the dough down (it’s great stress relief!) and roll it out into a large rectangle on a floured surface. Spread that softened butter over every square inch. Mix your cinnamon and brown sugar, then sprinkle it over the butter. Leave a tiny border at the edge so it seals properly.
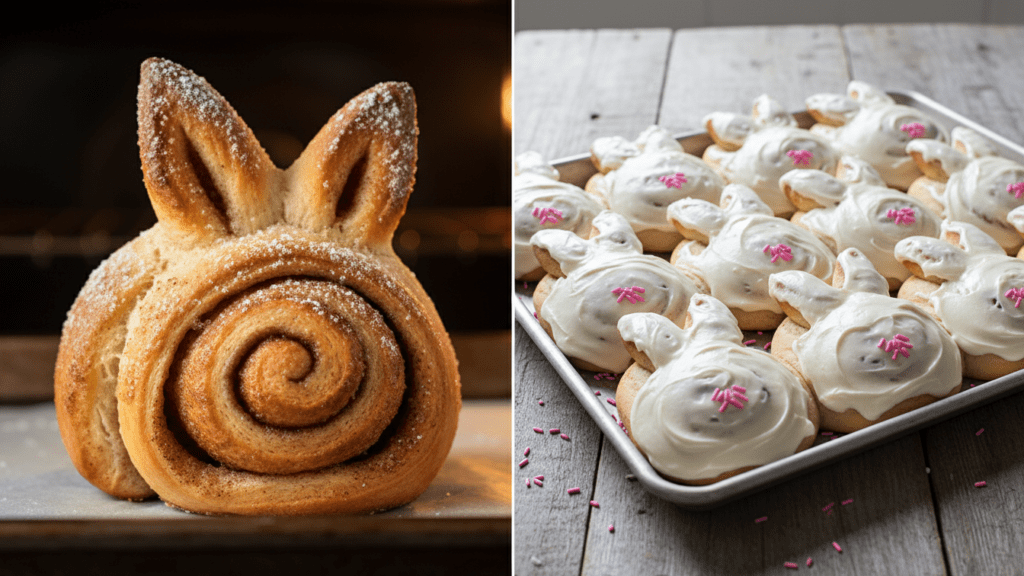
Step 5: The Bunny Transformation
Roll the dough up tightly starting from the long edge. Now, instead of just cutting circles, cut your rolls and then unroll about two inches of the tail end. Loop that loose piece over the top of the circle to create two “ears.” Pin them down firmly so they don’t fly off in the oven.
Step 6: Second Rise and Bake
Let the bunnies rest on your baking sheet for 20 minutes. Preheat your oven to 350°F. Bake them for 20-25 minutes until they are lightly golden. TBH, the smell alone might bring the neighbors over, so lock your doors.
Step 7: Frosting and Faces
Whisk your cream cheese, butter, powdered sugar, and vanilla until smooth. Slather the icing on while the bunnies are still slightly warm. Use mini chocolate chips for eyes and a pink sprinkle for a nose. Congratulations, you’ve created edible art!
Calories & Nutritional Info
I know, I know. You’re here for the sugar, not a math lesson. But for the curious, here is the breakdown per bunny:
- Calories: Approximately 380-420 kcal (Depending on how much icing you “sample”).
- Total Fat: 18g (Mostly the good kind from butter, right?).
- Sugars: 32g (It’s a holiday, don’t look at me like that).
- Protein: 5g (Hey, there’s an egg in there!).
- Notes: These contain zero cabbage and 100% joy. FYI, these are not considered a “health food” in any universe.
Common Mistakes to Avoid
Don’t be the person who brings “sad monsters” to brunch. Avoid these classic blunders:
- Using Boiling Milk: If the milk is too hot, you will kill the yeast. Use a thermometer; you want it around 110°F.
- Over-flouring the Dough: Adding too much flour makes for a roll that doubles as a brick. Keep it soft and tacky.
- Cold Cream Cheese: If your cream cheese is cold, your icing will be lumpy. Let it sit out for at least an hour.
- Not Pinning the Ears: If you don’t press the ears into the dough firmly, they will uncurl during baking and look like weird tentacles.
- Rushing the Rise: Yeast is like a teenager; it won’t do anything if you try to rush it. Give it time to grow.
Variations & Customizations
Once you master the basic bunny, you can start getting fancy with it.
- The Nutty Bunny: Sprinkle half a cup of finely chopped pecans over the cinnamon filling before rolling for a crunch factor.
- Fruit Loop: Add a layer of orange zest to the icing and toss some dried cranberries into the dough for a bright, citrusy twist.
- The Chocolate Hare: Swap the cinnamon filling for a Nutella spread. It’s messy, it’s indulgent, and it’s absolutely worth the extra napkins.
FAQ Section
How do I make my bunny ears stay in place? The secret is to press the dough firmly where the ear meets the head. You can even use a tiny dab of water to act as “glue” to ensure they don’t spring open while baking.
Can I make these easter bunny cinnamon rolls the night before? Absolutely! Shape the bunnies, put them on the tray, cover them tightly, and refrigerate overnight. Just let them sit at room temperature for 30 minutes before baking the next morning.
Why did my yeast not bubble? Your water was either too hot (you killed it) or too cold (it’s still sleeping). Or, your yeast is just old. Check the expiration date before you start your project.
Can I use bread flour instead of all-purpose? Yes, but your bunnies will be a bit chewier. All-purpose flour gives you that tender, cake-like crumb that makes these rolls so addictive.
What if I don’t have a stand mixer? No problem! Stir the dough with a wooden spoon until it’s too heavy, then knead it by hand for about 10 minutes. It’s a great way to justify eating two rolls later.
How do I keep the rolls from getting dry? Don’t overbake them! Take them out when they are lightly golden. If they turn dark brown, they will be dry. Also, keep them covered once they cool.
Can I use a different icing? Sure, but why would you? Cream cheese icing is the king of toppings. If you must, a simple powdered sugar and milk glaze works, but it won’t be as decadent.
Final Thoughts
There you have it—the only recipe for easter bunny cinnamon rolls you will ever need to win the holiday. Once you pull these golden, bunny-shaped clouds out of the oven, you’ll realize that store-bought rolls are a lie. Your kitchen now smells better than a professional bakery, and you have the cutest breakfast on the block.
Go ahead, share them with your friends, or hide the tray and tell everyone the batch failed so you can eat them all yourself. I won’t judge. Ready to ruin every other holiday breakfast for yourself? Happy baking!