
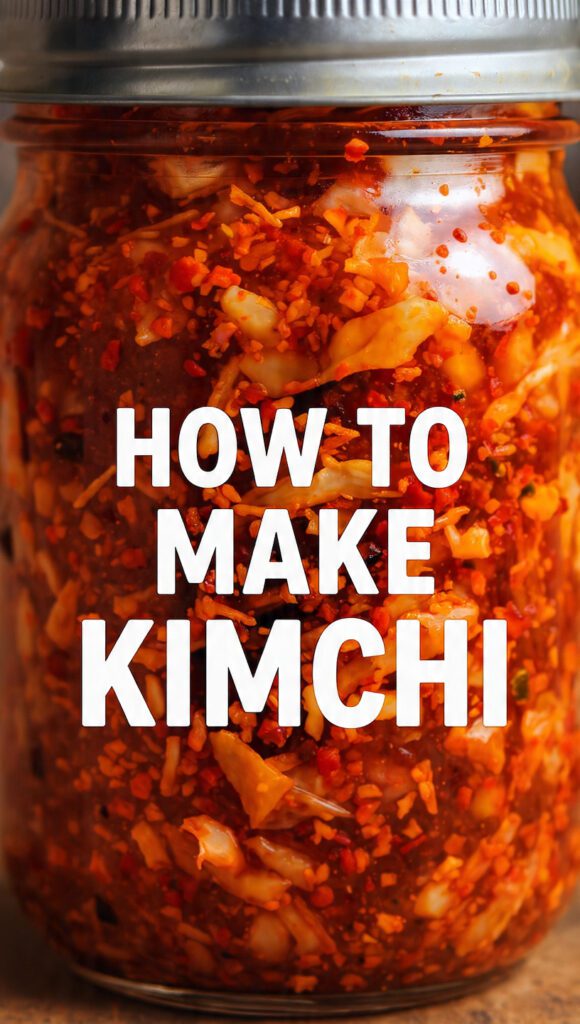
Fermentation Station: How to Make Kimchi That Actually Tastes Good
Have you ever walked into a trendy Korean BBQ spot, taken one bite of that spicy, crunchy cabbage, and wondered if you could recreate it without smelling like a garlic factory for three weeks? We’ve all been there. You probably bought a jar from the store once, realized it tasted like spicy wet paper, and gave up on your dreams. Well, put your apron back on, because learning how to make kimchi at home is the ultimate culinary flex that proves you’re more than just a microwave enthusiast.

Seriously, why pay ten dollars for a tiny jar of fermented cabbage when you can make five gallons of the stuff for the price of a Netflix subscription? It’s alive, it’s spicy, and it’s basically a science project you can eat. Ready to become the person who brings jars of funky goodness to every dinner party? Let’s get to work before your cabbage loses its spirit.
Why This Recipe is Awesome
This recipe is the holy grail of food prep because it actually gets better the longer you ignore it. Do you love recipes that reward procrastination? This is the one for you. Once you pack that jar, the bacteria do all the heavy lifting while you sit on the couch and binge-watch a documentary about cults.

The flavor profile is a wild ride of salty, spicy, and umami that elevates everything from basic ramen to a boring grilled cheese. Plus, it’s a probiotic powerhouse. You can basically tell people you’re a “wellness influencer” because you’re cultivating a miniature ecosystem in your fridge. It’s impressive, deeply traditional, and TBH, it makes you look like a much more competent adult than you actually are. 🙂
Ingredients
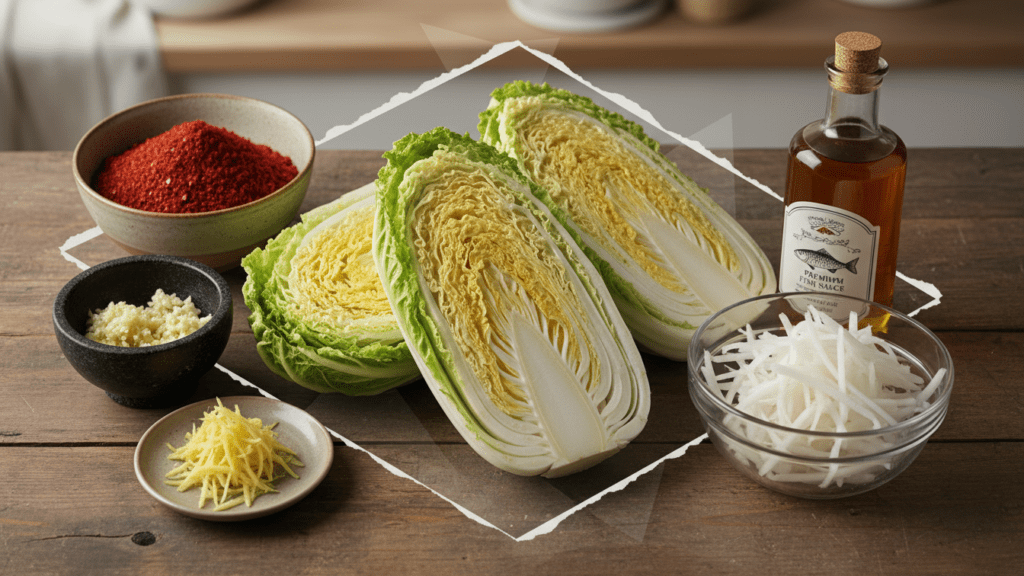
Don’t get intimidated by the list. If you can find an Asian grocery store, you’re golden. If not, the internet exists for a reason. Grab these basics and prepare for a kitchen that smells… interesting.
The Veggie Base
- 2 large Napa Cabbages (The star of the show)
- 1/2 cup Sea Salt (Use coarse Korean salt if you want to be authentic)
- 1 large Daikon Radish, cut into matchsticks
- 1 bunch Scallions, chopped into 2-inch pieces
The Spicy Porridge (The Paste)
- 2 tablespoons Rice Flour (Sweet/glutinous rice flour is best)
- 1 ½ cups Water
- 2 tablespoons Brown Sugar
- 1/2 cup Fish Sauce (Swap for soy sauce for a vegan version)
- 1 cup Gochugaru (Korean red chili flakes—don’t even think about using regular chili powder)
The Aromatics
- 1/3 cup Minced Garlic (Yes, that much)
- 1 tablespoon Minced Ginger
- 1 small Onion, pureed
Tools & Kitchen Gadgets Used
You don’t need a laboratory, but a few specific tools will keep you from losing your mind. If you’re missing these, they are a solid investment for your future as a fermentation master.
- Extra Large Mixing Bowl – You need space to massage that cabbage without it ending up on the floor.
- Glass Fermentation Jars – Plastic absorbs the smell, and trust me, you don’t want your Tupperware smelling like kimchi forever.
- Kitchen Gloves – Gochugaru will stain your skin and burn your eyeballs if you touch them. Protect yourself.
- Stainless Steel Colander – Crucial for rinsing the salt off without making a swamp in your sink.
- Glass Fermentation Weights – These keep the veggies submerged so they don’t grow a fuzzy “haircut” of mold.
Step-by-Step Instructions
Alright, let’s get messy. Follow these steps and try not to get chili flakes in your hair.
Step 1: The Great Cabbage Bath
Cut your cabbages into quarters lengthwise. Rub plenty of salt between every single leaf. Let them sit in a giant bowl for about two hours. Every 30 minutes, give them a toss. You want the cabbage to be floppy enough to fold without snapping.
Step 2: Rinse Like Your Life Depends On It
Once the cabbage is limp, rinse it at least three times in cold water. You need to get that excess salt out. Squeeze the water out like you’re wringing out a wet towel. If you skip the rinse, you’ll be eating a salt block.
Step 3: Make the Spicy Glue
Whisk the rice flour and water in a small pot over medium heat until it bubbles and turns into a translucent paste. Stir in the sugar, remove from heat, and let it cool. Once cool, mix in the gochugaru, fish sauce, garlic, ginger, and onion puree. It should look like a thick, spicy mud.
Step 4: The Veggie Mix-Up
Throw your radish matchsticks and scallions into a bowl and pour that spicy paste over them. Put on your gloves (seriously, put them on) and mix it all together until every veggie is coated in red glory.
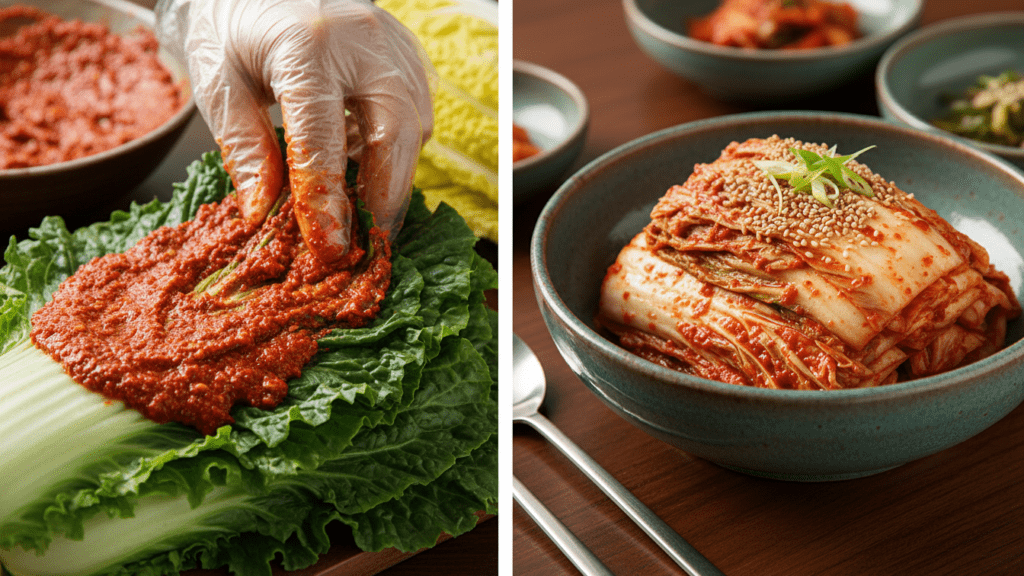
Step 5: The Massage
Take your cabbage quarters and spread the spicy paste between every single leaf. Be thorough. Don’t be stingy. Every leaf deserves love. Once coated, fold the cabbage into a neat little bundle.
Step 6: The Pack
Stuff the cabbage into your glass jars. Press down firmly to remove air pockets. Leave at least two inches of space at the top because this stuff is going to bubble and expand. If you overfill it, your jar will literally explode in your kitchen.
Step 7: The Wait
Leave the jar on your counter for 1 to 5 days out of direct sunlight. Taste it every day. When it tastes tangy and zingy, move it to the fridge. It’s officially kimchi!
Calories & Nutritional Info
You can eat an entire jar of this and still feel like a fitness god. It’s mostly water and fiber.
- Calories: 30 kcal per serving (about 1/2 cup).
- Probiotics: Billion of tiny “good guys” for your gut health.
- Vitamin C: High enough to ward off scurvy.
- Sodium: A bit high, so maybe don’t eat the whole jar in one sitting?
- Fiber: Excellent for keeping things moving, if you know what I mean.
Common Mistakes to Avoid
Don’t be the person who ruins the batch. Avoid these classic blunders:
- Using the Wrong Salt: Use non-iodized sea salt. Iodine can prevent fermentation and make your kimchi look like a science experiment gone wrong.
- Trapping Air: If you don’t press the cabbage down, oxygen will lead to mold. Mold is the enemy.
- Not Rinsing Enough: If you don’t rinse the salt off, your kimchi will be inedible. Taste a leaf after rinsing; it should be salty but not painful.
- Using “Normal” Chili Powder: Regular chili powder is for tacos. Gochugaru is for kimchi. They are not the same thing.
- Opening the Jar Constantly: Every time you open it, you let out the CO2 and let in oxygen. Be patient!
Variations & Customizations
Once you master the classic, try these twists to keep your fridge interesting.
- The Vegan Vanguard: Swap the fish sauce for miso paste or soy sauce. It adds that deep umami without the fishy funk.
- Keto-Friendly Version: Omit the rice flour paste and sugar. Use a tiny bit of monk fruit sweetener and just mix the spices with a little water.
- The Fruit Twist: Some people add grated pear or apple to the paste for a natural sweetness that helps the fermentation kick off.
FAQ Section
Why does my kimchi smell like a sulfur mine? That’s the garlic and fermentation doing their thing! It’s totally normal. If it smells like “rotting garbage” though, throw it out. There’s a fine line between “funky” and “toxic.”
Can I use any cabbage? Napa cabbage is the gold standard because its leaves are thin and soak up the sauce. Regular green cabbage is too tough. IMO, stick to Napa.
Is it okay if there are bubbles in the jar? Yes! Bubbles mean the yeast and bacteria are alive and well. It’s carbonation. It’s literally “fizzy” cabbage.
How long does homemade kimchi last? In the fridge, it can stay good for 6 months to a year. It just gets more sour and soft over time, which is perfect for stews.
Do I have to use a glass jar? Yes. Avoid plastic because the smell will never leave, and avoid metal because the acid can react with it. Glass is king.
What is the “white stuff” on top of my kimchi? If it’s a thin white film, it might be Kahm yeast (harmless but annoying). If it’s fuzzy and green or black, toss the whole batch. Don’t risk it.
Can I eat it right away? You can, but it will just taste like spicy salad. The magic happens after day 3 of fermentation.
Final Thoughts
There you have it. You now know how to make kimchi like a total pro. Your kitchen might smell like a basement for a few days, and your hands might be stained slightly orange, but the first time you put your homemade kimchi on a bowl of rice, you’ll realize it was worth it.
Go ahead, start your fermentation journey. Just don’t blame me when you start fermenting everything in your house, including the leftover carrots. Ready to ruin store-bought kimchi for yourself forever? Happy fermenting!

