
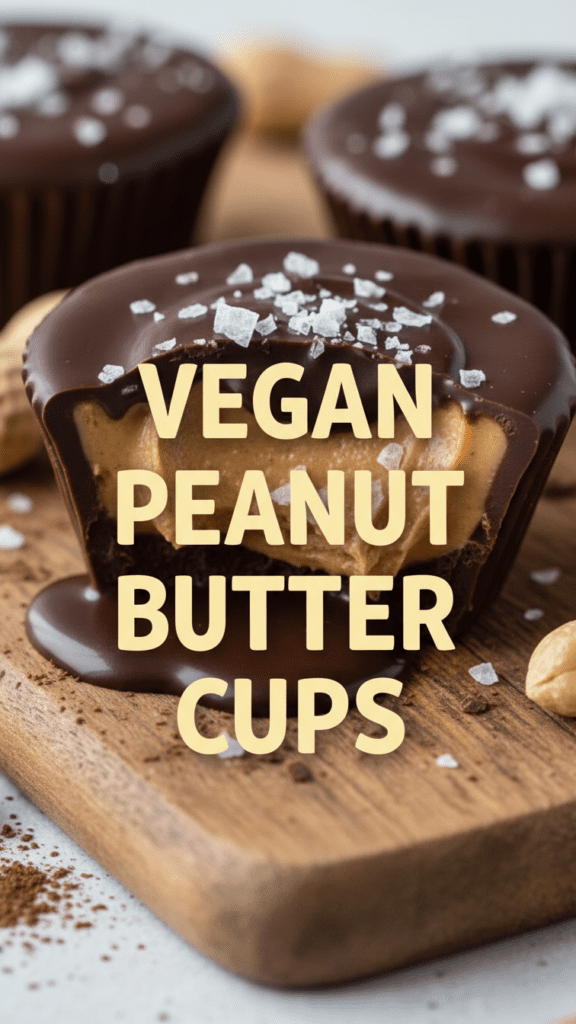
The Ultimate Vegan Peanut Butter Cups: Better Than the Orange Wrapper
Remember that one Halloween where you traded your entire haul of black licorice and questionable hard candies for just three of those iconic orange-wrapped chocolate discs? We’ve all been there, bartering like Wall Street traders for a taste of that salty-sweet magic. But let’s be real: as we get older, we start noticing that the “chocolate” in store-bought versions tastes suspiciously like flavored wax. It’s a tragedy, really. But what if I told you that you could create vegan peanut butter cups in your own kitchen that make the commercial ones look like sad, dusty relics?
Why This Recipe Is the Actual G.O.A.T.
Most vegan candy substitutes feel like a compromise, but this recipe is a direct upgrade. We use actual dark chocolate and real peanut butter—not the stuff that stays liquid until the year 2050. Why settle for processed fillers when you can have a decadent, melt-in-your-mouth masterpiece that actually respects your dietary choices?
You’ll love this version because it requires zero baking and exactly four ingredients. It’s the ultimate “impress your guests” move for parties, or just a great way to occupy your hands when you’re procrastinating on a Sunday. TBH, once you taste the snap of real tempered chocolate against a creamy, salty center, you’ll realize your childhood was just a series of missed opportunities. 🙂
The Ingredient Lineup: No Lab Chemicals Required
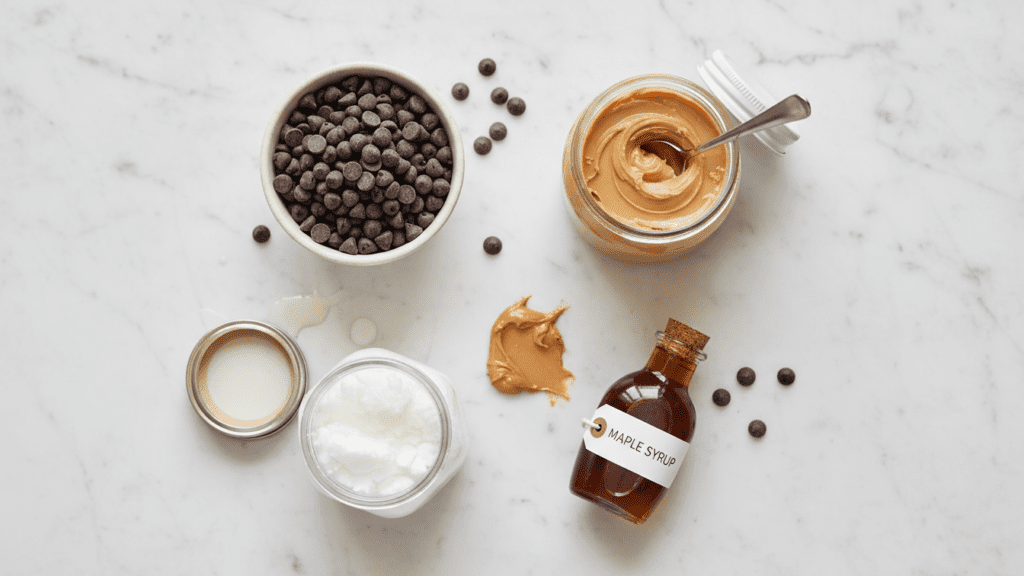
Grab your shopping bags, but leave the skepticism at the door. We’re keeping this clean, simple, and dangerously addictive.
- 1 cup Vegan Semi-Sweet or Dark Chocolate Chips (Go for 70% cocoa if you want that sophisticated “adult” vibe).
- 1/2 cup Creamy Peanut Butter (The natural kind works, but give it a good stir first).
- 2-3 tbsp Maple Syrup (Our liquid gold sweetener).
- 2 tbsp Coconut Oil (This ensures the chocolate stays silky and doesn’t crack like my phone screen).
- Optional: Flaky Sea Salt (To make you look like a professional chocolatier).
Key Substitution: If you have a nut allergy, swap the peanut butter for Sunflower Seed Butter. It’s just as creamy and saves you a trip to the ER. FYI, it still tastes incredible.
Tools & Kitchen Gadgets: Your Sweet Command Center
You can’t build a candy empire with a blunt rock and a prayer. Assemble these gadgets to make the process smoother than a fresh jar of Jif.
- Silicone Muffin Liners (These are the real MVPs; the chocolate pops right out).
- Mini Muffin Tin (To give your cups some structural integrity).
- Small Microwave-Safe Glass Bowl (For the melting magic).
- Small Whisk or Silicone Spatula (To combine the filling into a velvety dream).
- Teaspoon (Your primary precision-loading tool).
Step-by-Step: From Cocoa to Glory
Ready to create some magic? Follow these steps closely. Don’t go rogue and try to melt the chocolate over a literal bonfire; we want gentle heat, people.
Step 1: The First Melt
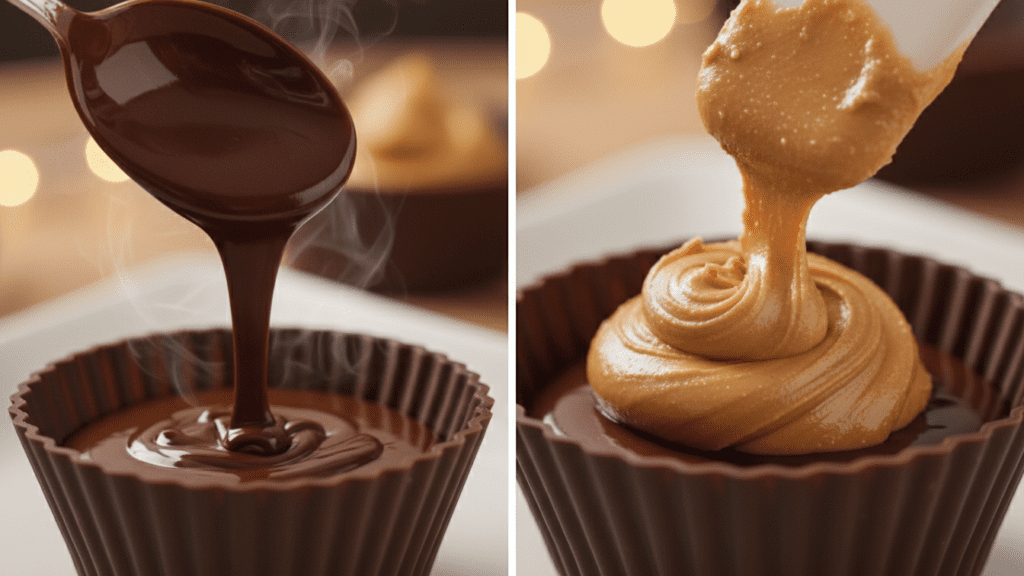
Combine your vegan chocolate chips and coconut oil in a bowl. Microwave in 30-second intervals, stirring in between, until it looks like a glossy pool of midnight. Do not overheat the chocolate, or it will “seize” and turn into a grainy, sad mess.
Step 2: The Foundation
Line your mini muffin tin with silicone liners. Spoon about 1-2 teaspoons of the melted chocolate into the bottom of each cup. Tilt the liners slightly to coat the edges just a tiny bit. Pop these in the freezer for 5-10 minutes.
Step 3: The Salty Center
While the bases set, mix your peanut butter, maple syrup, and a pinch of salt in a small bowl. Whisk until it becomes a thick, pliable paste. If it’s too runny, add a teaspoon of coconut flour; if it’s too thick, well, it’s peanut butter—it’s perfect.
Step 4: The Payload
Take the tin out of the freezer. Place a small dollop (about a teaspoon) of the peanut butter mixture into the center of each chocolate base. Gently flatten the peanut butter so it doesn’t stick out like a volcano—we need room for the lid!
Step 5: The Seal
Pour the remaining melted chocolate over each peanut butter dollop until it’s completely covered. Give the tin a gentle tap on the counter to level out the chocolate and get rid of any air bubbles. Sprinkle that flaky sea salt on top now if you’re feeling fancy.
Step 6: The Long Wait
Place the tin back in the freezer for at least 30-60 minutes. IMO, the wait is the hardest part of the entire day. Once they are solid, peel back the liners and try not to eat all of them before you finish reading this article.
Calories & Nutritional Info (Per Cup)
Since we are being transparent, here is the damage for one of twelve standard mini-cups. It’s a treat, not a kale salad, so adjust your expectations accordingly.
- Calories: 145 kcal
- Total Fat: 10g
- Carbohydrates: 12g
- Fiber: 2g
- Protein: 3g
- Sodium: 45mg
Common Mistakes to Avoid (The “Meltdown” Guide)
Don’t let your candy dreams turn into a kitchen nightmare. Avoid these classic blunders if you want to keep your foodie reputation intact.
- Wet Tools: Water is the mortal enemy of melted chocolate. Even one drop will make your chocolate seize up into a clumpy rock. Dry your bowls!
- Cheap Peanut Butter: If you use the kind with a layer of oil three inches thick, your centers will be a greasy mess. Stir your peanut butter thoroughly before measuring.
- Skipping the Coconut Oil: Without the oil, the chocolate will be too hard to bite through comfortably. Keep the fat in the mix.
- Impatience: If you try to peel the liners before they are frozen, you’ll end up with chocolate-covered fingers and a broken heart. Let them set!
Variations & Customizations
Once you master the basic cup, try these three twists to keep your palate guessing.
- The Crunch Factor: Stir some crushed pretzels or Rice Krispies into the peanut butter filling. It adds a texture that is frankly revolutionary.
- The PB&J Remix: Place a tiny dot of raspberry jam on top of the peanut butter before sealing it with chocolate. It’s a childhood classic in a sophisticated shell.
- The Dark & Spicy: Add a tiny pinch of cayenne pepper to the melted chocolate. It provides a slow burn that cuts through the richness of the peanut butter.
FAQ: Your Sweetest Questions Answered
Why are my vegan peanut butter cups melting so fast? Since we use coconut oil to keep the chocolate soft, these will melt at room temperature much faster than the wax-filled store versions. Store them in the fridge or freezer until the moment you’re ready to eat!
Can I use chunky peanut butter? Absolutely. If you like “texture,” chunky is a great move. It makes the cups feel a bit more rustic and homemade.
How long do these stay fresh? They will last for up to two weeks in the fridge or two months in the freezer. Though, let’s be honest, they won’t last forty-eight hours.
What is the best chocolate to use? IMO, a high-quality dark chocolate bar chopped up melts better than chips, but chips are easier for a quick fix. Just ensure it’s labeled “Vegan.”
Are these gluten-free? Yes! As long as your chocolate and peanut butter aren’t processed in a facility with wheat, these are naturally gluten-free.
My chocolate is grainy, what happened? You likely overheated it. Chocolate is sensitive! Use low power on the microwave and stir frequently to avoid burning.
Can I use a different sweetener? Agave nectar or even a little powdered sugar works if you don’t have maple syrup. Just avoid anything too watery.
Final Thoughts
There you have it—the only vegan peanut butter cups recipe you’ll ever need to dominate the snack game. They are rich, they are salty, and they prove that you don’t need dairy to have a good time. Go forth, fill your muffin tins, and try not to feel too smug when you realize you’ll never have to buy that orange-wrapped garbage again. If you manage to save even one cup for tomorrow’s lunch, you have more willpower than most of us. Happy chilling!
Would you like me to help you create a printable shopping list for these four ingredients?

