
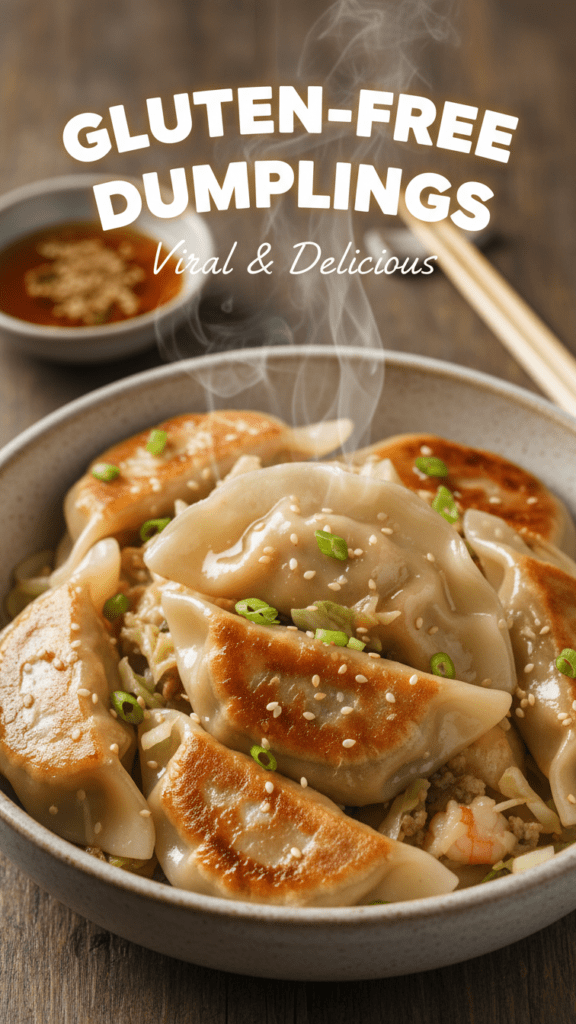
The Ultimate Gluten-Free Dumplings: No More Sticky, Sad, or Soggy Messes!
Have you ever gazed longingly at a bowl of perfectly pleated dumplings, only to sigh dramatically because “gluten-free” usually means “dense, flavorless pucks that fall apart”? We’ve all been there, pushing around a spoonful of soup, pretending that the absence of a fluffy, chewy dumpling isn’t slowly crushing your soul. Honestly, finding a decent gluten-free dumpling is like searching for a unicorn that also bakes. Most recipes yield sticky blobs or dry, crumbly disasters. But what if I told you that you could make a dumpling so tender, so chewy, and so perfectly formed that even your pickiest (gluten-loving) friends will demand the recipe? Get ready to banish those bland imposters from your kitchen forever.
Why These Gluten-Free Dumplings Are the Actual G.O.A.T.

Most gluten-free dumpling attempts fail because they lack the magical elasticity that gluten provides. This recipe is a game-changer because we use a blend of specific flours and a secret ingredient to create a dough that’s shockingly pliable. Why settle for a chewy rock when you can have a cloud-like morsel soaking up all that delicious broth?
You’ll love this recipe because it’s surprisingly straightforward. You don’t need a culinary degree or an ancient Chinese secret to make these. They come together quickly, cook perfectly, and taste like pure comfort. Plus, there’s something incredibly satisfying about making dumplings from scratch, isn’t there? It’s basically therapy. TBH, once you try these, you’ll wonder why you ever suffered through those pathetic store-bought versions.
The Grocery List: Your Dumpling Dream Team
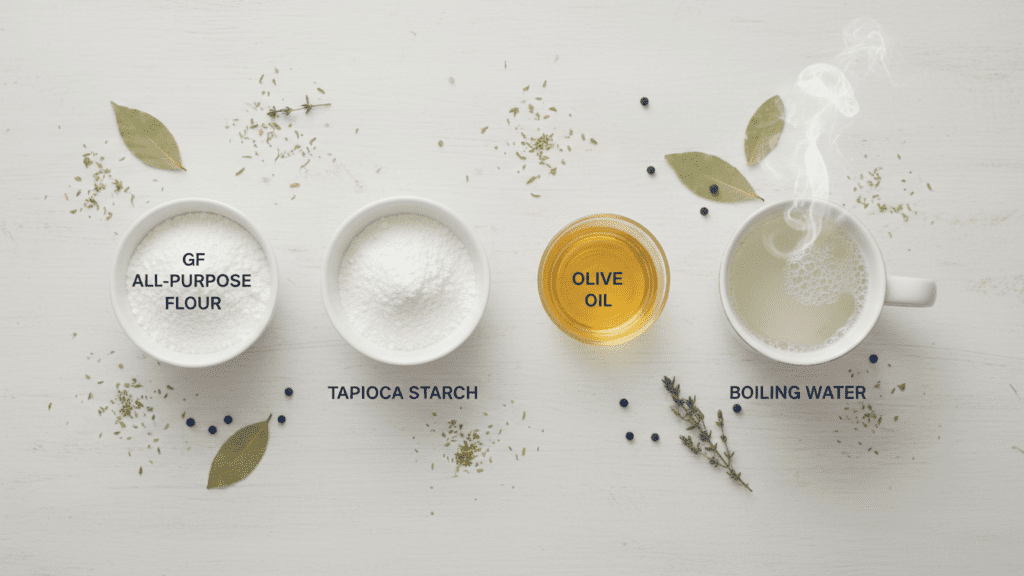

Grab your shopping bags, because we need specific heroes for this mission. Don’t cheap out on the flour blends!
- 1 cup Gluten-Free All-Purpose Flour Blend (Ensure it contains Xanthan gum. Bob’s Red Mill 1-to-1 or King Arthur GF Flour are excellent choices).
- ½ cup Tapioca Starch (This is the magic ingredient for stretch and chewiness!).
- 1 tsp Baking Powder (For a little lift and tenderness).
- ½ tsp Salt (Seasoning is key, even in the dough!).
- 2 tbsp Olive Oil or Melted Vegan Butter (Adds moisture and helps prevent sticking).
- ¾ cup Boiling Water (Not just warm, but boiling—this gelatinizes the starches for a pliable dough).
Key Substitution: If you don’t have olive oil, any neutral-flavored oil like canola or vegetable oil will work. For an even richer flavor, use melted dairy-free butter.
Tools & Kitchen Gadgets: Your Dumpling Workshop
You can’t make a masterpiece with a dull knife. Assemble these tools to ensure your kitchen doesn’t turn into a sticky, crumbly disaster zone.
- Large Mixing Bowl (For the dough dance).
- Rolling Pin (Or a wine bottle, if you’re resourceful).
- Round Cookie Cutter (2-3 inch) (For perfectly uniform dumpling wrappers).
- Parchment Paper or Wax Paper (Prevents sticking while you work).
- Large Pot (For boiling or steaming your glorious creations).
- Slotted Spoon or Spider Strainer (For retrieving your cooked treasures).
- Clean Kitchen Towel (To keep dough balls from drying out).
Step-by-Step: From Flour to Fluffy Pockets of Joy
Ready to conquer the dumpling mountain? Follow these steps closely. Gluten-free dough can be finicky, but with these tips, you’ll be a dumpling master in no time.
Step 1: The Dry Mix Dream Team
In your large mixing bowl, whisk together the gluten-free all-purpose flour blend, tapioca starch, baking powder, and salt. Make sure everything is super well combined. This prevents pockets of unmixed starch, which are basically tiny flavor criminals.
Step 2: Liquid Gold & The Hot Mix
Add the olive oil to the dry ingredients. Now, here’s the crucial part: pour in the boiling water. Mix immediately with a sturdy spoon or silicone spatula. The dough will look shaggy and feel hot. That’s okay! Keep mixing until it forms a loose ball.
Step 3: The Knead & Rest Retreat
Once the dough is cool enough to handle, turn it out onto a lightly floured (with GF flour!) surface. Knead it for 3-5 minutes. It should become smooth, pliable, and surprisingly elastic. Don’t over-knead, but definitely put in the effort. Form it into a ball, cover it with a damp kitchen towel, and let it rest for 20 minutes. This allows the starches to fully hydrate and makes the dough much easier to roll.
Step 4: Roll, Cut, and Conquer
Lightly flour your work surface (again, with GF flour). Divide the dough into two equal portions. Roll one portion out to about 1/16th of an inch thick. It should be thin enough to be translucent but not so thin that it tears easily. Use your round cookie cutter to cut out wrappers. Re-roll scraps and cut more. Keep the wrappers you aren’t immediately using covered with that damp towel so they don’t dry out.
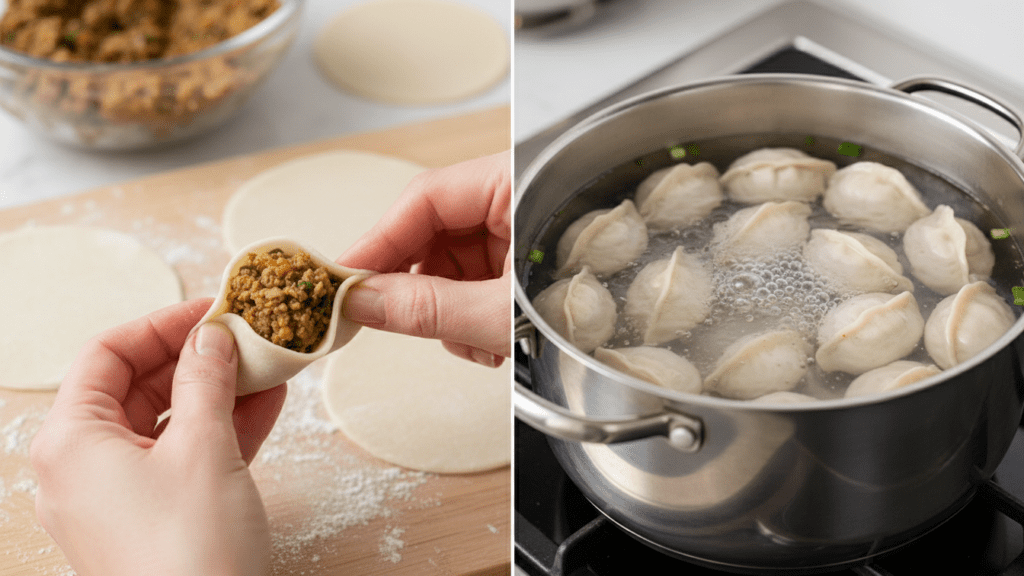
Step 5: Fill ‘Em Up!
Place a small amount of your chosen filling (about 1-2 teaspoons, don’t overstuff!) in the center of each wrapper. Moisten the edges of the wrapper with a little water using your finger. Fold the wrapper in half to create a crescent shape and pinch the edges firmly to seal. You can crimp them with a fork or attempt fancy pleats if you’re feeling ambitious (and have more patience than I do on a Tuesday).
Step 6: Cook Your Masterpieces
You can boil, steam, or pan-fry these beauties!
- Boiling: Bring a large pot of salted water to a rolling boil. Drop in the dumplings, careful not to overcrowd the pot. Cook for 3-5 minutes, or until they float to the surface and are tender.
- Steaming: Place dumplings in a single layer in a steamer basket lined with parchment paper. Steam over boiling water for 8-10 minutes, or until cooked through.
- Pan-Frying (Potstickers): Heat 1 tbsp oil in a non-stick skillet over medium-high heat. Place dumplings in a single layer. Fry until golden brown on the bottom (2-3 mins). Add 1/4 cup water, cover, and steam until water evaporates (5-7 mins). Uncover and fry until crispy.
Calories & Nutritional Info (Per Serving of 4 Dumplings, Dough Only)
Let’s look at the stats for the dough. Keep in mind that fillings and cooking methods will add to this!
- Calories: 220 kcal
- Total Fat: 6g
- Carbohydrates: 38g
- Fiber: 2g
- Protein: 3g
- Sodium: 250mg
Common Mistakes to Avoid (The “Dumpling Disaster” Prevention Guide)
Don’t let your culinary dreams turn into a sticky nightmare. Avoid these common blunders to ensure dumpling success.
- Using Cold Water: Boiling water is crucial for activating those starches. Do not use warm water!
- Skipping the Rest: Dough that hasn’t rested will be stiff and crack when you try to roll it. Be patient!
- Over-filling: Too much filling means a leaky dumpling and a messy pot. Less is more here.
- Overcrowding the Pot/Steamer: If your dumplings are spooning each other, they won’t cook evenly or properly. Give them space.
- Not Sealing Properly: If the edges aren’t sealed tightly, your delicious filling will escape into the cooking water. Pinch firmly!
Variations & Customizations
Once you master the basic dough, the world is your gluten-free oyster. Try these three twists to keep things exciting.
- The Herbaceous Touch: Mix in 1 tsp of dried parsley or chives to the dry flour mixture for an extra layer of flavor. Great for savory stews.
- The Spicy Kick: Add ½ tsp of garlic powder and a pinch of red pepper flakes to the dough for a subtle warmth. Perfect for serving with a chili crisp dipping sauce.
- The Sweet Surprise: Reduce the salt to ¼ tsp and add 1 tbsp of sugar to the dough. Fill with sweetened fruit puree or cinnamon apples for a dessert dumpling. IMO, a sweet dumpling is seriously underrated.
FAQ: Your Pressing Dumpling Questions Answered
Why are my gluten-free dumplings sticky? This can happen if you used too much water or didn’t cook them long enough. Ensure your dough isn’t overly wet when kneading, and cook until fully tender.
Can I make the dough ahead of time? Yes! You can refrigerate the dough ball, wrapped tightly in plastic wrap, for up to 24 hours. Let it come to room temperature for 30 minutes before rolling.
Can I freeze uncooked gluten-free dumplings? Absolutely! Place them in a single layer on a parchment-lined baking sheet and freeze until solid. Then transfer to an airtight bag for up to 2 months. Cook from frozen, adding a couple of minutes to the cooking time.
What kind of filling works best? Any filling you’d use for traditional dumplings! Ground meat (pork, chicken, beef), finely chopped vegetables, or a mix of tofu and mushrooms are all fantastic. Just make sure your filling isn’t too wet.
My dumplings fell apart in the water! What happened? You likely didn’t seal them properly, or your dough was too thin and broke during cooking. Make sure to pinch those edges firmly!
Can I use just one type of gluten-free flour? While you technically can, a blend (like one containing rice, potato, and tapioca starches) plus extra tapioca starch is key for the best texture and pliability. Using just rice flour, for instance, might result in a very brittle dumpling.
How do I get my dumplings to float? Floating indicates they are mostly cooked through! Ensure your water is at a rolling boil and that you aren’t overcrowding the pot. Patience is key.
Final Thoughts
There you have it—the holy grail of gluten-free dumplings. You are now the proud owner of a recipe that actually behaves like real food. Go ahead, fill them with savory goodness, float them in a steaming broth, or pan-fry them until crispy. Just try not to act too smug when you realize you’ll never have to settle for sad, store-bought imposters again. Happy folding, you absolute kitchen wizard!

