
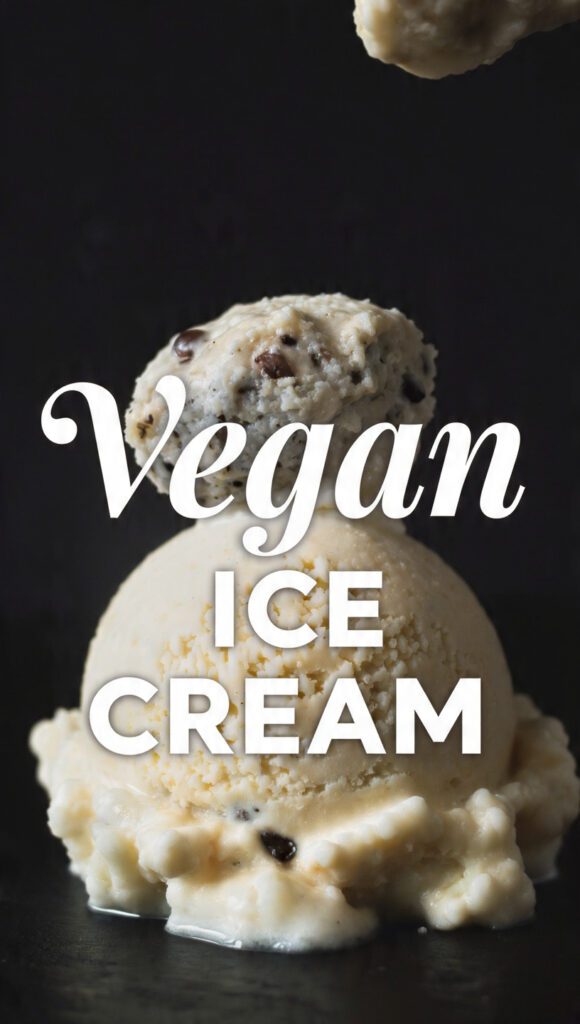
The Ultimate Creamy Vegan Ice Cream: Better Than The Dairy Version?
Have you ever walked into a high-end creamery, seen the single, sad “sorbet” option for the non-dairy crowd, and felt a piece of your soul wither away? We’ve all been there, standing in line while everyone else orders triple-chunk fudge, forced to settle for a frozen block of lemon-flavored ice. It’s a culinary tragedy. Why does the world act like “dairy-free” means “fun-free”? But hold onto your spoons, because I finally cracked the code on a vegan ice cream that actually feels like silk on your tongue and won’t leave you with a sugar-induced identity crisis.
Why This Vegan Ice Cream Actually Slaps
Most homemade vegan frozen desserts end up with the structural integrity of a snow cone or the flavor profile of a coconut-scented sunblock. This recipe changes the game because we prioritize high-fat plant bases and natural emulsifiers to mimic the mouthfeel of premium gelato. Why settle for icy water when you can have a decadent, scoopable masterpiece?
You’ll love this because it requires zero chemical stabilizers or ingredients you’d find in a lab. It’s the ultimate “stealth” dessert. When you serve this to your dairy-loving friends, they’ll ask for the brand name, and you can casually drop the fact that it’s 100% plant-based. TBH, the smug satisfaction is almost as good as the flavor. Plus, you control the sugar, meaning no post-dessert crash!
The Ingredient Lineup: No Lab Coats Required
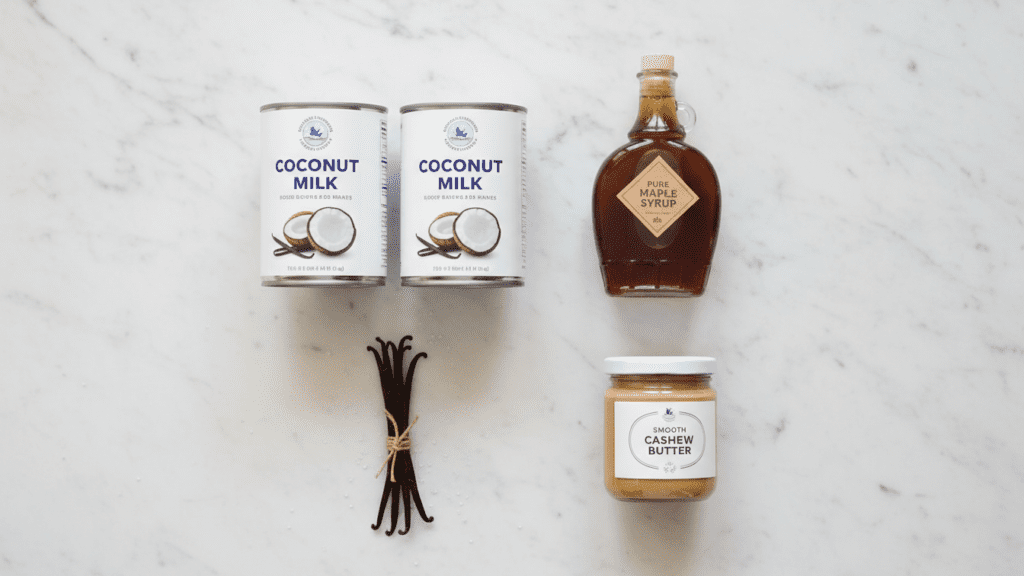

Grab your shopping bags, but leave the stress behind. These ingredients work together to create that “is this actually vegan?” texture we’re all chasing.
- 2 cans Full-Fat Coconut Milk (Do not even look at the “lite” version; we need the fat for creaminess).
- 1/2 cup Cashew Butter or Almond Butter (This provides the “body” and protein that cow’s milk usually offers).
- 2/3 cup Pure Maple Syrup or Agave (Liquid sweeteners prevent that weird, grainy crunch).
- 2 tsp Pure Vanilla Extract (The secret to masking the coconut flavor if you’re not a huge fan).
- 1/4 tsp Sea Salt (Salt wakes up the sugars and makes the chocolate—if you add it—pop).
- Optional: 1/4 cup Cocoa Powder (For the chocolate lovers who think vanilla is just a suggestion).
Key Substitution: If you have a nut allergy, swap the cashew butter for sunflower seed butter. It works brilliantly, though it might turn the mix a slightly funky (but delicious) shade of green. 🙂
Tools & Kitchen Gadgets: Your Sundae Station
You can’t make velvet with a blunt rock. Assemble these tools to ensure your kitchen doesn’t turn into a sticky mess of failed dreams.
- High-Speed Blender (Essential for emulsifying the nut butter and coconut milk into a smooth base).
- Electric Ice Cream Maker (Saves you from the “hand-churning” workout nobody asked for).
- Insulated Ice Cream Tub (Prevents freezer burn and keeps your creation scoopable).
- Silicone Spatula (To scrape every precious drop out of the blender).
- Stainless Steel Ice Cream Scoop (To get those perfect, Instagram-worthy rounds).
- Fine Mesh Strainer (Optional, for those who want a truly ultra-smooth finish).
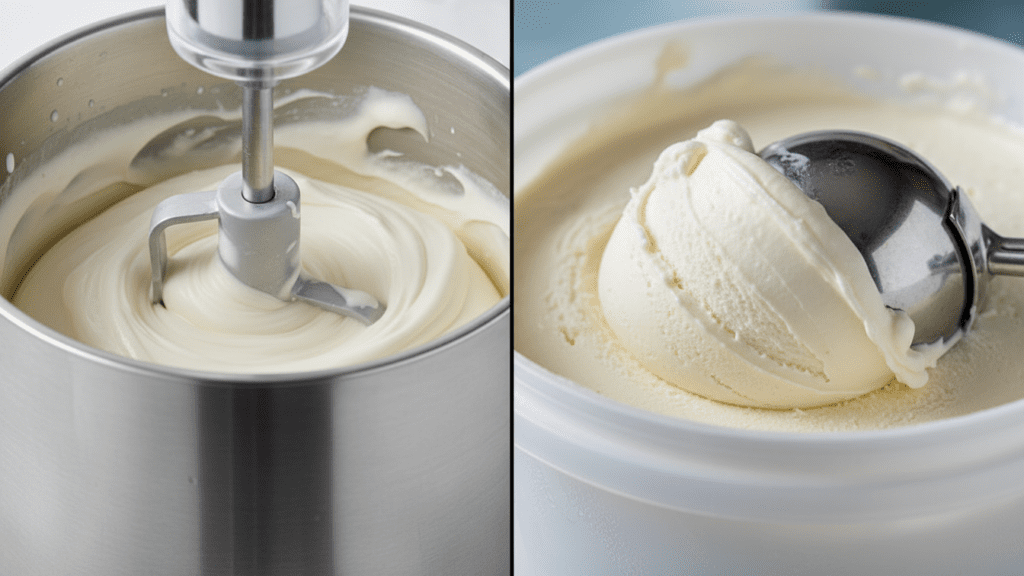
Step-by-Step: From Liquid to Legend
Follow these steps closely. Don’t try to rush the process; great things (and cold things) take time.
Step 1: The Cold Front
Place your ice cream maker bowl in the freezer at least 24 hours before you start. If that bowl isn’t solid ice, you’re just making an expensive milkshake. Do not skip this, or you’ll be staring at liquid for forty minutes.
Step 2: The Blend Session
Dump your coconut milk, nut butter, maple syrup, vanilla, and salt into the blender. Blend on high for about 60 seconds. You want to see tiny bubbles and a completely uniform texture. If you see clumps of nut butter, keep going!
Step 3: The Chill Factor
Pour the mixture into a bowl and chill it in the fridge for at least 4 hours. Pouring a room-temperature base into an ice cream maker is the fastest way to kill the churn. IMO, the colder the base, the smaller the ice crystals.
Step 4: The Churn Cycle
Turn on your ice cream maker and slowly pour in the chilled mixture. Let it churn for 20-25 minutes. It should reach a “soft serve” consistency. If you want to add chocolate chips or fruit, toss them in during the last 2 minutes.
Step 5: The Deep Freeze
Transfer the mix to your insulated tub. Smooth the top with your spatula and press a piece of parchment paper directly onto the surface to prevent ice crystals from forming. Freeze for at least 4-6 hours before scooping.
Calories & Nutritional Info (Per Serving)
This makes about 1 quart of ice cream, or 8 standard scoops. It’s indulgent but packed with healthy fats!
- Calories: 285 kcal
- Total Fat: 22g
- Carbohydrates: 18g
- Fiber: 1g
- Protein: 3g
- Potassium: 210mg
Common Mistakes to Avoid (The “Frozen Brick” Guide)
Don’t let your dessert become a cautionary tale. Watch out for these easy-to-make blunders.
- Using Low-Fat Milk: I’ve said it before, and I’ll say it again. Fat equals creaminess. Using “lite” milk results in a block of ice you could use to build an igloo.
- Skipping the Nut Butter: The fat in coconut milk is great, but the protein in nut butter provides the structure. Without it, the ice cream melts too fast.
- Not Chilling the Base: If you’re impatient and use a warm base, the machine won’t be able to drop the temperature fast enough. Chill it properly.
- Over-churning: If you let it go too long, you’ll actually beat the air back out of it. Stop when it looks like thick soft-serve.
Variations & Customizations
Once you master the base, the world is your non-dairy oyster. Try these three twists to keep your freezer interesting.
- The Cookie Monster: Fold in crushed gluten-free chocolate sandwich cookies and a swirl of blue spirulina for a viral, kid-friendly look.
- The Spicy Mayan: Add a pinch of cayenne pepper and cinnamon to the chocolate version for a heat that lingers in the best way possible.
- The Berry Blast: Swirl in a homemade strawberry compote after churning for a fruity, tart contrast to the rich base.
FAQ: Your Frozen Queries Answered
Why is my vegan ice cream so hard to scoop? Homemade versions lack the chemical softeners of store brands. Let it sit on the counter for 10 minutes before scooping. It’s worth the wait!
Can I make this without an ice cream maker? You can, but it’s more work. Pour the mix into a pan and whisk it every 30 minutes as it freezes to break up ice crystals. It won’t be as fluffy, but it works.
Does it taste like coconut? There’s a hint, but the nut butter and vanilla do a great job of neutralizing it. If you really hate coconut, try an oat-milk-based recipe instead.
What is the best sweetener to use? IMO, maple syrup is king. It stays liquid at low temperatures, which keeps the ice cream from turning into a rock.
Can I use almond milk? No, it has too much water content. You’ll end up with a shabby frozen ice block. Stick to full-fat canned milks.
How long does it stay fresh? It’s best within two weeks. After that, it starts to pick up “freezer flavors,” and nobody wants their dessert tasting like frozen peas.
Why did my ice cream turn out grainy? This usually happens if the sugar didn’t dissolve or if you used a low-quality nut butter. Blend the base thoroughly to ensure total emulsion.
Final Thoughts
There you have it—the only vegan ice cream recipe you’ll ever need to survive the summer (or a Tuesday night on the couch). It’s creamy, it’s rich, and it proves that plants are actually magic. Go ahead, fill a bowl, pile on the toppings, and try not to feel too smug when you realize you never have to buy store-bought again. If you manage not to eat the entire quart in one sitting, you have more willpower than I do. Happy scooping!
Would you like me to help you brainstorm some epic topping combinations for this base?

