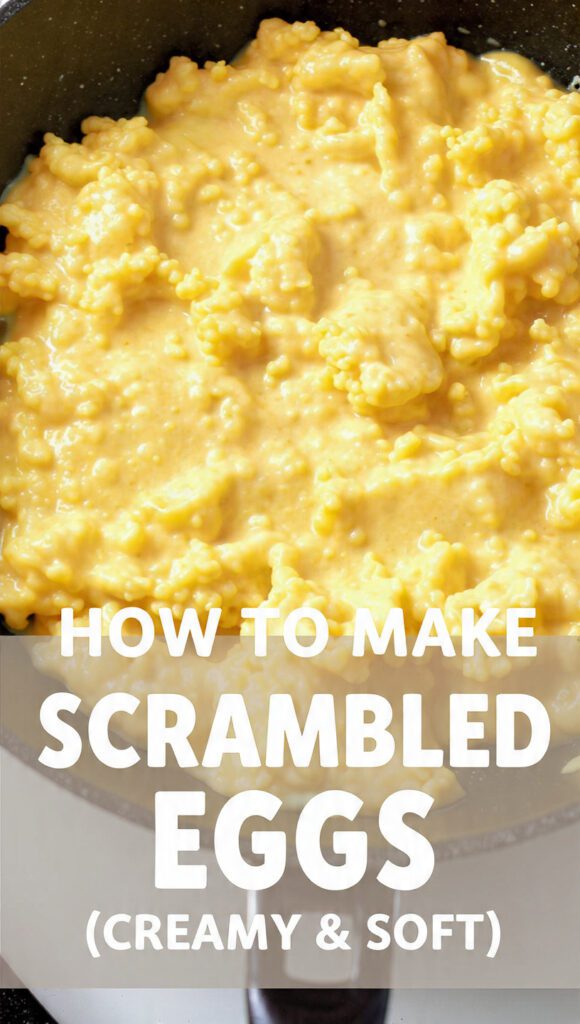
🍳 Stop Serving Rubber: How to Make Scrambled Eggs Like a Pro (Creamy Perfection!)
Let’s be honest, you probably think you know how to make scrambled eggs. You crack them, you whisk them, you dump them in a hot pan, and five minutes later, you have a pile of dry, sad, slightly gray lumps that taste vaguely of sulfur. Sound familiar? I’ve been there. Scrambled eggs are the simplest thing to cook, yet mastering that perfect, creamy, soft texture—the kind that melts in your mouth and makes you question all your life choices before this moment—is surprisingly elusive. We’re ending the rubber egg era today. Get ready to cook eggs so good, they’ll demand their own Instagram account.
Why This Recipe Is the Only Way You’ll Ever Cook Eggs Again

This isn’t just about cooking eggs; it’s about culinary respect. When you get this right, scrambled eggs become a breakfast delicacy, not just a protein filler. We’re prioritizing low heat, high fat, and constant attention. The result is a cloud-like, buttery texture that you will literally crave.
Why is this recipe awesome? Because it’s a three-ingredient miracle that instantly boosts your kitchen credibility. You need to stop settling for those aggressively yellow, spongy hunks. The secret is simplicity, patience, and one very important ingredient (hint: it rhymes with cutter).
It takes marginally more time than the frantic-high-heat method, but the payoff is exponential. Do you want to impress your weekend guests? Do you just want a moment of true, unadulterated buttery bliss? This technique is your answer. It guarantees flavor, creaminess, and absolutely zero rubbery edges.
Essential Ingredients for Cloud-Like Scramble
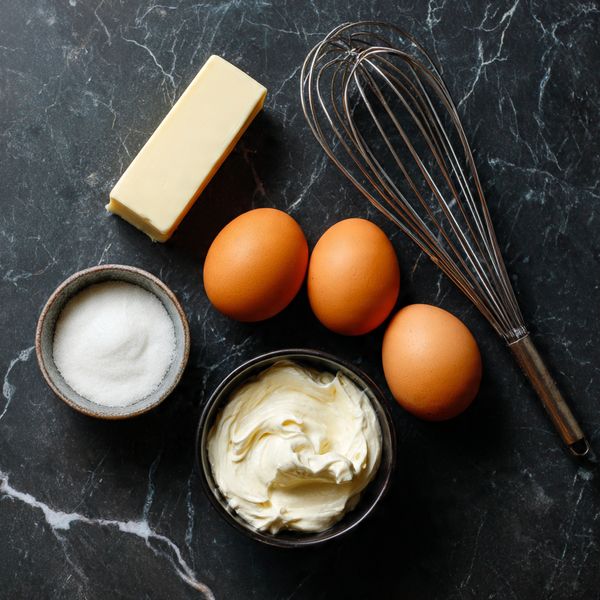
Keep the ingredients list short, but pay attention to the fat content. This isn’t the time for a health kick, folks.
- 3 Large Eggs (per serving): Use good quality eggs; they make a massive difference in flavor and color.
- 1 tsp Unsalted Butter (per 3 eggs): This is the non-negotiable fat base. Skip the oil, embrace the butter.
- 1 tsp Crème Fraîche or Heavy Cream (per 3 eggs): Added at the very end for velvety smoothness (optional, but highly recommended).
- Salt (Kosher or Sea Salt): To season the eggs before cooking.
- Freshly Ground Black Pepper: To season the eggs after cooking.
Key Substitutions:
- Butter: Ghee or clarified butter works beautifully and adds a nutty flavor. Avoid vegetable oil!
- Crème Fraîche/Heavy Cream: A splash of whole milk works if that’s all you have, but the higher fat content of cream/crème fraîche delivers better texture.
- Salt: Salt after whisking, but before cooking!
Tools & Kitchen Gadgets Used
You don’t need much, but a good pan is essential for preventing sticking and burning.
- Non-Stick Skillet (8 or 10-inch): This is your most important tool. A quality non-stick pan ensures the eggs glide easily and don’t stick to the bottom and burn.
- Small Bowl: For cracking and whisking the eggs.
- Fork or Whisk: For incorporating air into the eggs.
- Rubber Spatula: Crucial for low-and-slow cooking. You need a flexible rubber spatula to scrape the sides and bottom constantly.
- Measuring Spoons: For accurate butter and cream measurements (don’t eyeball the fat!).
Step-by-Step Instructions: The Low-and-Slow Method
We’re slowing down, people. Think French omelet technique, but without the rolling. Patience is your new seasoning.
H3 Prep and Whisking
- Crack and Season: Crack your eggs into the small bowl. Add a generous pinch of salt. Whisk vigorously with a fork or whisk for at least 30 seconds. You want to incorporate air and fully break down the yolks and whites into one uniform, slightly foamy yellow liquid.
- Heat the Pan: Place your non-stick skillet over low heat. Seriously, LOW. Medium-low is the absolute highest you should go. Add the butter and let it melt completely until it’s just shimmering. The pan should be warm, but not smoking hot.
H3 The Gentle Scramble
- Pour and Wait: Pour the whisked eggs into the buttered pan. Do not stir yet! Let them sit for about 30 seconds. You want a very thin layer around the edges to start setting.
- Scrape and Fold: Now, grab your rubber spatula. Begin to slowly push the cooked egg from the edges toward the center, folding it over itself. Then, tilt the pan so the uncooked egg runs underneath.
- Constant Motion: Keep repeating this gentle pushing and folding motion. Scrape the bottom constantly! This prevents any part from burning or forming large, dry curds. The eggs should form small, soft curds.
- The Creamy Finish: When the eggs are mostly set but still look slightly wet (this is critical!), remove the pan from the heat. Stir in the Crème Fraîche or heavy cream now. The residual heat finishes the cooking process.
H3 Serve Immediately
- Plate and Season: Immediately scrape the creamy eggs onto a warm plate. Grind fresh black pepper over the top. Don’t let the eggs sit in the hot pan—they will overcook and lose the creamy texture! Serve immediately and bask in the glory.
Calories & Nutritional Info (Fueling the Day)
Eggs are protein superstars. Embrace the healthy fats! These are estimates for one serving (3 eggs).
- Estimated Calories Per Serving: Approximately 250–300 calories. (Varies based on fat usage).
- Protein: High! Around 18–20g of complete protein.
- Carbohydrates: Very Low. Less than 1g.
- Fat: Moderate, mostly from the butter and yolk. Around 20–25g per serving.
- Key Nutritional Note: Excellent source of Choline (brain fuel!) and Vitamins D and B12. FYI, this is the perfect macro-friendly way to start your day.
Common Mistakes to Avoid (The Anti-Rubber Guide)
Avoid these errors unless you want to serve foam rubber for breakfast.
- High Heat: The number one sin! High heat creates large, dry, brown curds instantly. Cook on low heat for a slow, gentle set that promotes creaminess.
- Adding Milk/Cream Too Soon: Adding liquid during the whisking phase only dilutes the flavor and makes the eggs wetter, not creamier. Add the cream/crème fraîche only at the end to stop the cooking process and boost texture.
- Not Whisking Enough: You must whisk the eggs vigorously to incorporate air and thoroughly combine the yolk and white. Whisking for a full 30 seconds is your minimum.
- Salting Too Late: Salt draws moisture out of the eggs. If you salt them just before cooking, the eggs will be tender. If you salt them after they’re cooked, they can taste drier. Salt before cooking!
Variations & Customizations
Tired of plain yellow? Jazz up your morning routine!
H3 Cheesy Herby Explosion
For the ultimate flavor bomb, stir in 1 tbsp of finely chopped chives and tarragon along with the cream at the very end. Before serving, top with 1/4 cup of grated Gruyère or sharp white cheddar cheese. The heat melts the cheese into the eggs perfectly.
H3 Spanish Scramble (Picante)
Sauté 1 tbsp of finely diced red bell pepper and a pinch of smoked paprika in the butter before adding the eggs. Fold in a dash of hot sauce right before serving. Serve with chopped cilantro for a fresh, spicy, smoky start to your day.
H3 Cottage Cheese Cream Dream (Extra Protein)
Want even creamier texture and a protein boost? Blend 1 tbsp of cottage cheese with your eggs before whisking. It sounds wild, but it melts into the eggs, creating ultra-soft curds and an extra protein punch. Don’t knock it ’til you try it!
FAQ Section: Scrambled Egg Secrets Revealed
You’ve got questions about eggs. We’ve got answers.
1. Should I add milk or water to my scrambled eggs?
No. Adding milk or water dilutes the flavor and makes the eggs steamed, not creamy. The secret to creaminess is low heat, butter, and heavy cream/crème fraîche added at the end.
2. What is the best pan to use for scrambled eggs?
A high-quality non-stick skillet is crucial. It prevents sticking and ensures you can fold and scrape the eggs gently without burning, which is key to creaminess.
3. When should I season the eggs with salt?
Salt the eggs before cooking! Whisk the salt into the liquid eggs just before they hit the pan. This tenderizes the proteins and makes the final product more moist.
4. How do I make my eggs fluffy?
Whisk vigorously to incorporate air before cooking, and cook on low heat with gentle, continuous scraping. The air you whisk in provides the fluffiness; the low heat preserves it.
5. Why are my scrambled eggs green/gray?
You overcooked them! High heat causes the iron in the yolks to react with sulfur in the whites, creating that unappetizing color. Pull the eggs while they still look slightly wet.
6. Can I use a metal whisk in a non-stick pan?
Absolutely not! Use a fork in a separate bowl to whisk, and a rubber spatula in the pan to protect your non-stick surface.
7. Should I use cold or room temperature eggs?
It doesn’t make a huge difference, but room temperature eggs blend slightly faster and cook a tiny bit more evenly. If you remember, take them out 15 minutes before cooking.
Final Thoughts
You are no longer a victim of dry, rubbery, overcooked breakfast. You now possess the sacred knowledge of how to make scrambled eggs that are creamy, buttery, and utterly divine. You conquered the low-heat method and embraced the butter. Go forth and cook magnificent things! Next time someone offers you those sad, diner-style eggs, politely decline. You are a chef now.