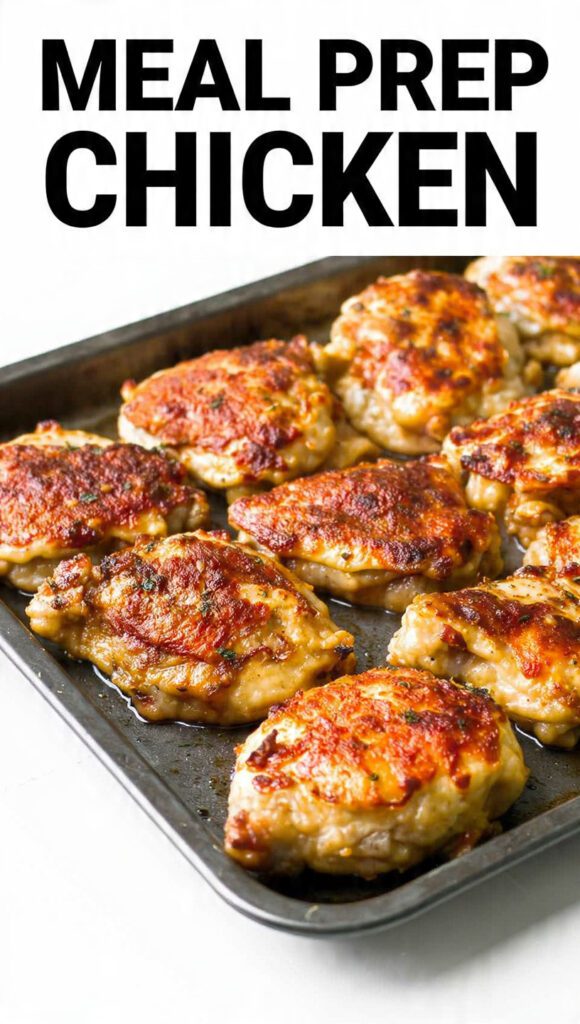
Meal Prep Chicken: The Ultimate Guide to Week-Long Flavor (Not Dry Sadness)
Let’s be honest, meal prep chicken has a terrible reputation. You picture those sad, dry, boiled chicken breasts sitting forlornly in a container, tasting like chalk and regret. If that’s your meal prep reality, you’re doing it wrong. We are here to rescue your chicken, infuse it with flavor, and make sure it stays juicy and versatile all week long.
This isn’t just a recipe for bland baked protein; it’s a strategy for making one large batch of chicken that is seasoned perfectly, cooked correctly, and ready to be transformed into five different meals. Say goodbye to dry sadness and hello to high-protein, flavorful lunches and dinners all week. Seriously, why settle for boring chicken when you can have flavor versatility?
Why This Meal Prep Chicken Is Awesome (Versatility, Juiciness, and Time)
Mastering this basic, highly flavorful chicken is the key to unlocking stress-free eating all week.
First, Ultimate Versatility. We use a classic, neutral seasoning base (lemon, garlic, Italian herbs) that pairs beautifully with almost any cuisine. You can slice it over a salad, shred it for tacos, mix it into a curry, or toss it with pasta. Why cook five times when you can season once?
Second, Guaranteed Juiciness. The secret to non-dry chicken is using chicken thighs (they have more fat, so they stay moist) or cooking breasts at a lower temperature in bulk, using olive oil to lock in moisture. We ensure it’s cooked perfectly and cooled properly to prevent that dreaded chalky texture. IMO, a juicy meal prep is a successful meal prep.
Third, The Time-Saving MVP. You commit 30-45 minutes on Sunday afternoon, and you cut out hours of weeknight cooking time. This is the definition of efficiency. TBH, the main goal of meal prep is winning back your evenings.
The Goods: Ingredients You Need
Focus on buying in bulk and stocking high-impact, versatile dried herbs and spices.
- The Protein Core (Bulk Buy):
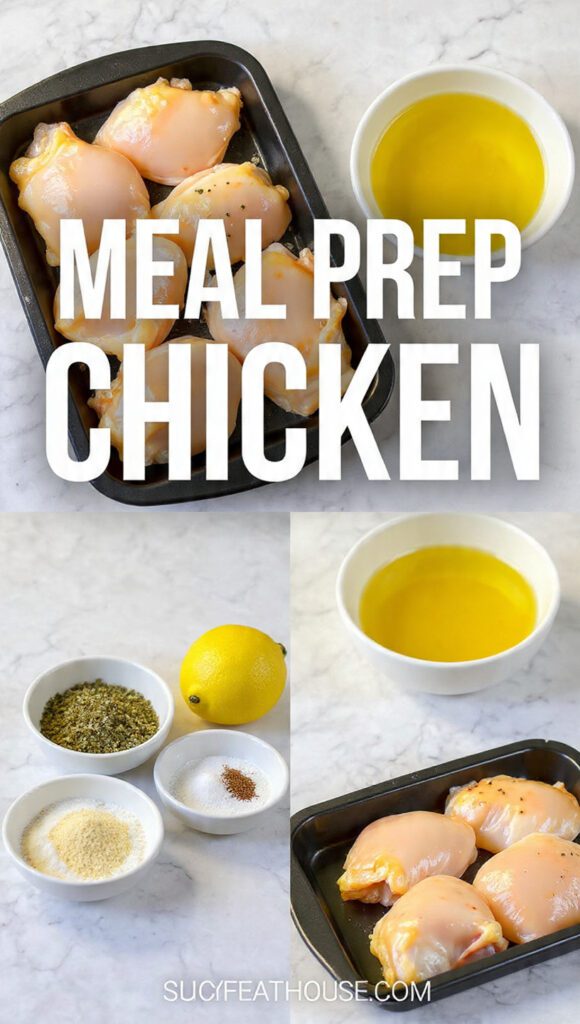
- 3–4 pounds Boneless, Skinless Chicken Thighs (recommended for juiciness) OR Chicken Breasts.
- The Wet Binder:
- 1/4 cup Olive Oil (Extra Virgin).
- Juice of 1 large Lemon.
- The Versatile Seasoning (The Flavor Base):
- 2 tablespoons Dried Italian Seasoning (Oregano, Basil, Thyme mix).
- 1 tablespoon Garlic Powder (use powder, not fresh minced!).
- 1 teaspoon Onion Powder.
- 1 teaspoon Salt.
- 1/2 teaspoon Freshly Ground Black Pepper.
- The Finish:
- Fresh Parsley, chopped (for garnishing the final meals).
H3 Key Substitutions (The Prep Mix-Up)
- Chicken Thighs Swap: Use boneless, skinless chicken breasts, but slice them in half horizontally (cutlets) to keep them thin, and reduce the bake time by 5 minutes to prevent dryness.
- Olive Oil Substitute: Use avocado oil or melted coconut oil—any neutral, stable fat works well.
- Lemon Substitute: Use white wine vinegar or apple cider vinegar for acidity, but reduce the quantity by half.
- Seasoning Swap: Use a Taco Seasoning blend (chili powder, cumin, paprika) for a Mexican theme, or a Curry Powder blend for an Indian/Asian base.
Tools & Kitchen Gadgets Used (The Batch Cook Arsenal)
You need large-capacity tools to cook 3-4 pounds of chicken efficiently and evenly.
- Large Rimmed Baking Sheet (Half-Sheet Pan): CRUCIAL! You need space for a single layer of chicken. Use two pans if necessary.
- Parchment Paper or Aluminum Foil: Essential for easy cleanup after cooking a massive batch.
- Large Mixing Bowl (Colossal): For tossing all the chicken pieces with the marinade evenly.
- Instant-Read Meat Thermometer: MANDATORY! Overcooked chicken is dry chicken.
- Sharp Chef’s Knife and Cutting Board: For trimming and slicing the chicken.
- Airtight Meal Prep Containers (5-7 count): For separating your weekly portions.
Step-by-Step Instructions (Toss, Bake, and Divide)
The key to perfect meal prep chicken is even coating and precise temperature control.
H3 Step 1: Prep and Marinate (10 mins)
- Preheat your oven to 400°F (200°C). Line your large baking sheet with parchment paper.
- Trim any excess fat from the chicken. Place the chicken pieces in the colossal mixing bowl.
- In a small cup, whisk together the olive oil, lemon juice, Italian seasoning, garlic powder, onion powder, salt, and pepper.
- Pour the marinade over the chicken. Toss vigorously until every piece is evenly coated in the seasoning mix.
H3 Step 2: Bake to Perfect Juiciness (20-25 mins)
- Spread the seasoned chicken onto the baking sheet in a single, even layer. Do not overcrowd! Use a second pan if necessary. Overlapping causes steaming.
- Bake for 20–25 minutes (thighs) or 18–22 minutes (breasts/cutlets).
- The chicken is done when an instant-read thermometer inserted into the thickest part reads 165°F (74°C). Pull it out immediately! Do not let it exceed 170°F.
H3 Step 3: Shred, Cool, and Divide (10 mins)
- Transfer the cooked chicken to a clean cutting board. Let it rest for 5 minutes (this locks in the juices!).
- If using breasts, slice them. If using thighs, shred them with two forks or a stand mixer (the ultimate shredding hack!).
- Let the chicken cool completely (to room temperature) before portioning. Crucially, cooling prevents condensation from forming in the container, which leads to soggy reheated chicken.
- Divide the chicken into your airtight meal prep containers (3-4 oz per serving) and refrigerate immediately.
Calories & Nutritional Info (High-Protein Fuel)
This meal prep base is excellent for tracking macros and ensures you hit your protein goals all week.
- Estimated Calories Per 4oz Serving (Cooked Thighs): ~200–250 calories (lean protein base).
- Very High in Protein: Excellent source of complete protein for satiety and muscle building.
- B Vitamins & Iron: Chicken thighs are rich in B vitamins and iron.
- Low Carb/Keto: Naturally low in carbohydrates.
- Healthy Fats: Olive oil provides healthy monounsaturated fats.
Common Mistakes to Avoid (The Dry Chicken Dilemma)
The reputation of meal prep chicken is ruined by these two failures: overcooking and bad chilling.
- Overcooking (The Temperature Crime): Chicken cooked past 170°F (77°C) becomes tough and dry. Use a thermometer and pull the chicken out at 165°F (74°C).
- Packing While Warm (The Sog Factor): Putting warm chicken directly into a sealed container traps steam, resulting in soggy, wet chicken after refrigeration. Cool the chicken completely on a cutting board or wire rack first!
- Overcrowding the Pan: Overlapping chicken pieces steam instead of roast, leading to pale, wet textures. Spread the chicken in a single layer.
- Using Fresh Garlic: Fresh minced garlic burns easily at 400°F, leaving a bitter taste. Use garlic powder for roasting; save fresh garlic for the final sauce.
Variations & Customizations (Flavor Freedom)
You can easily split your batch and season them differently for maximum variety!
- Fiery BBQ Shredded Chicken: Shred half the chicken batch. Mix immediately with 1/2 cup of your favorite BBQ sauce (sugar-free for keto). Perfect for sandwiches or potatoes.
- Asian Sesame Ginger Cubes: Dice the chicken. Marinate with Soy Sauce/Tamari, fresh ginger paste, sesame oil, and Sriracha. Roast as directed. Serve over rice or in lettuce wraps.
- Keto/Low-Carb Garlic Butter Chicken: Add 3 tablespoons of melted butter to the marinade. Use only garlic powder, salt, and pepper. Serve sliced chicken with a side of steamed green beans or asparagus.
FAQ Section (The Prep Power Queries)
New preppers always need logistical advice on cooking in bulk.
- Q: How long will the cooked meal prep chicken last?
- A: Properly cooked and stored chicken will last safely in the refrigerator for 3–4 days. After that, transfer the remaining portions to the freezer.
- Q: Can I use frozen chicken breasts for this?
- A: Yes, but thaw them completely before seasoning and cooking. Frozen chicken won’t season evenly and releases too much water during the roast.
- Q: What is the best way to reheat meal prep chicken?
- A: The air fryer (350°F for 3-5 minutes) or a quick pan-sear works best for restoring crispness. Microwaving is fastest but risks drying it out.
- Q: Should I cut the chicken before or after cooking?
- A: Cut chicken breasts into cutlets or cubes before cooking for faster, more even cooking. Thighs can be cooked whole and shredded later.
- Q: How can I prevent the chicken from being bland?
- A: Use bold seasoning (like the Italian herb blend above) and acid (lemon juice). Also, salt the chicken aggressively before cooking, as high heat dulls seasoning.
- Q: Can I freeze the cooked chicken?
- A: Yes! Store cooled portions in freezer bags or containers. Freeze for up to 3 months. Thaw overnight in the fridge and reheat.
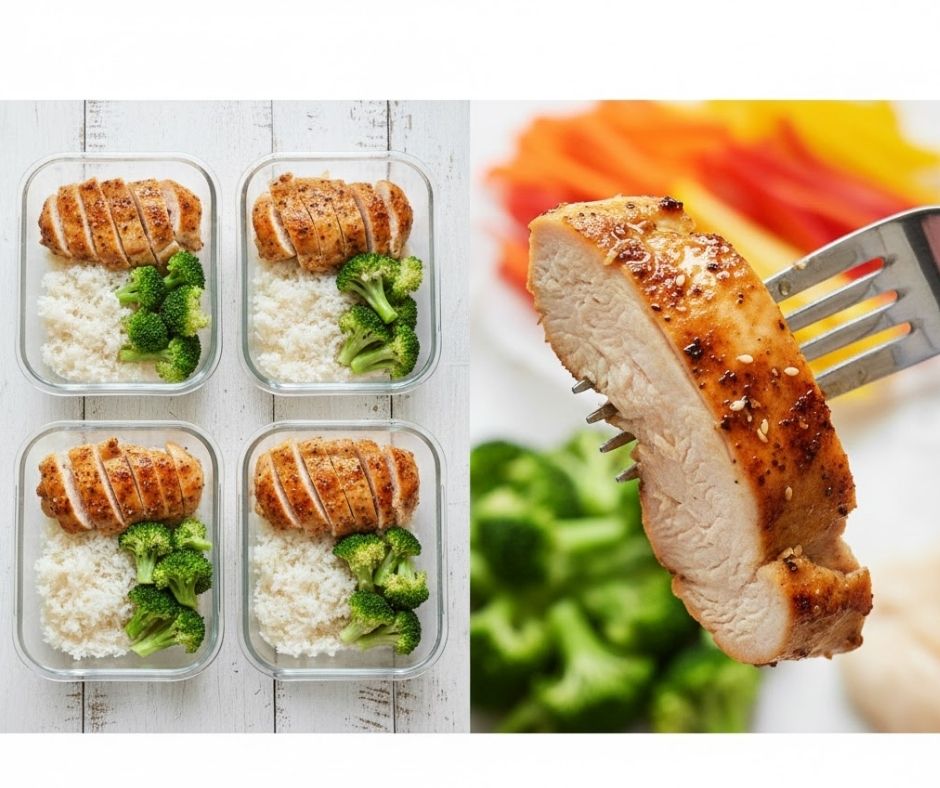
- Q: What are the easiest meals to make with this prepped chicken?
- A: Tacos/Burrito Bowls, quick pasta tosses (with pesto), chicken salad, or topping pre-made salads are the fastest options.
Final Thoughts (The Prep Pro)
You conquered the Sunday afternoon kitchen session, mastered the art of the temperature hold, and created a large batch of perfectly juicy, flavorful protein. That pan of golden-brown chicken is proof that meal prep chicken doesn’t have to be dry sadness. You are officially a Prep Pro.
Go ahead, enjoy the knowledge that your weekday lunches are sorted. Did you realize flavor versatility could be this easy? I bet you’ll never buy a sad supermarket rotisserie chicken again. Now, are you shredding this for tacos or slicing it for salad?