Ditch the Deli: The Ultimate Guide to Chewy, Perfect Homemade Bagels
Okay, confession time: you’ve probably shelled out too much cash for a mediocre, oversized, airy thing they call a Bagel at some coffee shop, right? You know the kind—it’s more bread roll with a hole than the dense, chewy perfection you crave. I’ve been there, thinking that real, honest-to-goodness New York-style bagels were a mystical creation only accessible to bakers who wear white aprons and get up before dawn.
Guess what? It’s a complete lie. Making authentic, chewy, and slightly sweet Bagels at home is absolutely achievable. You need a few basic ingredients, a stand mixer (or a serious forearm workout), and a willingness to boil things. Seriously, once you taste a warm, crusty bagel pulled fresh from your own oven, slathered in cream cheese? You’ll never look back. TBH, you might start judging everyone else’s breakfast choices.
Why This Bagel Recipe Is Your Weekend Project
This isn’t just about saving $5 a pop. This recipe is about achieving that magical texture: the crisp, slightly blistered crust and the dense, chewy interior. That texture comes from two key steps: a slow, cold rise (hello, flavor!) and the non-negotiable step of boiling them before baking.

Do you want to impress your brunch guests? Walk out with a basket of these golden rings and watch their jaws drop. They’ll think you secretly moved to Brooklyn for a year of intense baking apprenticeship. Plus, the smell of malt and dough baking in your kitchen? That’s pure, comforting heaven.
Ingredients: Keep It Simple, Get That Chew
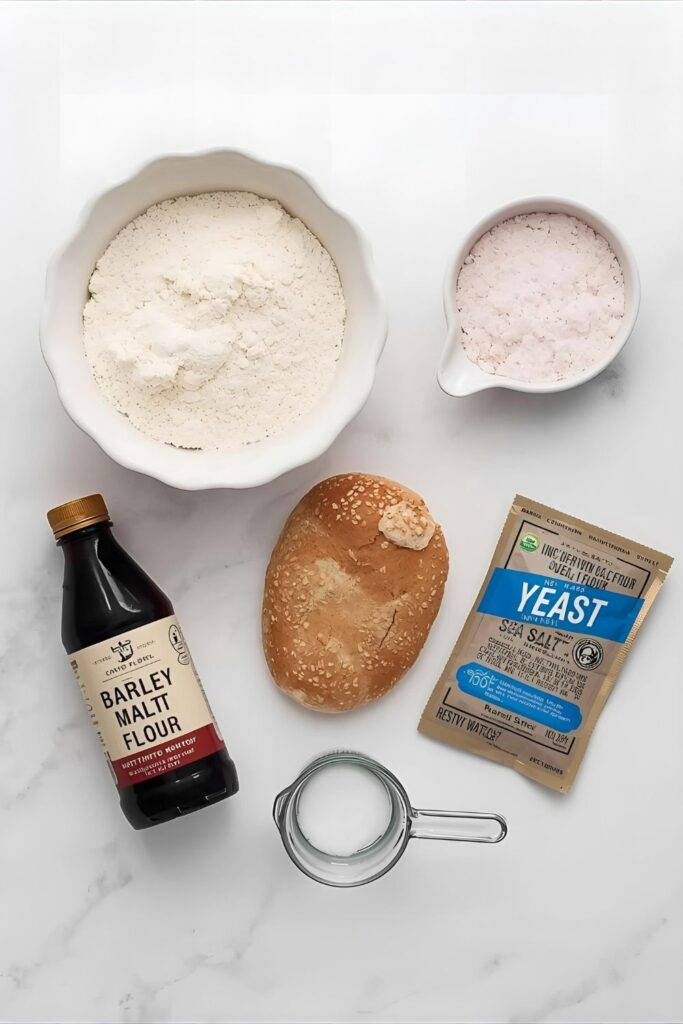
The ingredient list is deceivingly short, but the high-protein flour is non-negotiable.
- 1 1/2 cups Warm Water (Around $105^{\circ}F$ to $115^{\circ}F$. Too hot kills the yeast; too cold makes it lazy. We need active participants!)
- 1 tablespoon Granulated Sugar (Feeds the yeast.)
- 2 1/4 teaspoons (1 packet) Active Dry Yeast (The little guys working hard for you.)
- 3 1/2 cups High-Protein Bread Flour (Crucial for the chew. Do not substitute all-purpose flour if you want that true bagel density!)
- 2 teaspoons Fine Sea Salt (The essential flavor booster.)
- For the Boiling Water:
- 8 cups Water
- 2 tablespoons Barley Malt Syrup (This is the secret sauce for that authentic sweetness and deep brown color. Substitution: Use molasses or honey if you can’t find malt syrup.)
- 1 teaspoon Baking Soda (Optional, but adds a little extra crispness to the crust.)
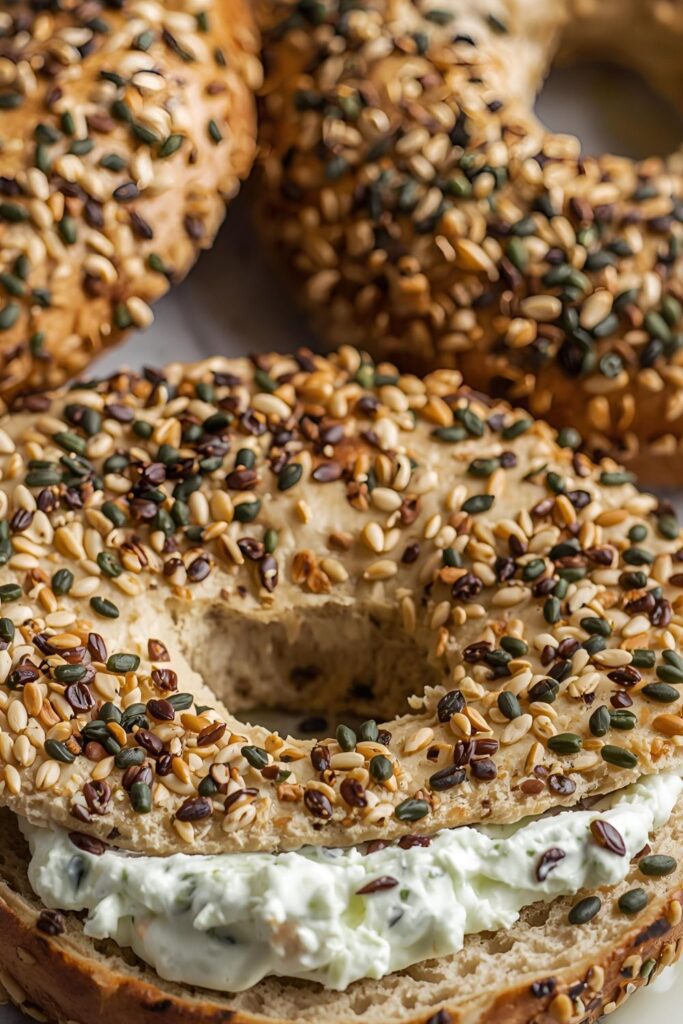
- Toppings: Everything Bagel Seasoning, Sesame Seeds, Poppy Seeds, or Coarse Salt.
Key Substitution Note: If you cannot find Barley Malt Syrup (which gives the deepest, richest flavor), substitute with an equal amount of honey or molasses in the boiling water. The results are still delicious, but the flavor depth is a little different. FYI, it’s worth seeking out the malt!
Tools & Kitchen Gadgets Used
This isn’t a minimalist baking project, but every tool here serves a purpose in achieving that perfect chew.
- Stand Mixer with Dough Hook Attachment (Highly recommended. This is a very stiff dough and needs powerful kneading!)
- Large Mixing Bowl (For the first rise.)
- Measuring Cups and Spoons (Precision prevents disappointment.)
- Kitchen Scale (Use this! Weighing the flour ensures the right consistency for a dense dough.)
- Large Pot or Dutch Oven (For the boiling step—must be wide enough to fit two bagels comfortably.)
- Slotted Spoon or Spider Strainer (To lift the boiled bagels without damage.)
- Two Large Baking Sheets
- Parchment Paper (Line your baking sheets so the boiled dough doesn’t stick.)
Step-by-Step Instructions: The Boil-Then-Bake Magic
This process isn’t complicated, but it involves a lot of waiting and one crucial, fun step: the bath!
H3: Mixing the Stiff Dough (AKA, The Stand Mixer’s Workout)
- In your mixing bowl, dissolve the sugar and yeast in the warm water. Let it foam for 5-10 minutes. Proof check complete!
- Add the bread flour and salt to the bowl. Mix on low speed until a shaggy mass forms.
- Switch to the dough hook and knead on medium-low speed for 8-10 minutes. This is a stiff dough; your mixer will rumble a bit. The dough should become smooth, elastic, and pass the stretch test (it should stretch a few inches without easily tearing).
H3: The Slow, Cold Flavor Development
- Lightly oil the large mixing bowl. Form the dough into a ball and place it in the bowl. Cover tightly with plastic wrap.
- Let it rise at room temperature for 60-90 minutes. It should slightly increase in size, but not double—this is a slow riser.
- Now for the key flavor step: punch the dough down, wrap it loosely in plastic wrap, and refrigerate it for 12 to 24 hours. This slow, cold ferment develops that complex, signature bagel flavor. Don’t skip this, seriously!
H3: Shaping the Rings (The Hole Lot of Fun)
- Remove the dough from the fridge. Divide it into 8 equal pieces (about 110-120g each if you weigh them).
- Form each piece into a tight, smooth ball. Let the balls rest on the counter for 10 minutes to relax the gluten.
- Poke a hole through the center of each ball using a floured finger. Gently stretch the hole until it’s about 1.5 to 2 inches wide. The hole shrinks while boiling and baking, so make it look bigger than you think it needs to be!
- Place the shaped bagels on baking sheets lined with parchment paper.
H3: The Crucial Bath and Bake
- Preheat your oven to $425^{\circ}F$ ($220^{\circ}C$). Get that oven screaming hot.
- Bring the 8 cups of water with the malt syrup (or honey/molasses) and baking soda to a rolling boil in your large pot.
- Gently drop the bagels into the boiling water, 2 or 3 at a time. Do not crowd them!
- Boil each side for 30 seconds to 1 minute. Shorter boil equals chewier interior; longer boil equals thicker crust. Use the slotted spoon to flip them and then remove them to the lined baking sheet.
- Immediately brush the boiled bagels with a little water (or an egg white wash for extra shine) and sprinkle generously with your desired toppings.
- Bake for 15-20 minutes, flipping the tray halfway through, until they are deep golden brown and look incredibly tempting. Cool on a wire rack—if you can wait!
Calories & Nutritional Info (The Morning Fuel)
This recipe makes 8 medium-large bagels. Remember, this is the dough only—toppings and schmear add extra.
- Estimated Calories Per Bagel (Dough Only): Approximately 250-280 calories (Before toppings or fillings, of course.)
- Macronutrients Per Serving (Estimated):
- Carbohydrates: 50-55g (Mostly complex carbs from the bread flour.)
- Protein: 8-10g (Thanks to the high-protein bread flour!)
- Fat: <1g (A very lean dough.)
- Key Nutritional Note: Bagels are a high-carb, low-fat food (again, pre-schmear). Using bread flour boosts the protein content significantly compared to typical all-purpose white bread.
Common Mistakes to Avoid (AKA, Why Your Bagel Tastes Like Sad Bread)
Don’t let these simple errors turn your delicious dream into a dense reality.
- Killer Mistake #1: Using All-Purpose Flour: I said it once, I’ll say it again: use high-protein bread flour! All-purpose flour doesn’t have enough gluten to create that dense, chewy structure. It yields a bread-like, airy bagel, which is basically a bread roll with a hole.
- Killer Mistake #2: Skipping the Cold Ferment: If you just let the dough rise once at room temp, your bagels will taste flat and simple. The cold rest is essential for deep, complex flavor development. Plan ahead, people!
- Killer Mistake #3: Not Making the Hole Big Enough: That hole will shrink during the boil and bake. If you make it too small, you’ll end up with a glorified hockey puck. Stretch that hole until it looks almost too big.
- Killer Mistake #4: Over-Boiling: Boiling gives the crust its shine and chew, but overdo it, and the inside becomes overly tough and rubbery. Stick to 30 seconds to 1 minute per side, max.
Variations & Customizations
Bored with plain? Time to get creative.
- Everything Bagel Glory: After boiling, brush the tops with water and liberally dip the tops into a mix of poppy seeds, sesame seeds, dried garlic flakes, dried onion flakes, and coarse salt. You can buy pre-mixed Everything Bagel Seasoning to make life easy!
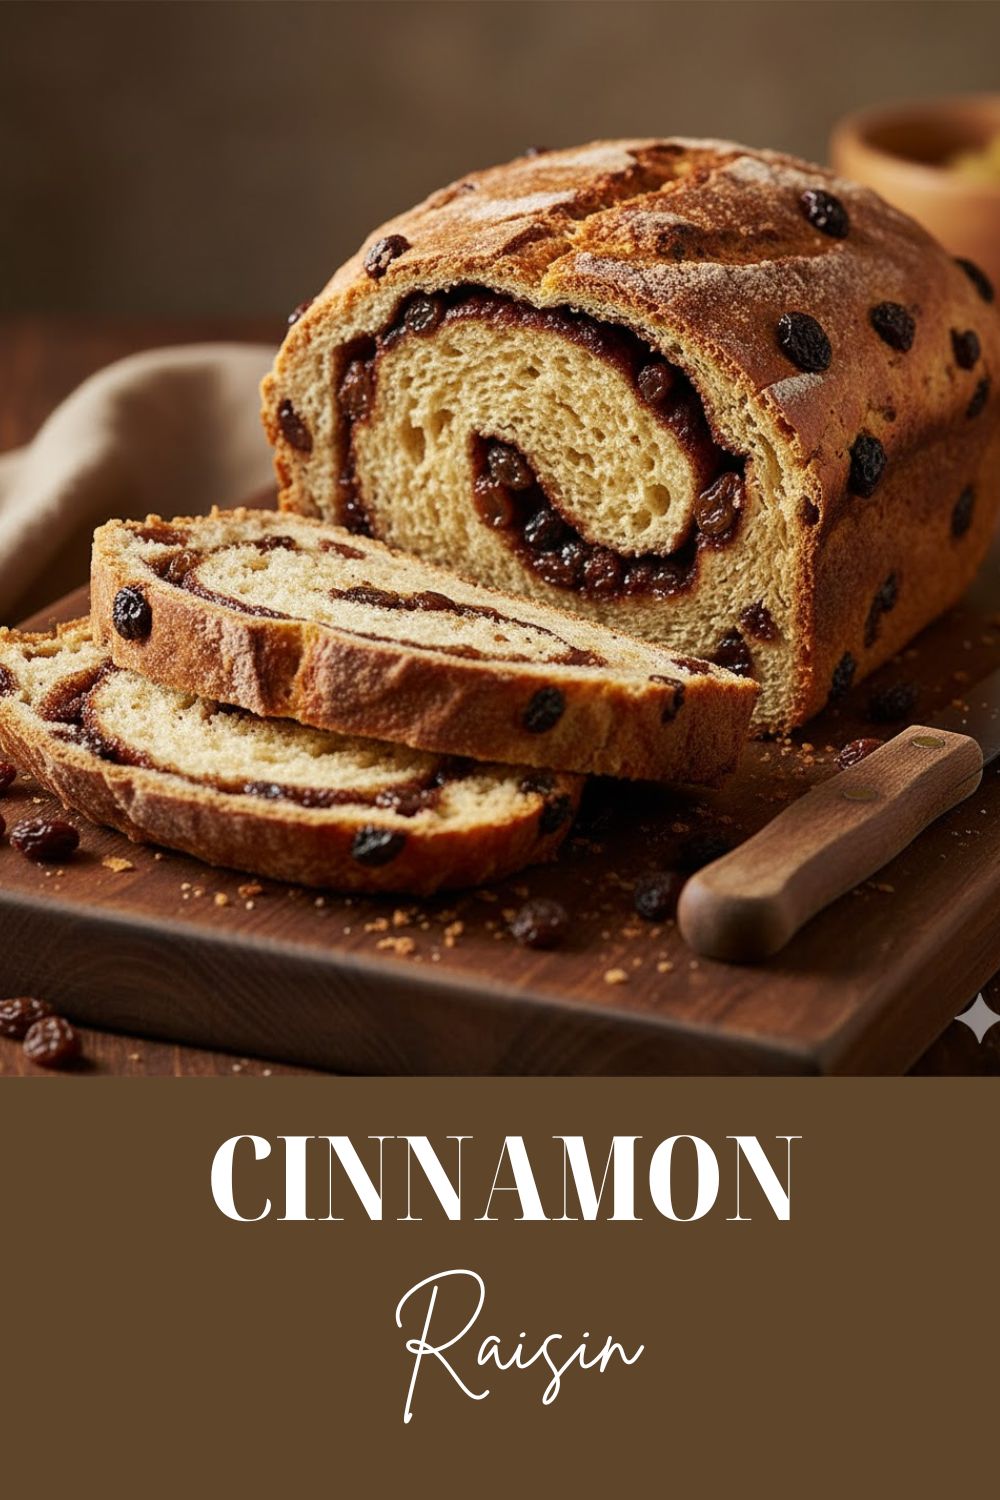
- Cinnamon Raisin Sweetness: Omit the salt in the dough. Add 1/2 cup of plump raisins and 2 teaspoons of ground cinnamon during the last minute of kneading. Reduce the malt syrup in the boil by half. Great for a sweet breakfast treat.
- Spicy Jalapeño Cheddar: Add 1/2 cup of shredded cheddar cheese and 1/4 cup of finely minced pickled jalapeños during the last minute of kneading. Top with a sprinkle of extra cheese before baking for a savory kick. Who doesn’t love a little heat?
FAQ Section: Bagel Brain Food
H3: Why do you boil bagels before baking them?
Boiling the bagels in alkaline water (often with malt or baking soda) gelatinizes the starch on the exterior of the dough. This process sets the crust quickly, giving the bagel its signature glossy shine and preventing it from fully rising in the oven, which creates that dense, chewy texture.
H3: How long should I boil bagels?
Aim for 30 seconds to 1 minute per side. A 30-second boil yields a slightly softer, chewier interior, while boiling for a full minute per side results in a thicker, firmer, and chewier crust. Don’t boil longer than 90 seconds per side, or they get tough.
H3: Can I skip the cold fermentation overnight?
Technically, yes, but you shouldn’t. The cold ferment is vital. It slows the yeast activity, which allows flavor compounds to develop. Skipping it results in a fast-rising, but ultimately bland-tasting bagel. Plan for that 12-24 hour rest!
H3: What is the best flour for making bagels?
The best flour for bagels is high-protein bread flour. Its protein content creates a stronger gluten network than all-purpose flour, which is necessary to handle the long kneading and boiling process, giving you the dense, characteristic chewiness.
H3: How do you store homemade bagels?
Store cooled bagels in an airtight container or zip-top bag at room temperature for up to 3 days. For longer storage, slice and freeze them in a freezer bag for up to 3 months. Toasting them from frozen works great!
H3: What is barley malt syrup, and is it necessary?
Barley malt syrup is a sticky, sweet liquid derived from sprouted barley. It’s highly fermentable and provides both flavor and deep color. It is highly recommended for the classic, authentic flavor. You can substitute honey or molasses, but the taste profile changes slightly.
H3: Why are my homemade bagels flat and dense?
If they’re flat, you might have over-proofed them after shaping (too much air). If they’re too dense (like a rock), you likely used too much flour during the mixing phase, or didn’t boil them long enough to set the crust properly. Next time, weigh your flour and check for that final cold rest!
Final Thoughts: The Hole Truth
Look at you, conquering the culinary world! You went from buying questionable coffee shop circles to making authentic, chewy bagels in your own kitchen. You now understand the magic of boiling, the importance of flour, and the necessity of a cold nap. Your bagel game is officially elite. Go make a giant schmear, toast one of these masterpieces, and seriously, tell me which topping you picked first. I’m betting on Everything.