Forget Takeout: The Only Easy Homemade Pizza Dough Recipe You’ll Ever Need (Seriously)
Remember that time you promised yourself you’d stop ordering sad, soggy delivery pizza? Yeah, me too. But who has the time or the patience for homemade crust, right? Wrong. Listen, learning how to make the perfect pizza dough isn’t some ancient secret reserved for nonnas and certified pizzaiolos. It’s actually ridiculously simple, and once you master this recipe, you’ll wonder why you ever settled for the cardboard disc from the frozen aisle. We’re talking about a light, airy, chewy crust with those perfect little charred bubbles. Get ready to impress yourself, TBH.
Why You Need This Pizza Dough in Your Life
I know, I know, another recipe claiming to be the best. But trust me on this one. This simple combination of flour, yeast, water, and salt creates a flavor bomb. It tastes complex, yet you’ll have it mixed up in like, ten minutes.
It’s about control, my friend. You dictate the ingredients (hello, good quality olive oil!), the thickness, and the chewiness. Plus, the smell of fresh dough proofing in your kitchen? Seriously intoxicating. It’s the kind of subtle flex that makes guests think you secretly went to culinary school. Go ahead, take a bow.
Ingredients: The Fab Four (Plus One)
You don’t need a pantry full of weird, imported stuff. You probably already have these things. No excuses!
- 1 1/2 cups Warm Water (Between $105^{\circ}F$ and $115^{\circ}F$. If it’s too hot, you murder the yeast; too cold, they get lazy.)
- 1 envelope (2 1/4 teaspoons) Active Dry Yeast (The little guys that make the magic happen.)
- 1 teaspoon Granulated Sugar (Food for the yeast. Think of it as a tiny energy drink.)
- 3 3/4 cups Bread Flour (Use bread flour for a chewier crust, thanks to its higher protein content. All-purpose works in a pinch, but you miss out on some texture!)
- 2 teaspoons Fine Sea Salt (Crucial for flavor. Don’t skimp!)
- 2 tablespoons Extra Virgin Olive Oil (Adds flavor and keeps things nice and supple.)

Key Substitution Note: If you only have all-purpose flour, reduce the water by about $1/4$ cup. All-purpose absorbs less liquid than the bread flour, and we don’t want a sloppy mess!
Tools & Kitchen Gadgets Used
Ready to put on your chef hat? These tools make the process a breeze. Time to justify that stand mixer purchase.
- Large Mixing Bowl (For the initial wet ingredients)
- Stand Mixer with Dough Hook Attachment (A massive time and effort saver. If you don’t have one, get ready for a serious arm workout!)
- Measuring Cups and Spoons (Precision, people!)
- Kitchen Scale (Optional, but gives you the most consistent results—FYI, measuring flour by weight is way more accurate.)
- Plastic Wrap or a Clean Kitchen Towel (For proofing)
- Baking Sheet or Pizza Stone/Steel (For the actual baking)
- Small Saucepan or Microwave (To warm the water)
Step-by-Step Instructions: The Dough Whisperer Edition
This is where the fun begins. Remember: you’re in charge!
H3: Activate the Yeast (The “Proof” is in the Pudding)
- Pour your warm water into the large mixing bowl (or the bowl of your stand mixer).
- Sprinkle the yeast and sugar over the water. Give it a quick stir.
- Walk away for about 5-10 minutes. You want to see a nice, foamy layer on top. If it looks like a bubble bath, you’re golden. If it looks like sad, murky water, your yeast is dead. Sorry, start over.
H3: Mixing and Kneading (AKA, The Workout)
- Add the flour, salt, and olive oil to the yeast mixture.
- If you use a stand mixer, use the dough hook and mix on low speed for about 5-7 minutes. The dough should pull away cleanly from the sides of the bowl.
- If you’re kneading by hand, mix the ingredients with a wooden spoon until a shaggy dough forms. Turn it out onto a lightly floured surface and knead aggressively for 8-10 minutes. The final dough should feel smooth and elastic, not sticky. It’s a great way to work out your frustrations, right?
H3: The Glorious Rest (Proofing)
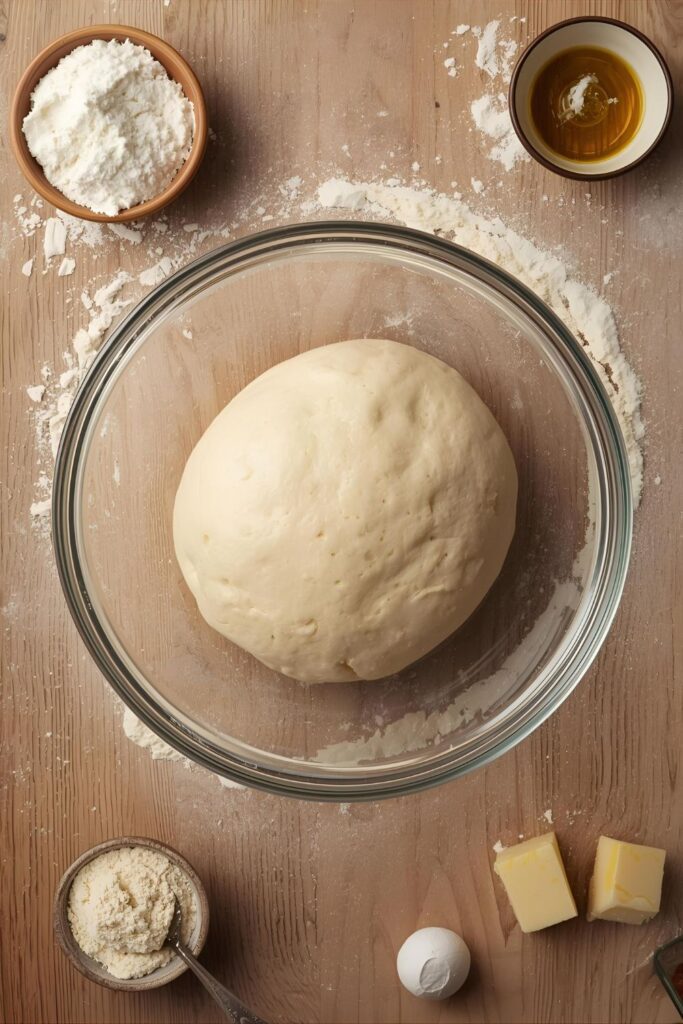
- Lightly grease the inside of a clean large bowl with a little olive oil.
- Form the dough into a smooth ball and place it in the oiled bowl. Turn it once to coat the entire ball.
- Cover the bowl tightly with plastic wrap or a kitchen towel.
- Place the bowl in a warm, draft-free spot (the top of a warm oven or inside a microwave works well) and let it rise for 1 to 1.5 hours. The dough should double in size. This is the part where patience is a virtue.
H3: Shape and Bake
- Gently punch the air out of the risen dough (it’s so satisfying!) and divide it into two equal balls for standard 12-inch pizzas, or one large one.
- Let the dough balls rest for 10 minutes to relax the gluten, making them easier to stretch.
- Stretch or roll the dough into your desired shape. Don’t overthink it; rustic is charming!
- Top it with your favorite sauce and toppings and bake at the highest temperature your oven allows, typically $475^{\circ}F$ to $500^{\circ}F$, for 8-15 minutes, depending on your oven and toppings. Enjoy the smell!
Calories & Nutritional Info (The Not-So-Fun Part)

Look, you’re making pizza. Don’t stress too much, but here’s the scoop for those who track things. This recipe makes about two 12-inch pizzas (8 servings total).
- Estimated Calories Per Serving (Dough Only): Approximately 200-220 calories (This is based on 1/8 of the total dough recipe, before toppings).
- Macronutrients Per Serving (Estimated):
- Carbohydrates: 40g
- Protein: 7g
- Fat: 2g (Mostly from the olive oil)
- Key Nutritional Note: This dough offers a good source of complex carbohydrates and a decent amount of plant-based protein, especially if you use high-protein bread flour. It’s also naturally vegan.
Common Mistakes to Avoid (So You Don’t Cry)
We’ve all been there—a brick instead of a fluffy crust. Don’t make these rookie errors!
- Killer Mistake #1: Water Temperature: As mentioned, water that is too hot kills the yeast, and water that is too cold puts it to sleep. Aim for Goldilocks temperature: just warm. Use a thermometer, or if you’re brave, test it on your wrist; it should feel pleasantly warm, not hot.
- Killer Mistake #2: Skipping the Kneading: You need to develop that gluten! Kneading gives the dough its structure and chew. A dough that’s not kneaded enough comes out dense and flat. Knead until it’s smooth and passes the windowpane test (you can stretch a small piece thin enough to see light through it without it tearing).
- Killer Mistake #3: Too Much Flour While Kneading/Rolling: Only use as much flour as you absolutely need to prevent sticking. Adding too much flour results in a dry, tough crust. Do you want to eat a cracker? Didn’t think so.
- Killer Mistake #4: Not Preheating Enough: You need a blazing hot oven to get that crispy-chewy texture. Preheat your oven (and your pizza stone/steel!) for at least 30-45 minutes before baking.
Variations & Customizations
Tired of the basic? Spice things up!
- Herby Garlic Dough: Add 2 cloves of minced garlic and 2 teaspoons of dried Italian herbs (like oregano, basil, and rosemary) to the dough along with the flour. It gives the crust an amazing aroma and flavor, perfect for dipping in marinara.
- Whole Wheat Health Nut Swap: Substitute up to half of the bread flour with whole wheat flour for a heartier, nuttier flavor and a fiber boost. The dough will be slightly denser, but it’s a great way to sneak in some nutrition.
- Spicy Chili Flake Kick: Mix 1-2 teaspoons of red pepper flakes into the dough. This adds a subtle, pleasant heat that complements almost any topping, especially pepperoni or sausage. A little zing never hurt anyone!
FAQ Section: Answers to Your Burning Dough Questions
H3: Do you need a stand mixer to make pizza dough?
Absolutely not! You can mix and knead this pizza dough by hand. It takes a little more elbow grease—about 10 minutes of solid kneading—but you’ll still achieve fantastic results. Think of it as your pre-pizza appetizer workout.
H3: How long can pizza dough sit out?
Once the dough has doubled in size during its initial rise, you should use it or refrigerate it. You can let it sit out for an extra hour or two, but eventually, it will over-proof and collapse. Don’t leave it out overnight!
H3: Can you freeze homemade pizza dough?
Yes! Once the dough completes its initial rise, punch it down, shape it into a ball, lightly oil it, and place it in a freezer-safe zip-top bag, squeezing out the air. It freezes beautifully for up to 3 months. Thaw it overnight in the fridge.
H3: Why is my pizza dough tough and not stretchy?
You probably either added too much flour or didn’t let the dough rest long enough before shaping. Gluten is a muscle; if you try to stretch it while it’s tight, it fights back. Let your dough balls rest for 10-20 minutes after punching down to relax the gluten, making it pliable.
H3: What is the best kind of flour for pizza dough?
Bread flour is generally considered the best because of its high protein content (around 12-14%). This protein develops strong gluten networks, which trap gas and create that desirable chewy, airy texture we all crave in a perfect crust.
H3: Do I need to use sugar in pizza dough?
The sugar feeds the yeast, which helps it activate faster and produce gas (the bubbles!). While technically optional, a small amount of sugar ensures your yeast is active and contributes to better flavor and browning of the crust. Use it for the best results.
H3: How do you store leftover pizza dough?
Store leftover dough in an airtight container or a zip-top bag in the refrigerator for up to 3 days. The cold temperature slows down the yeast activity. Just remember to let it come to room temperature for about an hour before you plan to roll and bake it.
Final Thoughts: Say Goodbye to Subpar Slices
Seriously, you did it! You now possess the secret knowledge of fantastic pizza dough. Feel that sense of accomplishment? Go ahead, bask in the glory. IMO, nothing beats the satisfaction of biting into a slice knowing you built that foundation from scratch. Don’t ever buy that sad, pre-made stuff again. What crazy toppings are you throwing on your masterpiece first? Tell me everything! 🙂