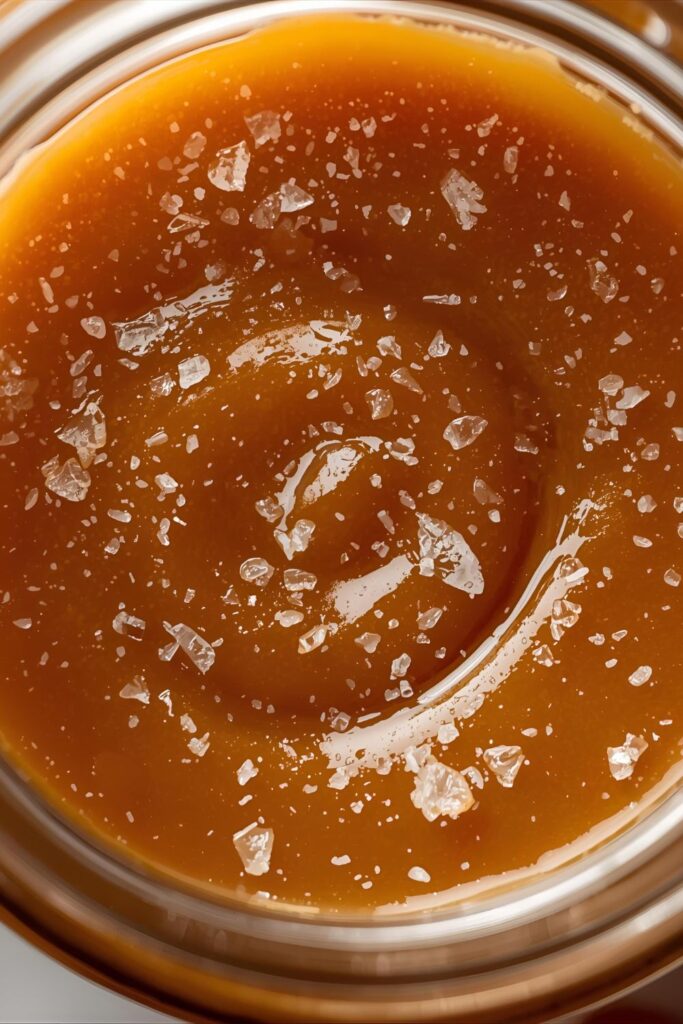
Seriously Addictive Salted Caramel Sauce: The Only Recipe You’ll Ever Need (Better Than Store-Bought!)
Let’s just be honest: Salted caramel isn’t a flavor; it’s a personality trait. It’s the perfect balance of sweet, smoky, and salty—a deep, complex, velvety hug in liquid form. You know that moment you realize your ice cream, your coffee, or your apple slices are just missing something? That something is this sauce. And while you could buy a jar of the commercial stuff that tastes suspiciously like corn syrup, why settle? I’m here to show you how to whip up a batch of rich, smoky, and utterly viral homemade salted caramel sauce in about ten minutes. Prepare for immediate addiction.
Why This Salted Caramel Recipe Is Absolute Gold
Why take ten minutes to make caramel when you can just grab a squirty bottle? Because this recipe is awesome, that’s why. It delivers a depth of flavor that store-bought versions simply cannot match. We’re creating true caramelization, which gives a rich, nutty, smoky undertone.

First, the flavor is superior. The balance of high-quality butter, real cream, and flaky sea salt is pure perfection. Second, it’s ridiculously versatile. Drizzle it on everything from brownies to popcorn, or just eat it with a spoon (no judgment here, IMO). Third, the process itself is surprisingly satisfying. You conquer sugar chemistry, and you get to impress guests with something that tastes gourmet but takes minimal effort. Seriously, why wait for the next fancy dessert when you can make this magic right now?
Ingredients: The Four Horsemen of Sweetness

You only need four basic ingredients to create this rich, complex sauce. No complicated stabilizers or preservatives here!
- 1 cup Granulated Sugar: The star of the show. We’re caramelizing this bad boy.
- ½ cup Unsalted Butter: Cut into small cubes, and make sure it’s at room temperature. Cold butter causes problems!
- ¾ cup Heavy Cream (Full-Fat): Warmed slightly. Cold cream will seize the caramel, and we don’t want that kind of drama.
- 1 teaspoon Flaky Sea Salt: Crucial for the “salted” part. Maldon is fantastic, but any flaky salt works. Use a little less if using fine table salt.
- Optional: 1 teaspoon Vanilla Extract: Adds a lovely depth and rounds out the flavor.
Key Substitutions:
- Dairy Swap: For a vegan option, use a full-fat, creamy coconut milk (the solid cream from the top of the can is best) instead of heavy cream, and use vegan butter sticks. Warm it just as you would heavy cream.
- Sugar Swap: You can attempt this with brown sugar, but it burns much easier and makes monitoring the caramel color impossible. Stick to granulated sugar for your first few tries, TBH.
- Salt Swap: If using fine table salt, use ½ teaspoon instead of a full teaspoon to avoid making it overly salty.
Tools & Kitchen Gadgets Used: Your Caramel Command Center
You’ll need a couple of essentials and a heavy dose of patience.
- Heavy-Bottomed Saucepan (Medium Size): Crucial! A heavy bottom distributes heat evenly and prevents scorching.
- Whisk (Long-Handled): For safety during the vigorous stirring stages.
- Rubber Spatula: For scraping down the sides of the pan.
- Measuring Cups and Spoons: For accurate measurements.
- Candy Thermometer (Optional): Helpful for absolute precision, but not strictly necessary if you watch the color.
- Airtight Jar: For storing your finished golden syrup.
Step-by-Step Instructions: Mastering the Caramel Art
Caramelization is a thrilling process, but it requires your full attention. Do not walk away! You are seeking that perfect amber color.
H3: Step 1: Prep Your Players
Cut your butter into cubes and leave it at room temperature. Gently warm the heavy cream in a separate small saucepan or microwave for about 30 seconds. You want it warm to the touch, not hot. Having these prepped and ready next to the stove is key to success.
H3: Step 2: Melt the Sugar (Dry Method)
Pour the 1 cup of granulated sugar into your heavy-bottomed saucepan. Set the pan over medium heat. Do not add water. Do not stir yet! Wait until you see the sugar around the edges starting to melt and turn clear/amber (this takes about 5-8 minutes).
H3: Step 3: The Golden Stir
Once the sugar begins to melt around the edges, start gently stirring with your rubber spatula. As the sugar melts, continue stirring until all the sugar dissolves and the liquid turns a beautiful deep amber color—like dark copper or an old penny. Stop heating immediately once it reaches this stage. This dark color provides the rich, complex flavor. Do not let it burn!
H3: Step 4: Add the Butter (The Foaming Stage)
Remove the pan from the heat. Carefully add the cubed room-temperature butter, one cube at a time, whisking vigorously and continuously. The caramel will bubble up aggressively—that’s normal! Keep whisking until the butter melts and the mixture becomes smooth again.
H3: Step 5: Add the Cream (The Big Sizzle)
Slowly and carefully pour in the warm heavy cream while whisking constantly. The caramel will bubble and sizzle dramatically again, and it might look like it’s seizing up. Don’t panic! Keep whisking until the sauce is uniform and smooth.
H3: Step 6: Salt and Chill
Whisk in the vanilla extract (if using) and the flaky sea salt. Stir until the salt dissolves slightly. Pour the finished caramel immediately into your airtight jar. It will be very thin right now—that’s okay! Let it cool to room temperature, uncovered. It thickens perfectly as it cools.
Calories & Nutritional Info: The Delicious Details
Let’s not pretend this is a salad. It’s a rich sauce, and it’s worth every calorie. These estimates are approximate per 2-tablespoon serving.
- Estimated Calories per serving (2 tbsp): 150-180 calories
- Fat: 10-14g (mostly from butter and cream)
- Carbohydrates: 15-20g (mostly sugar)
- Protein: $<1\text{g}$
- Note on Sugar: High sugar content—it’s caramel!
- Mood Booster: Zero nutritional value, but 100% emotional value. Who needs vitamins when you have this?
Common Mistakes to Avoid: Stop Making Caramel Failures!
Caramel is the drama queen of the kitchen. Avoid these common slip-ups for smooth sailing.
- Adding Cold Ingredients: Adding cold butter or cold cream to scorching hot caramel will cause the entire mixture to seize up instantly and solidify. Ensure both the butter and the cream are warm or room temperature.
- Stirring Too Soon: When you first put the sugar on the heat, do not stir until the edges start to melt. Stirring dry sugar can cause it to crystallize, ruining the batch. Only stir once liquefaction begins.
- Burning the Sugar: The sugar turns from perfect amber to burnt, bitter black in seconds. Watch it like a hawk once it starts melting. If it smells burnt, you need to start over. Sorry, but burned caramel tastes like sadness.
- Using a Thin Pan: A thin-bottomed pan creates hot spots, causing parts of the sugar to burn before the rest melts. Always use a heavy-bottomed saucepan for even heat distribution.
- Not Whisking Vigorously: When you add the butter and cream, whisking constantly and aggressively is the only way to ensure the fats and sugar emulsify into a smooth sauce rather than separating.
Variations & Customizations: Your Golden Upgrade
The classic salted caramel is a masterpiece, but why stop there?
- Spiced Cardamom Caramel: Add ½ teaspoon of ground cardamom along with the salt and vanilla extract at the end. The floral spice adds a sophisticated warmth, making it perfect for coffee or spiced cider.
- Smoky Bourbon Caramel: After removing the sugar from the heat but before adding the butter, carefully pour in 1-2 tablespoons of bourbon or dark rum. It will bubble violently! Whisk, then proceed with the butter and cream. The alcohol adds a lovely, complex depth.
- Chocolate Caramel Sauce: Once the caramel is finished and smooth (before adding the salt), whisk in ½ cup of high-quality semi-sweet chocolate chips until melted. Add salt and serve. This creates an unbelievably rich, dark mocha caramel hybrid.
FAQ Section: Solving Your Sticky, Sweet Problems
Caramel creates questions. Let’s tackle the stickiest ones.
H3: Q1: How do I store homemade salted caramel sauce?
A1: Store the cooled caramel in a clean, airtight jar in the refrigerator for up to 3 weeks.
H3: Q2: How do I reheat caramel sauce?
A2: Reheat the sauce in the microwave in 15-second intervals, stirring between each, until it reaches your desired consistency, or warm it gently in a small saucepan over low heat.
H3: Q3: Why did my caramel turn into a hard lump?
A3: Your caramel seized because you added the butter and/or cream while they were too cold, or you didn’t whisk vigorously enough. Don’t throw it out! Add a tablespoon of warm water and heat gently, whisking constantly until the lump melts back into a liquid.
H3: Q4: Can I use brown sugar to make caramel?
A4: While you can technically make a caramel sauce with brown sugar, it contains molasses which makes the mixture darker and harder to monitor for burning. Stick to white granulated sugar for clear visual cues on caramelization.
H3: Q5: What is the difference between caramel and butterscotch?
A5: Caramel is made primarily with granulated sugar. Butterscotch is made primarily with brown sugar (which contains molasses). Both use butter and cream, but the base sugar changes the final flavor profile.
H3: Q6: What can I use this caramel sauce on?
A6: Everything! Pour it over ice cream, brownies, cheesecakes, coffee, apple slices, popcorn, waffles, or simply lick it off a spoon.
H3: Q7: When is the sugar the correct color?
A7: The correct color is a deep, dark amber, like dark copper or a well-aged whiskey. A pale yellow or light amber caramel will taste mostly like sweet sugar, lacking the complex, smoky richness we crave.
Final Thoughts: The Sweet, Salty Victory is Yours!
You did it! You’ve mastered the art of the perfect, velvety, Salted caramel sauce. Go ahead, take a tiny taste—isn’t that deep, smoky sweetness paired with the flaky salt just divine? You are officially a sugar wizard. Are you ever going to buy that inferior, watery store-bought syrup again? I highly doubt it. Now, go pour this liquid gold over your entire life!