

The 2-Minute Mug Cheesecake That’ll Change Your Life
It’s 10 PM on a Tuesday. You’re deep into a streaming binge, the house is quiet, and then it hits you. Not a subtle suggestion, but a full-blown, primal need for cheesecake. You picture the creamy filling, the buttery crust… but the thought of a springform pan, a water bath, and an 8-hour chill time makes you want to cry. Well, my friend, wipe those tears, because I’m about to introduce you to the life-altering magic of the 2-minute mug cheesecake. This isn’t a drill. This is your emergency dessert protocol.
Forget everything you thought you knew about making cheesecake. We’re breaking all the rules, using a microwave, and achieving single-serving bliss faster than you can find your car keys to go to the store. You’re welcome.
Why This Recipe is Basically a Superpower

Still skeptical? Let me lay it out for you. Why is this mug cheesecake your new culinary best friend?
First, INSTANT GRATIFICATION. From craving to consumption, you’re looking at less than five minutes, and most of that is just gathering the ingredients. In a world of waiting, this recipe is the hero we need. Who has the patience for a full-sized cheesecake? Seriously, who are those people?

Second, perfect portion control. This recipe makes one perfect, indulgent serving. There are no leftovers staring at you from the fridge for three days, silently judging your life choices. It’s a one-and-done deal of pure, unadulterated joy.
Finally, it tastes shockingly legit. Is it a New York deli cheesecake that took 12 hours to create? No, and let’s manage our expectations. But is it a creamy, tangy, rich, and utterly satisfying dessert that will absolutely crush your craving? You bet it is. IMO, it’s a game-changer.
Your (Very Short) Ingredient List
Gather your tiny army of ingredients. We’re going to build this masterpiece in two parts: the crust and the glorious filling.
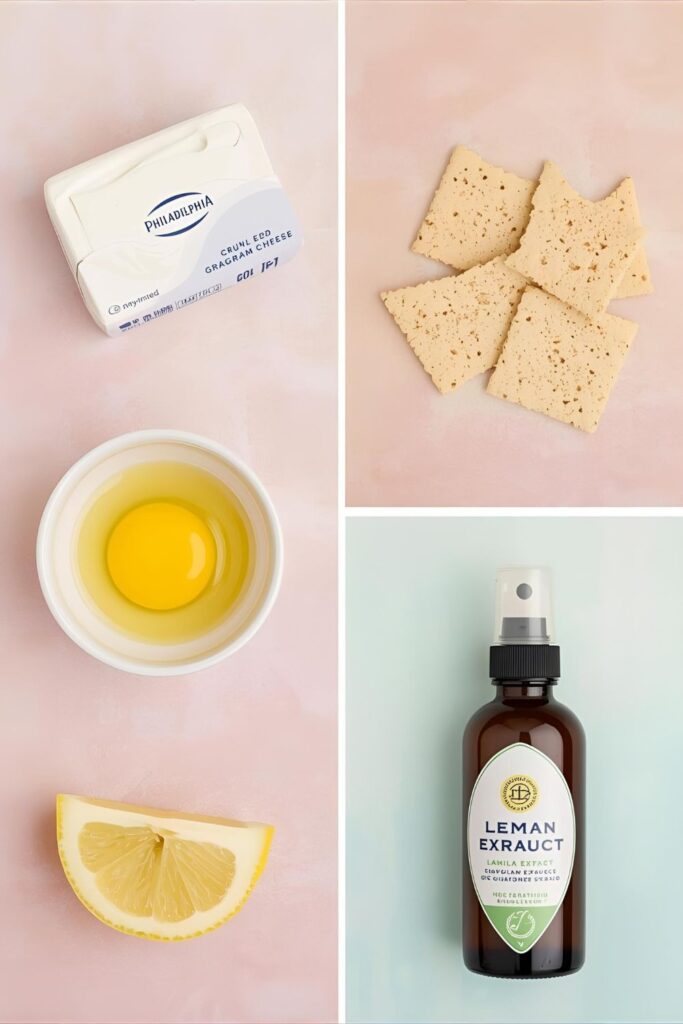
For the “Crust”:
- Graham Cracker Crumbs: 2 tablespoons. You can buy them pre-crushed or just smash a couple of crackers in a bag while channeling your frustrations from the day. Digestive biscuits or Biscoff cookies also work wonders.
- Melted Butter: 1 tablespoon. This is the glue that holds our crusty dreams together.
For the Cheesecake Filling:
- Full-Fat Cream Cheese: 2 ounces (or about 1/4 cup), softened to room temperature. This is the most important step. Cold cream cheese will give you a lumpy, sad filling. Don’t be that person.
- Granulated Sugar: 2 tablespoons. You can adjust this to your liking, but this is a good starting point.
- Egg Yolk: Just one! Save the egg white for a tiny, virtuous omelet tomorrow morning. The yolk makes it rich and creamy without turning it into a rubber ball.
- Lemon Juice: 1/4 teaspoon. A tiny amount makes a huge difference! It brightens the flavor and gives it that classic cheesecake tang.
- Vanilla Extract: 1/4 teaspoon. Because what’s a dessert without a little vanilla?
Tools & Kitchen Gadgets (Spoiler: You Already Have Them)
You don’t need any fancy equipment for this mission. Your kitchen is already prepared.
- A Microwave-Safe Mug: Choose one that holds at least 10-12 ounces. You need some headroom to prevent a tragic cheesecake eruption. A wider, shorter mug is often better than a tall, skinny one.
- Measuring Spoons: For some semblance of scientific accuracy.
- A Small Bowl: To mix your crust ingredients.
- Another Small Bowl: To mix your filling ingredients.
- A Fork or a Tiny Whisk: For mixing everything until it’s smooth and glorious.
Step-by-Step to Microwave Nirvana
Follow these steps precisely, and you’ll be on the fast track to dessert heaven.
Step 1: Build Your Crust Foundation
In your first small bowl, mix the graham cracker crumbs and the melted butter together with a fork until it looks like wet sand. Dump this mixture into the bottom of your mug and press it down gently with the back of the spoon or your fingers to form an even layer. This is the crunchy bedrock of your cheesecake empire.
Step 2: Create the Creamy Filling
Now, in your other bowl, combine the softened cream cheese and sugar. Mix them together vigorously with your fork or whisk until the mixture is completely smooth and lump-free. I mean it. Hunt down and destroy every single lump. Lumps are the enemy of good cheesecake.
Once it’s smooth, add the egg yolk, lemon juice, and vanilla extract. Mix again until everything is just combined. Do not overmix! Overmixing adds too much air and can lead to a weird, spongy texture. We want creamy, not bouncy.
Step 3: The Assembly and the Main Event
Gently spoon the cheesecake filling over the crust in your mug. Smooth the top a little, but don’t obsess over it. It’s a mug cheesecake, not a contestant on a baking show.
Now for the magic. Microwave on HIGH for 60 to 90 seconds. This is the crucial part. Every microwave is different. Start with 60 seconds. The cheesecake is done when the edges are set, but the center is still slightly jiggly. It will set up more as it cools. If you nuke it until it’s rock-solid, you’ve gone too far.
Step 4: Patience, Young Grasshopper (Just a Little)
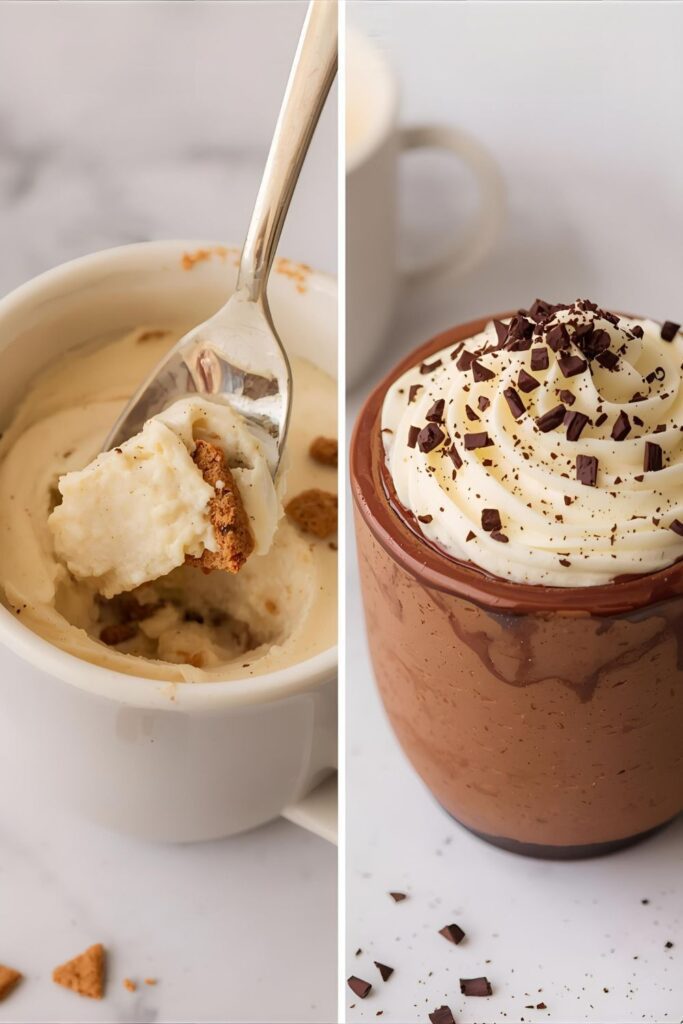
Let the mug cool on the counter for a few minutes before you even think about touching it—that thing is molten lava. For the best texture, chill it in the refrigerator for at least 30 minutes. Can you eat it warm? Yes. But the chilled version is where it truly shines and tastes most like real cheesecake. Top with berries, a dollop of whipped cream, or a drizzle of chocolate sauce before digging in.
Calories & Nutritional Info (For the Curious)
Here’s a rough estimate of what you’re getting into. It’s a dessert in a mug, not a kale salad, so let’s be real.
- Calories: Approximately 350-450 kcal, depending on your specific ingredients.
- Fat: Around 25-30g, mostly from the cream cheese and butter. It’s what makes it delicious!
- Carbohydrates: Roughly 25g.
- Protein: About 8g.
- Disclaimer: This is a single-serving treat designed for maximum joy, not a health food. Enjoy it accordingly. 🙂
Common Mistakes to Avoid (The Cheesecake Hall of Shame)
I’ve made the mistakes so you don’t have to. Avoid these pitfalls!
- The Lumpy Filling Disaster: This is almost always caused by using cold cream cheese. You must let it soften to room temperature. If you’re impatient, you can microwave the cream cheese by itself for 10-15 seconds before mixing.
- The Great Mug Explosion: You used a mug that was too small, didn’t you? The filling will puff up significantly while cooking. Give it space, or you’ll be cleaning cheesecake off the inside of your microwave for a week.
- Cheesecake-Flavored Scrambled Eggs: This is the sad result of overcooking. The egg yolk cooks too much, and the texture becomes grainy and weird. Remember, a little jiggle in the center is your friend!
- The Soupy Disappointment: You forgot the egg yolk. The yolk acts as a binder and helps the cheesecake set. Without it, you just have sweet, warm cream cheese.
Variations & Customizations (Pimp Your Mug)
The basic recipe is a blank canvas. Go wild and make it your own!
- Keto Mug Cheesecake: This is an easy swap! Use a keto-friendly sweetener (like erythritol or monk fruit) instead of sugar. For the crust, mix 2 tablespoons of almond flour with 1 tablespoon of melted butter. Voilà! A low-carb dream.
- Chocolate Lover’s Version: Add 1 tablespoon of unsweetened cocoa powder to the cream cheese and sugar mixture. For an extra decadent crust, use crushed Oreo cookies instead of graham crackers. You’re welcome.
- Fruit Swirl Fantasy: After you pour the filling into the mug, add a teaspoon of your favorite fruit jam or preserves on top. Use a toothpick to gently swirl it into the filling before microwaving. Raspberry or strawberry swirl cheesecake in two minutes? Yes, please.
FAQ: Your Mug Cheesecake Queries, Solved
Let’s tackle some of the internet’s most burning questions about this miraculous dessert.
1. Can I make this mug cheesecake without an egg yolk?
You can, but the texture will be different. It won’t set as firmly and will be more like a creamy pudding. The egg yolk is what gives it that classic, dense cheesecake texture.
2. Why did my mug cheesecake turn out rubbery?
You most likely overmixed the filling after adding the egg yolk, or you overcooked it. Mix until just combined, and cook until the center is still a bit jiggly.
3. Can I bake this in the oven instead of the microwave?
Sure! If you’re anti-microwave or just want a more traditional result, you can bake it in a greased ramekin at 350°F (175°C) for about 15-20 minutes, or until the center is just set.
4. Is it supposed to be jiggly when it comes out of the microwave?
YES! A thousand times, yes. The slight jiggle in the center is the sign of a perfectly cooked mug cheesecake. It will firm up completely as it cools down, especially if you pop it in the fridge.
5. What toppings are best for mug cheesecake?
The possibilities are endless! Fresh berries, whipped cream, chocolate syrup, caramel sauce, a sprinkle of cinnamon, or even some mini chocolate chips are all fantastic choices.
6. How can I make it without a crust?
Just skip the crust steps! You’ll have a delicious, crustless cheesecake. It’s a great option if you’re low-carb or just feeling lazy.
7. Can I use low-fat cream cheese?
You can, but full-fat cream cheese will give you the best flavor and the creamiest, most authentic texture. Low-fat versions can sometimes result in a slightly grainier or more watery consistency. TBH, if you’re making cheesecake, it’s best to just commit.
Final Thoughts
You now hold the key to on-demand, single-serving dessert happiness. This mug cheesecake isn’t just a recipe; it’s a life skill. It’s for celebrating tiny victories, surviving terrible days, and satisfying those late-night cravings that just won’t quit.
So go ahead, give it a try. Unleash your inner microwave pastry chef. And the next time someone suggests ordering a ridiculously expensive slice of cheesecake for delivery, you can just smile and say, “Nah, I got this. Give me two minutes.”

