

The Ultimate 2-Minute Mug Cake That’s Dangerously Easy
Let’s be honest. It’s 10 PM, you’ve scrolled through every streaming service known to man, and a sudden, primal craving for cake hits you like a freight train. But baking a whole cake? Who has the time or the energy for that? You want dessert, and you want it now. This is where the glorious, life-changing Mug cake comes in to save your night. This isn’t just a recipe; it’s a public service announcement for anyone who believes dessert shouldn’t require a committee meeting and a two-hour bake time.
Forget preheating the oven. Forget dusting off that stand mixer you swore you’d use every week. We’re about to make magic happen with a mug, a microwave, and about five minutes of your time, tops. Seriously.
Why This Recipe Is Basically Your New Best Friend

So, why are we so obsessed with this specific mug cake recipe? Is it because it tastes like a rich, fudgy dream? Yes. Is it because it’s a single-serving portion that prevents you from accidentally eating an entire cake? Also, yes (though “portion control” is a loose term here).
This recipe is the definition of maximum reward for minimal effort. It’s faster than ordering dessert for delivery and infinitely more satisfying. You get a warm, gooey, chocolatey cake that feels indulgent and special, but you barely have to lift a finger. It’s perfect for a solo night in, a quick treat for the kids, or even when a friend drops by unexpectedly. You’ll look like a culinary genius, and only you will know it took less time than a commercial break.
Ingredients You’ll Need
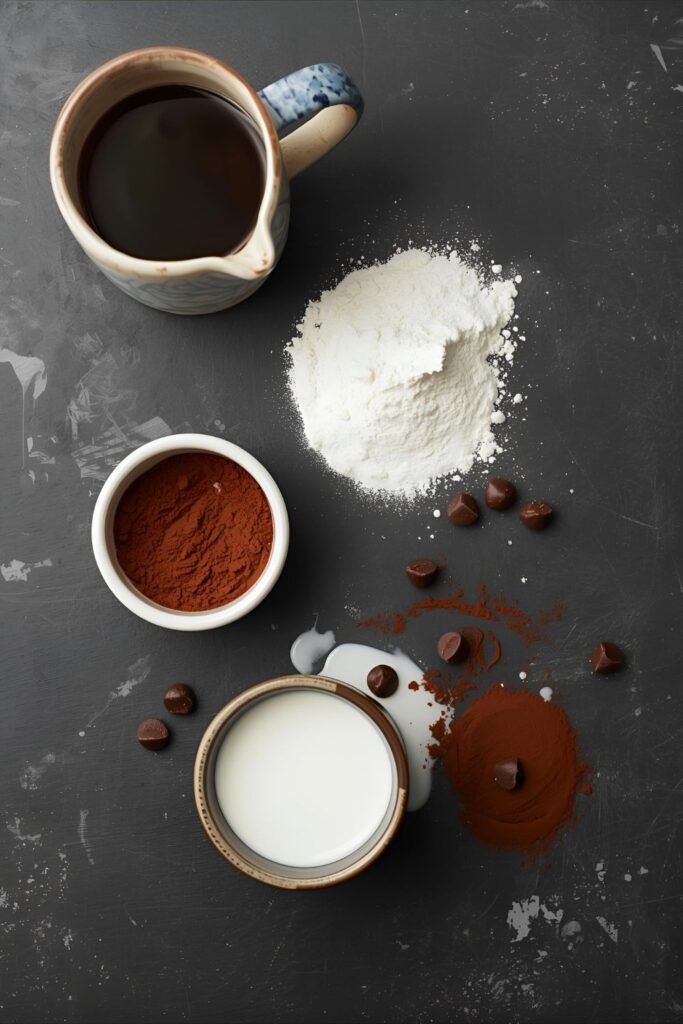
The beauty of this recipe is that you probably have everything in your pantry right now. No weird, one-use ingredients here!
- All-Purpose Flour: 4 tablespoons. The foundation of our glorious little cake.
- Granulated Sugar: 4 tablespoons. For that essential sweetness. You can cut it back to 3 if you prefer it less sweet.
- Unsweetened Cocoa Powder: 2 tablespoons. This is for the chocolatey goodness, so use the good stuff if you have it.
- Baking Powder: 1/4 teaspoon. This is what makes our cake rise and not turn into a sad chocolate hockey puck.
- A Pinch of Salt: Just a tiny bit to balance the flavors.
- Milk: 3 tablespoons. Any kind works—whole, skim, almond, oat. You do you.
- Vegetable Oil or Melted Butter: 2 tablespoons. This keeps the cake moist and delicious.
- Vanilla Extract: 1/4 teaspoon. The secret weapon of flavor.
- Optional Mix-ins: A handful of chocolate chips, a spoonful of peanut butter, or some chopped nuts.
Tools & Kitchen Gadgets Used
You don’t need a fully-stocked kitchen for this. Just a few essentials will do the trick.
- A Microwave-Safe Mug: This is crucial. Choose a standard-sized mug (at least 12 ounces) to prevent a volcanic eruption in your microwave. A wider, shorter mug often works better than a tall, skinny one.
- Measuring Spoons: For accuracy. Baking is a science, even when it’s this quick and dirty.
- A Small Whisk or Fork: To mix everything together. No fancy equipment is needed here.
- Microwave: The magical box that makes this all possible.
Step-by-Step Instructions: The 2-Minute Drill
Ready for the easiest baking you’ll ever do? Let’s go.
- Combine the Dry Stuff: In your chosen microwave-safe mug, dump in the flour, sugar, cocoa powder, baking powder, and salt. Give it a good stir with a fork until everything is evenly mixed and there are no lumps. This step is more important than you think!
- Add the Wet Ingredients: Pour in the milk, oil (or melted butter), and vanilla extract directly into the mug.
- Mix It Up (But Not Too Much!): Stir everything together until the batter is just combined. Scrape the bottom and sides to make sure there are no dry patches of flour. Do not overmix! A few small lumps are perfectly fine. Overmixing is the #1 enemy of a tender mug cake.
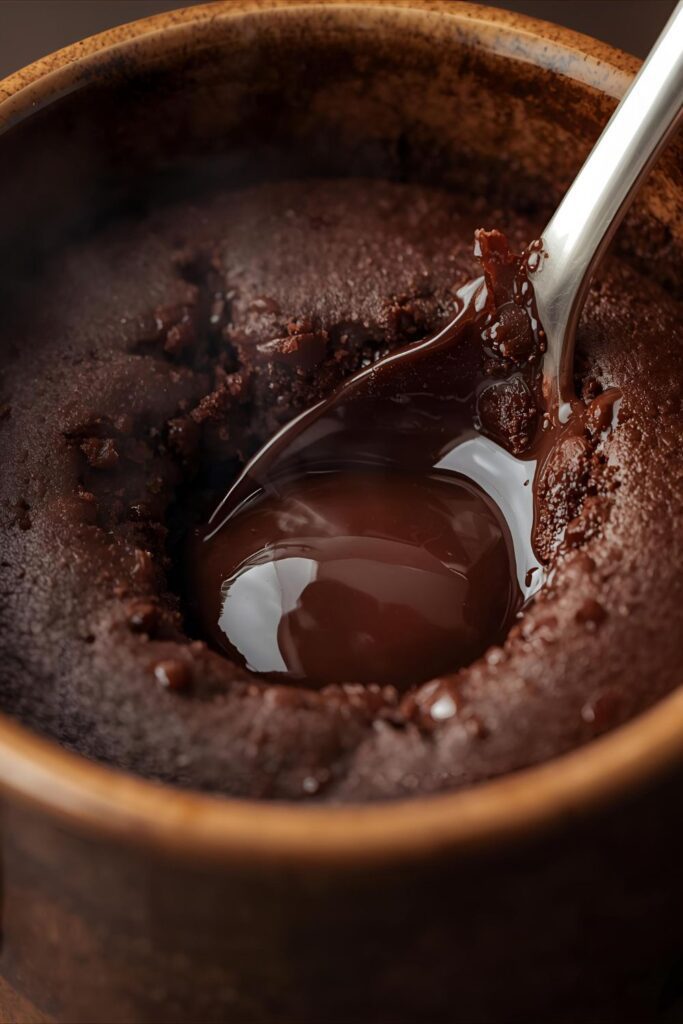
- Optional Add-ins: If you’re using chocolate chips or other mix-ins, gently fold them in now. For a molten lava center, you can drop a spoonful of Nutella or peanut butter right into the middle of the batter.
- The Microwave Moment: Pop that mug in the microwave. Cook on high for 70 to 90 seconds. The exact time will depend on your microwave’s wattage. Start with 70 seconds and check it. The top should look set and springy to the touch.
- Let It Rest! This is the hardest part. Let the mug cake cool for a minute or two before digging in. It’s volcanically hot, and the cake continues to cook a little as it sits. Patience, my friend.
Calories & Nutritional Info
Here’s a rough idea of what you’re looking at. This is an estimate, and the actual values will vary based on your specific ingredients.
- Calories: Approximately 350-450 per mug cake.
- Protein: Around 5g.
- Carbohydrates: Roughly 55g.
- Fat: Approximately 20g.
- Disclaimer: TBH, this is a treat. Let’s not get too hung up on the numbers and just enjoy the moment, shall we? 🙂
Common Mistakes to Avoid (Or, How Not to Make a Rubber Puck)
We’ve all been there. A sad, rubbery mug cake is a crime against dessert. Here’s how to avoid culinary disappointment.
- The Overmixing Overload: Did you whisk that batter like you were trying to win an Olympic medal? Stop it. Overmixing develops the gluten in the flour, resulting in a tough, chewy cake. Mix until just combined and then walk away.
- The Microwave Marathon: Overcooking is the fastest way to ruin your mug cake. A few extra seconds can turn a moist, tender cake into a dry, spongy mess. Always err on the side of undercooking. You can always pop it back in for 10 more seconds.
- The Great Mug Explosion: Using a mug that’s too small is a recipe for disaster. The batter will rise, and if it has nowhere to go, it will go all over the inside of your microwave. Use a 12-ounce mug or larger to be safe.
- Forgetting the Baking Powder: If you forget the leavening, you’ll end up with a dense, fudgy brownie-puck instead of a light cake. It’s not the worst mistake, but it’s not what we’re aiming for. Double-check your ingredients!
Variations & Customizations
Once you master the basic recipe, it’s time to get creative. The mug is your canvas!
- The Peanut Butter & Chocolate Dream: Add a tablespoon of creamy peanut butter to the batter or drop a spoonful in the center before microwaving for a molten peanut butter core. It’s ridiculously good.
- The Salted Caramel Indulgence: Mix a few chocolate chips into the batter. Once cooked, drizzle the top with caramel sauce and a sprinkle of flaky sea salt. The sweet and salty combo is pure perfection.
- The Birthday Cake Funfetti: Skip the cocoa powder, add an extra tablespoon of flour, and stir in a generous amount of rainbow sprinkles. Top with whipped cream and more sprinkles. Instant celebration!
FAQ Section: Your Mug Cake Questions, Answered
H3: Why is my mug cake rubbery and tough?
This is almost always due to one of two things: overmixing the batter or overcooking the cake. Mix only until the wet and dry ingredients are combined, and microwave it just until the top is set.
H3: Can I make this mug cake without an egg?
Absolutely! This recipe is specifically designed to be egg-free, which keeps it from getting that weird spongy texture some mug cakes have.
H3: Can I make a mug cake in the oven?
You can, but it kind of defeats the purpose of a quick mug cake. If you want to try, pour the batter into an oven-safe ramekin and bake at 350°F (175°C) for about 15-20 minutes.
H3: Why did my mug cake overflow in the microwave?
Your mug was likely too small for the amount of batter. The baking powder causes the cake to rise significantly. Always use a standard-sized mug (12 oz or more) and never fill it more than halfway with batter.
H3: How do I know when the mug cake is done cooking?
The surface of the cake should look dry and spring back when you gently touch it. If it’s still jiggly or wet in the center, it needs another 10-15 seconds. It’s better to undercook it slightly, as it will continue to cook from the residual heat.
H3: Can I use a different type of flour?
You can experiment, but it will change the texture. Whole wheat flour will make it denser. For a gluten-free version, a good 1-to-1 gluten-free baking blend should work well.
H3: Can I prepare the batter in advance?
IMO, it’s best not to. The baking powder starts reacting as soon as it hits the liquid ingredients. For the best rise and texture, mix and microwave it right away. The whole process is so fast, there’s really no need to prep it ahead.
Final Thoughts
You did it. You stared a cake craving in the face and conquered it in under five minutes. You are a dessert-making superhero. Now you hold the power to summon a warm, personal-sized cake whenever you please. Use this power wisely.
Go ahead, grab a spoon, and dive into that warm, gooey mug of happiness. You’ve earned it. And the best part? The only dish you have to clean is a single mug and a spoon. Now that’s what I call a win.

