

The Easiest Candy Cane Bark That Makes Holiday Stress Disappear
Picture this: it’s December, your kitchen looks like a flour bomb went off, and you have approximately 17 holiday parties to attend. You promised to “bring something,” but the thought of baking another batch of intricate cookies makes you want to curl up and hibernate until January. What if I told you that you could make a stunning, delicious, and wildly impressive holiday treat in about 10 minutes flat? Welcome, my friend, to the magic of candy cane bark. This isn’t just a recipe; it’s a holiday survival strategy. It’s the ultimate answer to the question, “What can I make that requires almost zero effort but looks like I’m a domestic god or goddess?” So, put down that complicated gingerbread house blueprint and let’s get ready to win the holidays.
Why This Recipe is Basically a Christmas Miracle

Seriously, if you’re looking for a reason to make this, I can give you about a dozen. But let’s stick to the highlights, shall we?
It’s Dangerously Easy
I’m not kidding. This recipe has three main ingredients and the primary skill required is melting chocolate without burning it. If you can use a microwave, you can make this bark. There’s no mixing, no baking, no precise timing—just melting, spreading, and sprinkling.
The Perfect Last-Minute Gift

Forgot you need a gift for your neighbor/teacher/mail carrier? Whip up a batch of this bark, let it set, break it into gorgeous shards, and pack it in a cute tin or cellophane bag. Everyone will think you’re so thoughtful and prepared. Your secret is safe with me.
It’s a Flavor Explosion
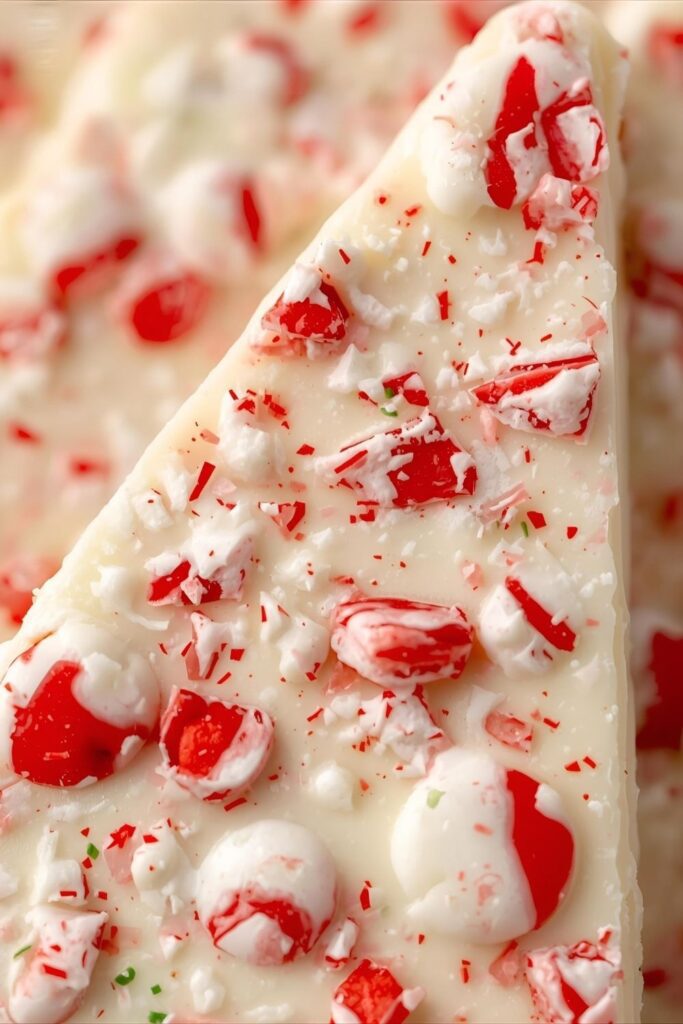
The combination of rich, smooth dark chocolate, creamy sweet white chocolate, and the crisp, minty crunch of candy canes is pure holiday perfection. It’s nostalgic, it’s festive, and it’s so incredibly addictive. You’ve been warned.
Ingredients You’ll Need

This list is so short and sweet, you’ll barely need to write it down.
- Good Quality Semi-Sweet or Dark Chocolate: 12 ounces (about 340g), chopped. This forms our rich, decadent base.
- Good Quality White Chocolate: 12 ounces (about 340g), chopped. This is the creamy, sweet top layer. Pro-tip: Use a white chocolate bar or wafers, not chips, for the best melting experience.
- Candy Canes or Peppermint Candies: About 1 cup, crushed. You can use more or less depending on how minty-crunchy you want it.
- Peppermint Extract (Optional): 1/2 teaspoon. Add this to the white chocolate for an extra-minty kick!
Tools & Kitchen Gadgets Used
You have all of this stuff already. I promise.
- Baking Sheet: A standard half-sheet pan is perfect.
- Parchment Paper or a Silicone Baking Mat: This is non-negotiable. It prevents the bark from sticking and makes cleanup a breeze.
- Two Microwave-Safe Bowls: For melting your two types of chocolate separately.
- Silicone Spatula or an Offset Spatula: For spreading the chocolate into a beautiful, even layer.
- Heavy-Duty Ziplock Bag and a Rolling Pin/Meat Mallet: This is my favorite (and most therapeutic) way to crush candy canes.
Step-by-Step Instructions: Your Path to Glory
Ready for the easiest recipe you’ll make all year? Let’s dive in.
Step 1: Prepare Your Workspace
Line a large baking sheet with parchment paper. Make sure it covers the whole surface. Next, take out your holiday frustrations on those candy canes. Place them in a heavy-duty ziplock bag, seal it (leaving a tiny bit of air out), and whack them with a rolling pin or meat mallet until they’re crushed into small pieces. Don’t pulverize them into dust; you want a mix of small bits and festive chunks.
Step 2: Melt the Dark Chocolate
Place your chopped semi-sweet or dark chocolate in a microwave-safe bowl. Microwave in 30-second intervals, stirring well after each one, until the chocolate is almost completely melted. Remove it and stir until the residual heat melts the remaining bits and the chocolate is perfectly smooth.
Step 3: Spread the Base Layer
Pour the melted dark chocolate onto your prepared baking sheet. Use your spatula to spread it into a thin, even layer. It doesn’t have to be perfect, so don’t stress. Pop it in the refrigerator for about 15-20 minutes, or just until the surface is set but not rock-solid.
Step 4: Melt the White Chocolate
While the dark chocolate is chilling, melt your white chocolate using the same method. Place it in a clean, dry bowl and microwave in 20 to 30-second intervals. White chocolate can be more temperamental and burns easily, so watch it closely. Once it’s smooth, stir in the peppermint extract, if you’re using it.
Step 5: Create the Top Layer & Decorate
Take the baking sheet out of the fridge. Pour the melted white chocolate over the set dark chocolate layer and spread it evenly on top. Immediately—while the white chocolate is still wet—sprinkle your crushed candy canes all over the top. Gently press them into the chocolate with your hands or the back of a spatula to make sure they stick.
Step 6: Chill Out
Place the entire baking sheet back into the refrigerator for at least 30-45 minutes, or until the bark is completely firm.
Step 7: Break It Up!
Once the bark is hard, lift the parchment paper off the baking sheet. You can either use a sharp knife to cut it into neat squares or—the more fun way—use your hands to break it into beautifully rustic, random pieces. And that’s it! You’re done. You’re a hero.
Calories & Nutritional Info
Let’s just call this holiday fuel. But if you must know…
- Serving Size: 1 ounce (about a 2×2 inch piece)
- Calories: Approximately 150 kcal
- Fat: ~9g
- Carbohydrates: ~16g
- Sugar: ~15g
- Protein: ~1g (Disclaimer: This is just an estimate! The actual nutrition will vary based on the specific brands of chocolate and the amount of candy cane you use.)
Common Mistakes to Avoid (Please Read This!)
This is easy, but not completely foolproof. Here’s how to avoid a chocolate catastrophe.
- Overheating Your Chocolate: The #1 mistake. This is how you get seized, clumpy, grainy chocolate. The key is to microwave in short bursts and stir frequently. Always pull it out before it’s fully melted and let the residual heat do the rest of the work.
- Getting Water in Your Chocolate: Water is the mortal enemy of melting chocolate. A single drop can cause it to seize into a solid, unusable mass. Make sure your bowls, spatulas, and hands are completely dry.
- Using Low-Quality Chocolate: This is not the time for that waxy, mystery chocolate from the dollar store. Better quality chocolate (like baking bars or wafers) not only tastes better but also melts much more smoothly.
- Waiting Too Long to Add Toppings: That melted white chocolate is your glue. If you let it set before you add the candy canes, they’ll just slide right off. Sprinkle immediately after spreading the top layer.
Variations & Customizations
Feeling fancy? Here are a few ways to level up your bark game.
1. Cookies & Cream Peppermint Bark
Before you pour the white chocolate, sprinkle a layer of crushed Oreo cookies over the set dark chocolate. The combination of chocolate cookie, cream, and peppermint is absolutely divine.
2. Sweet & Salty Pretzel Bark
Add a salty, crunchy element by sprinkling crushed pretzels over the top along with the candy canes. The saltiness is an amazing contrast to the sweet chocolate and mint. TBH, this might be my favorite version.
3. Ultimate Holiday Bark
Go wild and add more festive toppings! Swirl in some green and red candy melts for color, or add a sprinkle of festive-colored M&Ms, holiday sprinkles, or even chopped pistachios for a touch of green.
FAQ Section: Your Bark-Related Questions, Answered
What is the best way to store candy cane bark?
Store it in an airtight container at room temperature for up to a week. If your house is warm, it’s better to store it in the fridge to prevent it from getting soft.
Why did my chocolate layers separate after breaking?
This usually happens if the bottom layer gets too cold and hard before you add the top layer. You want the dark chocolate to be just set, not frozen solid. This helps the two layers adhere to each other properly.
Can I use chocolate chips to make bark?
You can, but it’s not ideal. Chocolate chips contain stabilizers to help them keep their shape, which means they don’t melt as smoothly as chocolate bars or wafers. If you do use them, you might want to add a teaspoon of coconut oil or vegetable shortening to help them melt more easily.
How do I keep the candy canes from getting sticky?
This can happen due to humidity. Make sure your bark is stored in a well-sealed, airtight container. Some people also suggest mixing the crushed candy canes with a tiny bit of cornstarch to absorb moisture, but I’ve never found it necessary.
Can I make this bark without a microwave?
Of course! You can use a double boiler. Just place a heatproof bowl over a saucepan of simmering (not boiling) water and melt the chocolate that way, stirring until smooth.
Why is my bark not setting?
It probably just needs more time in the fridge. Give it a full hour to be safe. Also, ensure you used real chocolate and not a “chocolate-flavored coating” which might have a different melting and setting point.
How far in advance can I make candy cane bark?
You can make it up to two weeks in advance! Just store it in an airtight container in the fridge. The candy canes might lose a tiny bit of their crunch over time, but it will still be delicious.
Final Thoughts
See? I told you it was easy. You are now officially armed with a recipe so simple and so impressive that it should probably be illegal. You’ll never have to show up to a holiday party empty-handed again. So go on, embrace the simplicity. Make a batch (or five) of this candy cane bark. Gift it, hoard it, eat it for breakfast—I won’t judge. Happy holidays, you brilliant, efficient baker, you.

