

The Ultimate Ghost Brownies: A Spooky, Silly, and Seriously Delicious Recipe
Ever tried to make a spooky Halloween treat, only to have it end up looking less “ghoulishly good” and more “tragically bad”? It’s a real holiday tragedy. The pressure to create a creepy, crawly, and delicious dessert is real, and it can be a source of major holiday stress. But what if I told you there’s a secret weapon, a foolproof recipe for ghost brownies that looks incredibly impressive but is ridiculously easy to make? I’m talking about a dessert that will make people think you’re a professional baker with a twisted sense of humor. This isn’t just a recipe; it’s a blueprint for Halloween party glory.
Why This Recipe Is a Halloween Game-Changer

Let’s face it: the holiday season is already jam-packed with decorating, costume planning, and trying to remember if you turned off the fog machine. This recipe for ghost brownies is a Halloween miracle because it’s a low-effort, high-reward kind of deal. You spend about 15 minutes on prep, and then your oven does all the heavy lifting. The result is a rich, fudgy brownie with a spooky, hilarious ghost on top. It’s the kind of dessert that people actually want to eat, and it makes for a fun, festive centerpiece for a party. Who doesn’t love a good ghost?
Ingredients You’ll Need (AKA Your Shopping List)
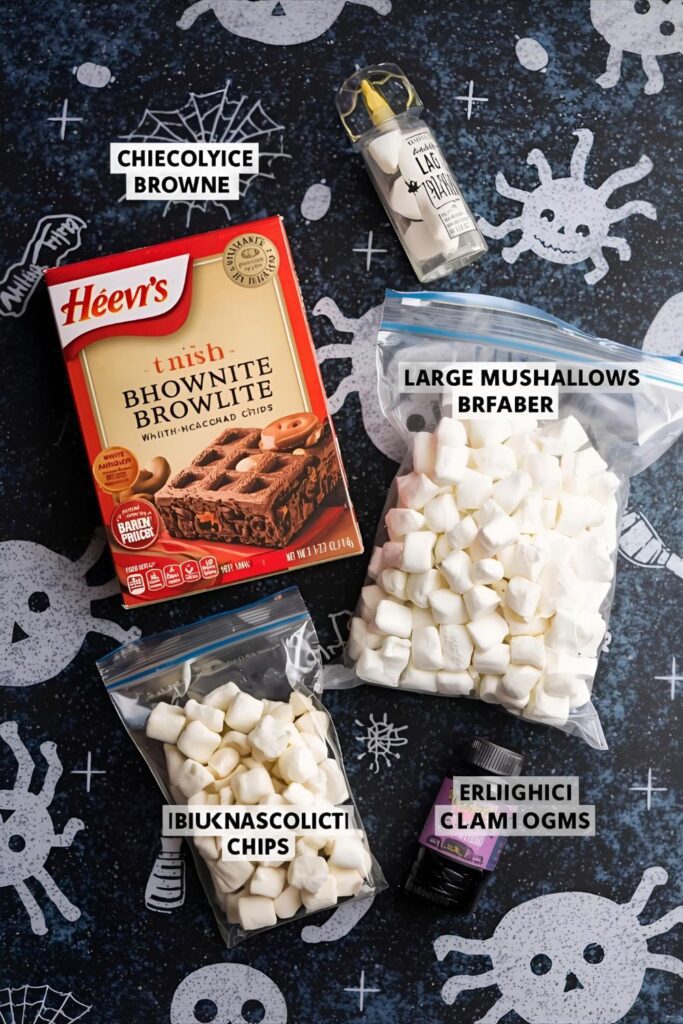
You won’t need a shopping cart full of weird ingredients for this. Trust me.
- 1 box (18-ounce) brownie mix (and all the ingredients it calls for, like eggs, oil, and water)
- 1 cup white chocolate chips or white melting wafers
- 1/2 teaspoon black food coloring
- 1 cup large marshmallows (the kind you use for s’mores)
- Optional: Candy eyeballs (the small ones work best)

Substitutions, IMO: No marshmallows? You can use a piping bag with a stiff white frosting to create the ghost shapes. No white chocolate chips? You can use any type of white frosting or icing.
Tools & Kitchen Gadgets to Get the Job Done
Here’s the gear you’ll need. Nothing complicated, I promise.
- 8×8 inch square baking pan
- Parchment paper
- Mixing bowl
- Spatula
- Small saucepan or a double boiler
- Microwave-safe bowl (for the frosting)
- Piping bag with a small round tip (or a Ziploc bag with a corner snipped off)
The Super-Simple, Step-by-Step Instructions
Ready? Let’s do this. You’re just a few steps away from spooky glory.
- Bake the Brownies. First things first, follow the instructions on your brownie mix box. Prepare the brownies and bake them in an 8×8 inch square baking pan lined with parchment paper. This is a non-negotiable step unless you want a massive, sticky mess.
- Cool Down. Once the brownies are baked, take them out of the oven and let them cool completely. This is crucial for a clean cut. If you try to cut them while they’re warm, you’ll have a crumbly mess.
- Cut the Ghosts. Use a sharp knife to cut the marshmallows into small, ghost-shaped pieces. You can also use a small ghost-shaped cookie cutter if you have one. Don’t worry if they’re not perfect—the messier the ghost, the spookier it looks!
- Melt the Chocolate. In a small saucepan or a double boiler, melt the white chocolate chips over low heat, stirring frequently. Once it’s smooth and glossy, take it off the heat and let it cool for a hot second. Like, two minutes.
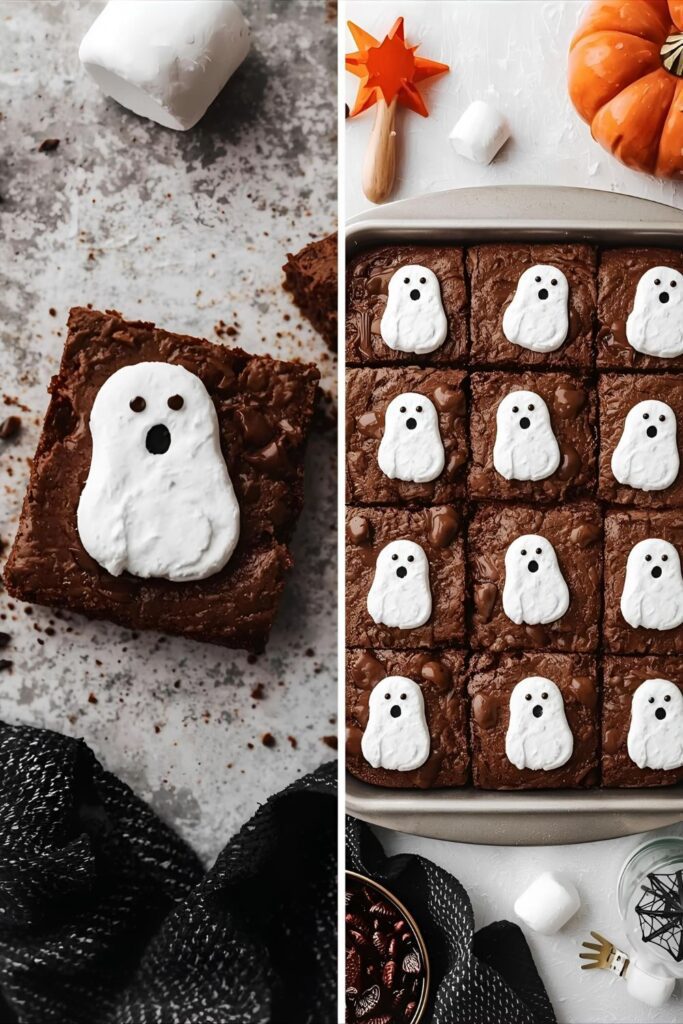
- Assemble the Ghosts. Now, take your cooled brownies and spread a thin layer of the melted white chocolate over the top. Immediately press your marshmallow ghosts into the chocolate. Be sure to press them in gently so they stick.
- Add the Spooky Details. Transfer a small portion of the melted white chocolate and mix it with a tiny bit of the black food coloring. You want a super dark, almost black color. Transfer the black chocolate to a small piping bag or a Ziploc bag with a tiny corner snipped off. Use it to pipe two small eyes and a mouth on each ghost. Don’t worry if it’s not perfect—the messier, the better! You can also use candy eyeballs for a more spooky look.
- Serve and Enjoy. Cut the brownies into squares and arrange them on a festive platter. Your guests will be so impressed!
Calories & Nutritional Info (The Reality Check)
I’m not a nutritionist, so these are just estimates, but IMO it’s totally worth it.
- Estimated Calories per serving: ~200-300 kcal per square (depending on the brownie mix and toppings)
- Key nutrients:
- Carbs: Mostly from sugar, flour, and marshmallows. It’s a dessert, what did you expect?
- Fats: From the oil and chocolate. These are the good fats that make it so delicious.
- Protein: A little bit from the eggs. So, it’s basically a health food, right? 😉
Common Mistakes to Avoid (So You Don’t Mess It Up)
Listen up, buttercup. These are the top reasons your brownies might go wrong.
- Not Cooling the Brownies: This is the most common crime against brownies. If you try to cut them while they’re still warm, you’ll have a crumbly, messy disaster. Let them cool completely.
- Overheating the White Chocolate: This is the most common crime against white chocolate. If it gets too hot, it becomes a grainy, clumpy mess. Melt it slowly and gently.
- Using Too Much Icing: Don’t use too much icing or melted chocolate. A thin, even layer is all you need. If you use too much, it will be too sweet and overpower the brownies.
- Not Storing the Brownies Properly: The brownies will last much longer and stay fresh if you store them in a properly sealed container.
Variations & Customizations (Time to Get Creative)
You’ve mastered the classic, now let’s mix it up.
- The Spooky S’mores Version: For a spooky s’mores flavor, add a layer of graham cracker crumbs on top of the brownies before you add the ghost marshmallows.
- The Cream Cheese Twist: Ditch the white chocolate and use a cream cheese frosting instead. Beat the cream cheese, powdered sugar, and a few drops of vanilla extract together for a delicious, tangy frosting.
- The Vegan’s Delight: Use a vegan brownie mix, vegan marshmallows, and a vegan white chocolate to create a delicious vegan version.
FAQ Section (Because You Have Questions, I Have Answers)
- Can I use a different type of brownie mix? Yes! You can use any type of brownie mix you like, from a classic fudgy brownie to a more cakey one.
- What’s the best way to cut the marshmallows? The easiest way is to use a pair of kitchen shears. Just snip them into small, ghost-shaped pieces.
- How do I make the brownies ahead of time? You can bake the brownies a day or two in advance and store them in an airtight container at room temperature. Just add the ghosts and icing right before you’re ready to serve them.
- How do I store leftovers? Store leftovers in an airtight container in the fridge for up to 3 days.
- Is this a good recipe for kids? Absolutely! Kids love this recipe. It’s a fun and easy activity for them to help with.
- What’s a good substitute for white chocolate? If you don’t want to use white chocolate, you can use a store-bought white frosting or even a marshmallow fluff.
- How do I make a bigger batch? You can easily double the recipe and use a 9×13 inch pan. Just be sure to adjust the baking time accordingly.
Final Thoughts (The Mic Drop)
So there you have it. The secret to being a Halloween hero is not in a complicated baking recipe or a store-bought dessert. It’s right here, in this ridiculously simple, ridiculously delicious ghost brownies. Go forth and conquer your Halloween baking anxieties. Your friends and family will thank you, and you’ll never buy a sad, premade treat again. Now, who’s ready for a second square?

