The Ultimate Guide to Mastery: How to Make Sourdough Bread From Starter
We have all been there. You are scrolling through Instagram at 1:00 AM, and you see it: a glistening, blistered loaf of bread with an “ear” so sharp it could probably defend your home from intruders. You look at your sad, squishy bag of supermarket white bread and feel a deep sense of betrayal. Why settle for yeast-inflated cardboard when you could be a sourdough wizard?
Honestly, learning how to make sourdough bread from starter is essentially the adult version of owning a Tamagotchi, except you get to eat the results. I once named my starter “Dough-bi-Wan Kenobi” and talked to it more than my actual roommates during the 2020 lockdown. Ready to stop being a bystander and start living your best fermented life? Let’s get into the gluten. 🙂
Why This Recipe is Actually Awesome
Why should you spend three days making one loaf of bread when the bakery down the street exists? First off, the flavor profile of a long-fermented loaf is a masterclass in complexity. We aren’t just making carbs; we are developing lactic and acetic acids that give you that iconic “zing” and a smell that will make your neighbors wonder if you’ve opened a boutique French café.
TBH, the ease of cooking is the real kicker—if you define “ease” as mostly ignoring the dough while it does the work for you. You don’t need a gym membership to knead this dough for forty minutes like a Victorian peasant. We use gentle folds. It impresses guests like crazy because people think sourdough is a dark art reserved for bearded men in flannel. In reality, it’s just flour, water, and math.
Our Top Pick

Papier Herb Garden Recipe Journal - Hardback Design
Capture your culinary ideas and favorite memories with this beautifully designed recipe journal. Organized sections for breakfast, lunch, dinner, and treats make it easy to record recipes, ratings, dietary notes, and cooking tips, along with measurement and conversion guides. Extra pages let you list favorite restaurants, shops, and places to try. Crafted with a premium hardback cover, luxurious 100gsm paper, and a gold foil accent, it’s both durable and stylish. Thoughtfully designed to suit any kitchen, it makes a practical, timeless gift for family, friends, or yourself.
Finally, let’s talk about the health flex. Sourdough is the “gut-friendly” bread. The fermentation process breaks down much of the gluten and phytic acid, making it easier on your stomach than that processed stuff. It’s artisanal, it’s healthy, and it makes you look like a domestic deity. What else do you want from a pile of dust?
The “Fermentation Station” Shopping List
Don’t go hunting for rare unicorn tears. You just need three soldiers for this war, but they better be high-quality.
- Active Sourdough Starter: Your pet. It must be bubbly and doubled in size before you even think about starting.
- Bread Flour: Use a high-protein flour (at least 12%). All-purpose is for cookies; we need muscle for these air pockets.
- Filtered Water: Chlorine is the enemy of wild yeast. Use filtered or spring water at room temp.
- Sea Salt: Use fine sea salt. Avoid iodized table salt unless you enjoy the subtle notes of a chemical plant.
- Rice Flour: For dusting your proofing basket so your dough doesn’t glue itself to the sides.
Tools & Kitchen Gadgets You’ll Need
To master how to make sourdough bread from starter, you need gear that handles high heat and sticky situations.
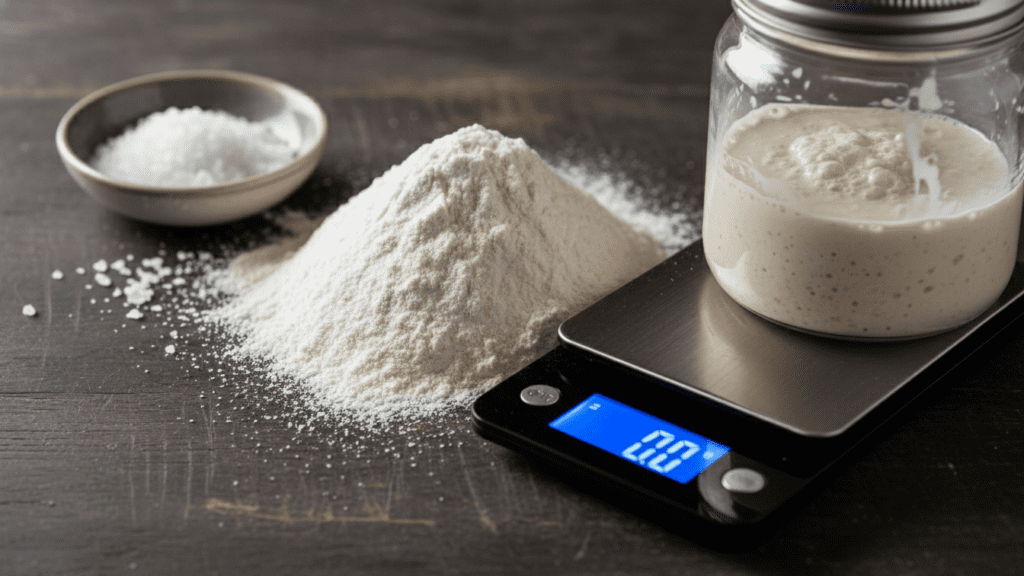
- Digital Kitchen Scale: Sourdough is science, not art. Measure in grams, or prepare for a flat pancake of shame.
- Dutch Oven: Essential for trapping steam to get that “shatter-crisp” crust.
- Banneton (Proofing Basket): To give your loaf those professional rings and proper airflow.
- Bread Lame: A fancy word for a razor blade. You need this to “score” the dough so it doesn’t explode.
- Bench Scraper: To handle the sticky dough without losing your mind or your patience.
- Large Glass Bowl: So you can watch the bubbles grow like a proud, slightly obsessed parent.
Step-by-Step Instructions
Step 1: The Levain Build
In the morning, mix 50g of active starter with 50g of flour and 50g of water. Let it sit in a warm spot until it’s bubbly and “tripled.” FYI, if it doesn’t pass the “float test” (dropping a spoonful in water to see if it floats), your yeast is still sleeping. Don’t be a hero; wait for the bubbles.
Step 2: The Autolyse
Mix 350g of warm water with 500g of bread flour until it looks like a shaggy, unappealing mess. Let it rest for 1 hour. This allows the flour to hydrate and the gluten to start self-organizing. It’s basically the pre-game for the dough.
Step 3: Incorporation and Bulk Fermentation

Add 100g of your active levain and 10g of salt to the shaggy dough. Squeeze it in with your hands. Now, every 30 minutes for the next 2 hours, perform a “stretch and fold.” Pull the side of the dough up and fold it over itself. Repeat four times around the bowl. IMO, this is better than any forearm workout at the gym. 🙂
Step 4: The Long Nap
Let the dough sit undisturbed in a warm spot (75°F-80°F) until it has grown by about 50% and looks “jiggly” like a bowl of jelly. This is the bulk fermentation. If you rush this, you’ll end up with a brick. If you let it go too long, you’ll have a puddle. Practice makes perfect!
Step 5: Shape and Cold Proof
Gently dump the dough onto a floured surface. Shape it into a tight ball (boule) by dragging it across the counter. Place it upside down into your rice-flour-dusted banneton. Cover it and stick it in the fridge for 12 to 24 hours. This “cold retard” is where that elite sour flavor actually develops.
Our Top Pick

LuBudingJoy Blank Recipe Book
B5 Blank Recipe Book – Create and organize your favorite recipes in one beautiful place. This hardcover recipe book (10" × 7.3") features 150 blank pages and includes DIY category stickers. Designed with conversion charts, content tables, and a back pocket for loose notes.
Step 6: The Big Bake
Preheat your oven and Dutch oven to 500°F (260°C) for an hour. Carefully flip the dough onto parchment paper, score a deep line across the top with your lame, and drop it into the screaming hot pot. Bake covered for 20 minutes at 450°F, then uncovered for 20 minutes. Wait 2 hours before cutting. If you cut it hot, the steam escapes and the bread turns gummy. Patience is a virtue, people!
Calories & Nutritional Info
You are eating the purest form of bread. Here is the breakdown per slice:
- Calories: Approximately 150-180 kcal per thick slice.
- Protein: About 5g-7g (bread flour is a beast).
- Carbs: 30g of slow-release energy.
- Fats: Nearly zero (unless you add the mandatory mountain of butter).
- Prebiotics: High levels that keep your gut bacteria happy and thriving.
Common Mistakes to Avoid
- Using a Weak Starter: If your starter isn’t hungry and active, your bread will be a rock. Feed your pet regularly.
- Skipping the Scale: Eyeballing “cups” is for amateurs. Measure in grams only.
- Cutting Too Soon: I know it smells like heaven, but cutting hot bread ruins the internal structure. Wait for the cool down.
- Under-preheating the Pot: If the Dutch oven isn’t screaming hot, you won’t get that “shatter-crisp” crust. Give it an hour.
- Ignoring the Temperature: If your kitchen is cold, your dough won’t rise. Find a warm spot like the top of the fridge. TBH, the microwave with a cup of hot water inside is a great DIY proofing box. 🙂
Variations & Customizations
Feeling like a master baker? Try these three spins:
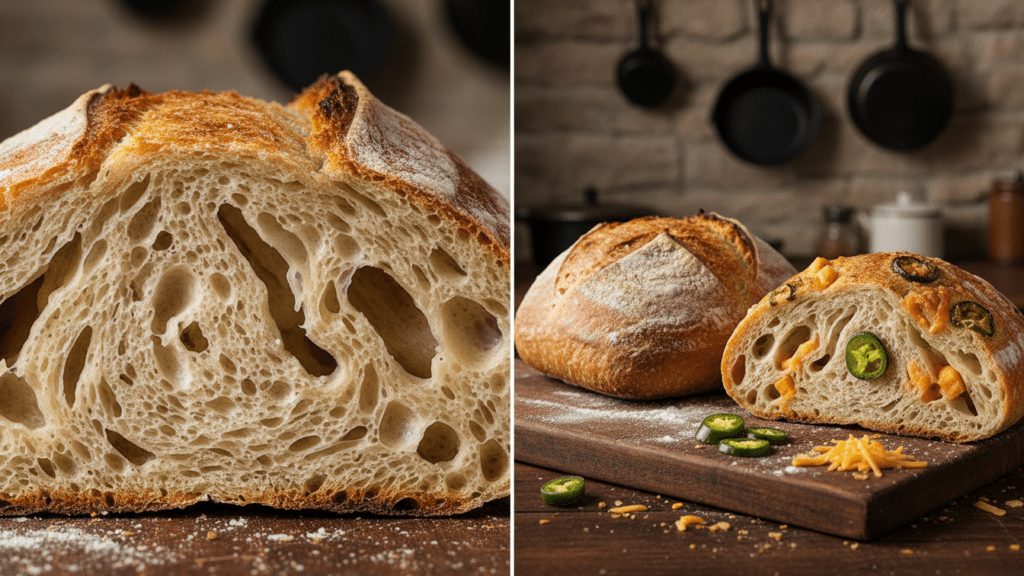
The Jalapeño Cheddar
Fold in diced jalapeños and cubes of sharp cheddar during your final stretch and fold. It turns your loaf into a spicy, cheesy masterpiece that is perfect for the world’s best grilled cheese.
The Rosemary Sea Salt
Add chopped fresh rosemary to the initial flour mix. Top the loaf with flaky Maldon sea salt after scoring. It’s sophisticated, earthy, and goes perfectly with a bowl of beef stew.
The Everything Bagel
Mist the top of your loaf with water right before baking and heavy-handedly apply everything bagel seasoning. It smells better than a Sunday morning deli and tastes even better. IMO, this is the “final boss” of dinner party breads.
FAQ Section
How do I know if my sourdough starter is dead? Unless it has orange or pink fuzzy mold, it’s probably just “sleeping.” Give it a few days of consistent feeding and it will likely wake back up.

Can I make sourdough bread without a Dutch oven? You can, but you need to create a steam environment in your oven using a tray of boiling water. It’s much harder to get that professional crust!
Why is my sourdough bread so sour? The “sour” comes from the acetic acid. If you want it more sour, let it proof in the fridge for a longer time (up to 48 hours).
What is the “ear” on sourdough? The ear is the flap of crust that peels back when you score it. It’s a sign of a perfectly fermented loaf and great “oven spring.”
Can I use whole wheat flour? Yes, but whole wheat is “thirstier.” You will need to increase the water by about 25-50g or your dough will be too stiff to rise.
How do I store my sourdough? Keep it in a paper bag or a bread box on the counter for 3 days. Never put it in the fridge; it will go stale faster than your favorite meme.
Why are there no big holes in my bread? This usually means you under-proofed the dough or you were too rough when shaping it and popped all the bubbles. Be gentle!
Final Thoughts
There you have it—the secret scrolls to mastering how to make sourdough bread from starter without having a mental breakdown. It’s flour, water, and time. It’s messy, it’s frustrating, and it’s the most rewarding thing you’ll ever pull out of an oven.
Go ahead, name your starter, buy a digital scale, and join the cult. And hey, if your first loaf ends up being a doorstop, don’t worry—it still makes excellent croutons. Tag me in your “crumb shots,” or just sit in your flour-dusted kitchen and enjoy the crunch. Happy fermenting!