DIY Thick & Creamy: How to Make Greek Yogurt at Home Without Losing Your Mind
We have all been there. You stand in the dairy aisle, staring at a tiny plastic cup of “authentic” yogurt that costs four dollars and contains more sugar than a glazed donut. You want that thick, velvety, protein-packed goodness, but your bank account is currently staging a protest. What if I told you that learning how to make greek yogurt at home is basically a magic trick involving nothing but milk and a little bit of patience?
Honestly, if you aren’t currently fermenting dairy on your countertop, are you even living your best foodie life? It is the ultimate kitchen flex. I once convinced a friend I had a secret Greek grandmother living in my pantry because my homemade batch was so thick it defied gravity. In reality, I just played a very slow game of “don’t kill the bacteria.” Ready to stop overpaying for fancy tubs and start your own probiotic empire? Let’s get culturing. 🙂
Why This Recipe is Actually Awesome
Why should you bother with this when you can just buy a tub? First off, the flavor profile is incomparable. Store-bought yogurt often has a weird chalky aftertaste from added thickeners like cornstarch or gelatin. Your homemade version? It’s pure, tangy, and smoother than a pickup line at a culinary school.
TBH, the cost savings are the real hero here. You can turn one gallon of milk into enough yogurt to feed a small village (or just you for a very healthy week) for the price of a single latte. It impresses guests like crazy, too. Pulling a jar of homemade yogurt out of the fridge for a brunch spread makes you look like a domestic deity who has mastered the ancient arts.
Our Top Pick

Papier Herb Garden Recipe Journal - Hardback Design
Capture your culinary ideas and favorite memories with this beautifully designed recipe journal. Organized sections for breakfast, lunch, dinner, and treats make it easy to record recipes, ratings, dietary notes, and cooking tips, along with measurement and conversion guides. Extra pages let you list favorite restaurants, shops, and places to try. Crafted with a premium hardback cover, luxurious 100gsm paper, and a gold foil accent, it’s both durable and stylish. Thoughtfully designed to suit any kitchen, it makes a practical, timeless gift for family, friends, or yourself.
Finally, let’s talk about the health perks. You control the sugar. You control the milk quality. Most importantly, you control the “tang factor.” Want it mild? Ferment it less. Want it to wake up your taste buds? Let those bacteria party for 12 hours. It is efficient, delicious, and deeply satisfying. What more could you want from a gallon of milk?
The Minimalist Shopping List
You do not need a laboratory to get started. You just need two things (and a whole lot of “waiting” vibes).
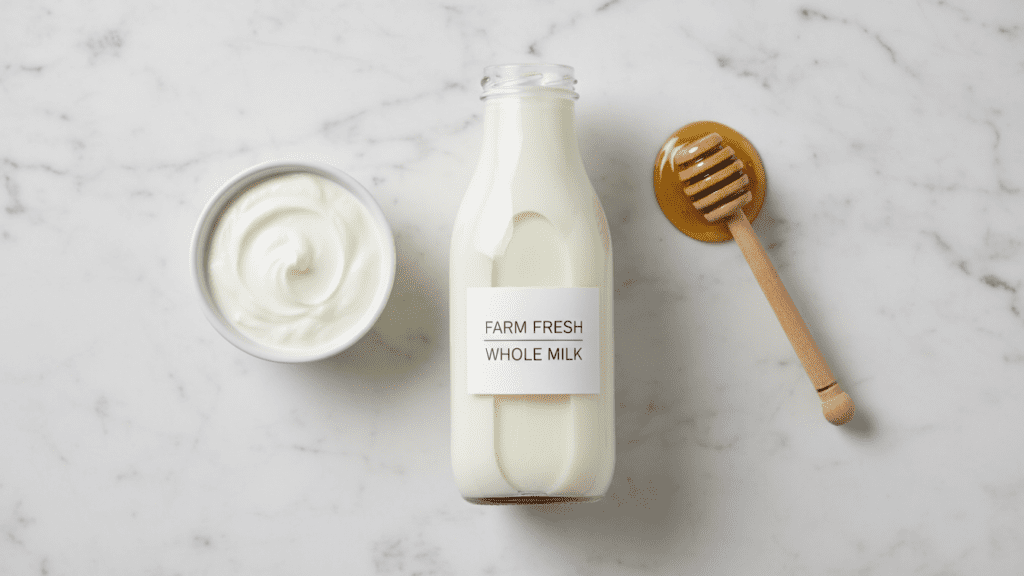
- Milk: Use whole milk for the best, creamiest results. You can use 2%, but avoid skim unless you enjoy eating watery disappointment.
- The “Starter”: A few tablespoons of plain Greek yogurt with “live active cultures.” This is the spark that starts the fire.
- Optional Add-ins: Honey, vanilla bean, or fresh fruit for the “after-party” once the yogurt is actually done.
Tools & Kitchen Gadgets You’ll Need
To master how to make greek yogurt at home, you need gear that can hold a steady temperature. If the milk gets too cold, the bacteria fall asleep; too hot, and you’ve committed probiotic genocide.
- Heavy-Bottomed Pot: To heat the milk without scorching the bottom (nobody likes “burnt toast” flavored yogurt).
- Instant-Read Thermometer: This is your most important tool. Accuracy is the difference between yogurt and a spoiled milk disaster.
- Large Whisk: To incorporate the starter smoothly.
- Incubator: You can use an Instant Pot (the “Yogurt” button is a godsend), a slow cooker, or even just an oven with the light turned on.
- Fine Mesh Strainer: Essential for the “Greek” part of the process.
- Cheesecloth or a Nut Milk Bag: To drain the whey and achieve that thick, scoopable texture.
- Glass Jars: For final storage and looking very aesthetic in your fridge.
Step-by-Step Instructions
Step 1: The Heat Up
Pour your milk into the pot and heat it slowly over medium heat. You want to reach 180°F (82°C). This step isn’t just for fun; it denatures the milk proteins so they can create a thick structure later. Don’t let it boil over, or you will be cleaning milk off your stovetop until 2029.
Step 2: The Cool Down
Remove the pot from the heat and wait. You need the milk to drop to 110°F-115°F (43°C-46°C). If you add the starter now while it’s 180°F, you will kill the bacteria instantly. FYI, you can speed this up by placing the pot in an ice bath, but don’t get distracted and let it get too cold!
Step 3: The Inoculation

Take about half a cup of that warm milk and whisk it into your plain yogurt starter in a small bowl until it’s smooth. Then, pour that mixture back into the big pot of milk and whisk gently. You’ve just introduced the “good guys” to their new home.
Step 4: The Long Nap
Now you need to keep that pot warm (around 110°F) for 8 to 12 hours. If you have an Instant Pot, just hit the “Yogurt” button and walk away. If you don’t, wrap the pot in thick towels and put it in the oven with the light on. Do not move it, stir it, or talk to it. Let the bacteria work in peace.
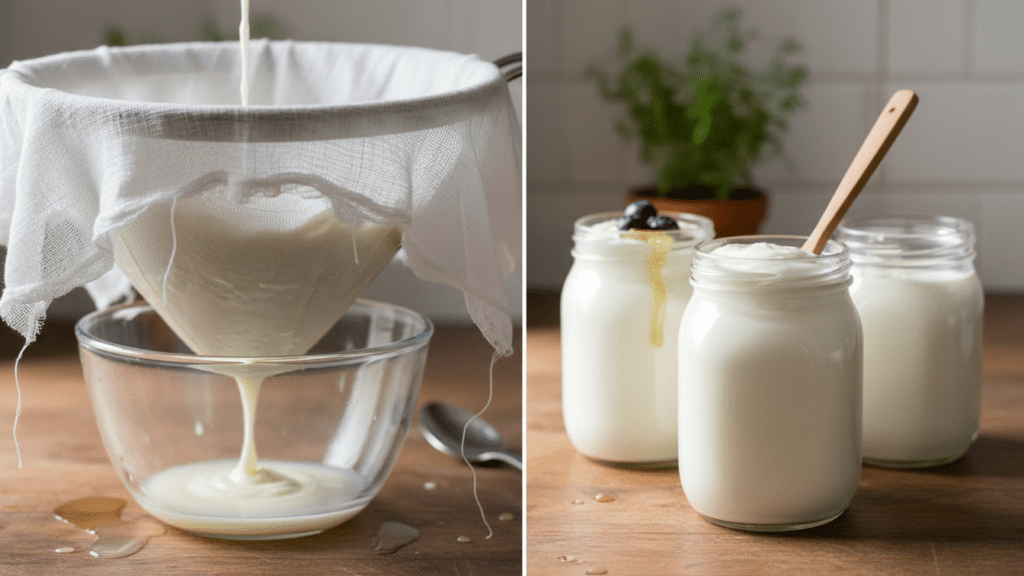
Step 5: The Great Strain
After the nap, you have regular yogurt. To make it “Greek,” you must drain the whey. Line a strainer with cheesecloth, set it over a bowl, and pour the yogurt in. Put it in the fridge and let it drain for 2 to 4 hours. The more liquid (whey) you remove, the thicker the yogurt becomes.
Our Top Pick

LuBudingJoy Blank Recipe Book
B5 Blank Recipe Book – Create and organize your favorite recipes in one beautiful place. This hardcover recipe book (10" × 7.3") features 150 blank pages and includes DIY category stickers. Designed with conversion charts, content tables, and a back pocket for loose notes.
Step 6: The Final Polish
Once it reaches your desired thickness, whisk it one last time to make it creamy. Transfer it to glass jars and store it in the fridge. IMO, the leftover liquid (whey) is great for smoothies or baking, so don’t just dump it down the drain! 🙂
Calories & Nutritional Info
You are eating a protein powerhouse. Here is the estimated breakdown per 1-cup serving:
- Calories: Approximately 150-170 kcal (for whole milk versions).
- Protein: A massive 15g-20g—nearly double regular yogurt.
- Carbs: About 6g-8g (straining removes a lot of the lactose/sugar!).
- Healthy Fats: 8g of satisfying dairy fats.
- Probiotics: Billions of live, gut-loving cultures.
Common Mistakes to Avoid
- Using Ultra-Pasteurized Milk: This milk has been heated so much that the proteins are “broken.” It won’t set properly. Stick to regular pasteurized milk.
- Killing the Starter: Adding yogurt cultures to milk that is over 120°F is a death sentence. Always check your thermometer.
- Disturbing the Fermentation: If you stir the yogurt while it’s incubating, you break the delicate protein bonds. Leave it alone.
- Skipping the Strain: If you don’t strain it, you just have plain yogurt. The straining is what makes it dense and creamy.
- Using Flavored Starter: Do not use vanilla or strawberry yogurt as your starter. The sugar and additives can mess with the fermentation. Always use plain. TBH, it’s just not worth the risk. 🙂
Variations & Customizations
Feeling like a yogurt mixologist? Try these three spins:
The Honey-Vanilla Dream
Fold in raw honey and the seeds of one vanilla bean after the straining process. It tastes better than any “gourmet” brand you’ll find in a store.
The Savory Labneh Style
Strain the yogurt for a full 24 hours until it’s the consistency of cream cheese. Mix in olive oil, za’atar, and sea salt. It’s the ultimate dip for warm pita bread.
The “Pro-Keto” Batch
Use half-and-half instead of whole milk for a portion of the recipe. It results in a ridiculously high-fat, low-carb yogurt that is basically a dessert.
FAQ Section
How long does homemade Greek yogurt last? It stays fresh in an airtight container for up to two weeks. If it starts to smell “yeasty” or grows colorful fuzz, it’s time to say goodbye.
Why is my yogurt runny? You might not have heated the milk to 180°F, or your starter was old. Make sure your starter yogurt is fresh and has “live cultures” listed on the label.
Can I make this dairy-free? You can, but it’s a totally different process involving thickeners like agar-agar or tapioca starch. Coconut milk is the most popular dairy-free choice!
Do I need a special yogurt maker? Not at all. Any warm, insulated spot works. An oven with the light on is a classic DIY “incubator” that works every time.
What can I do with the leftover whey? Whey is liquid gold! Use it as a liquid for pancakes, add it to smoothies for a protein boost, or use it to soak grains and beans.
Can I use my own homemade yogurt as a starter? Yes! You can usually do this for 3 or 4 batches before the bacteria get “tired” and you need to buy a fresh commercial starter.
Why does my yogurt taste so sour? You probably fermented it for too long. Next time, check it at the 8-hour mark. The longer it sits, the more lactose the bacteria eat, making it more tart.
Final Thoughts
There you have it—you are now a certified yogurt technician. You learned how to make greek yogurt at home without spending a fortune or needing a degree in microbiology. It’s thick, it’s creamy, and it’s a heck of a lot better for your gut than that sugary supermarket stuff.
Go ahead, give it a shot. And hey, if you find yourself staring at your straining yogurt like a proud parent, don’t worry—it’s a perfectly normal side effect of being a “culture” enthusiast. Tag me in your thick-yogurt-swirl photos, or just sit in your creamy bliss and enjoy the savings. Happy fermenting!