

The Ultimate 5-Ingredient Dessert (No-Bake Oreo Truffles!)
Picture this: You casually volunteered to “bring dessert” to a party. It seemed like a simple, noble thing to do at the time. But now, it’s T-minus three hours, you’ve accomplished nothing, and your baking ambition has packed its bags and left town. You need something impressive, something delicious, and you need it fast. What if I told you that you could become a dessert legend with a recipe that’s no-bake, foolproof, and requires only a handful of ingredients? My friend, allow me to introduce you to your new secret weapon: the ultimate 5-ingredient dessert.

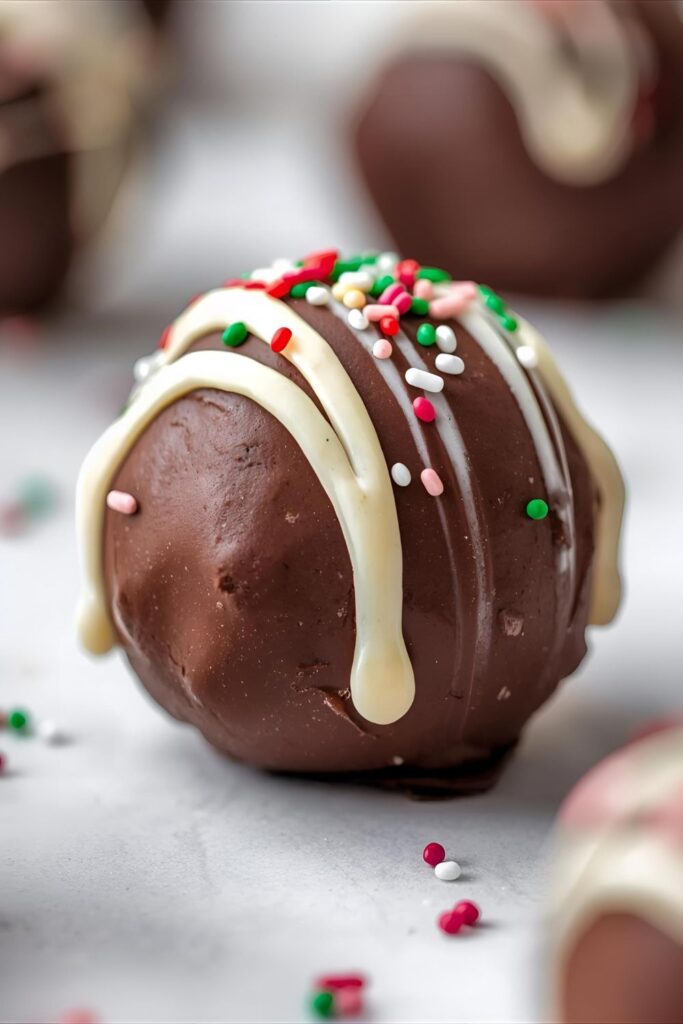
We’re not talking about a sad fruit salad or some store-bought cookies arranged nicely on a plate. We’re talking about decadent, creamy, chocolate-coated Oreo truffles. They look like they came from a fancy chocolatier, but they’re so easy to make it almost feels like you’re cheating. Almost.
Why This Recipe is Basically Magic
The single greatest thing about this dessert is the effort-to-impressiveness ratio. It is completely off the charts. You are investing minimal time and energy, yet the result is a platter of elegant, bite-sized truffles that will have people asking you for the recipe all night. Be prepared for the praise.

This is a no-bake champion. Is it a sweltering October day in Khulna? Do you just fundamentally mistrust your oven? No problem! Your refrigerator and a microwave are the only appliances you’ll need. This makes it a perfect year-round treat for any and all occasions.
And let’s talk about the flavor. It’s a concentrated blast of everything we love: the iconic chocolatey crunch of Oreos, the tangy smoothness of cream cheese, and a rich, decadent chocolate shell. It’s a universally adored combination that is guaranteed to be the first thing to disappear at any potluck or party.
The Fab Five: Your Ingredient Lineup
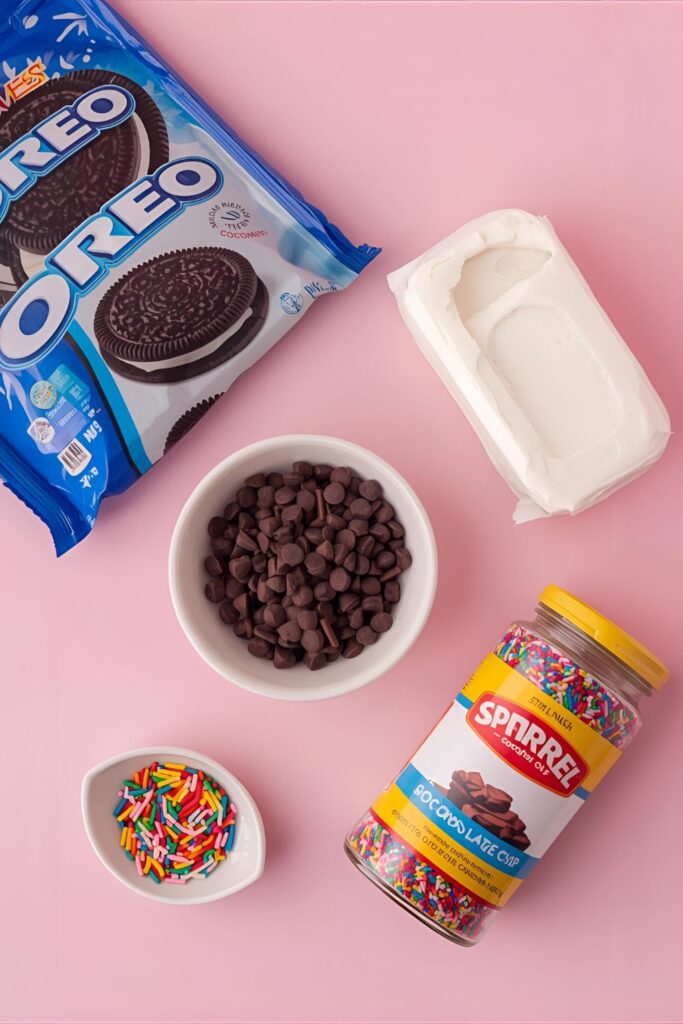
Yes, we are sticking to the five-ingredient rule. It’s a minimalist masterpiece. (A pinch of salt is a freebie, I don’t make the rules. Oh wait, I do.)
- Oreo Cookies: One 13-15 ounce package of classic, regular Oreos. Don’t you dare scrape out that creamy filling; it’s essential to the magic.
- Cream Cheese: One 8-ounce block of full-fat cream cheese. This is not the time for the low-fat stuff. It needs to be softened to room temperature—this is non-negotiable!
- Semi-Sweet Chocolate Chips: About 12 ounces. This will be for the rich, delicious coating that brings it all together.
- Coconut Oil (or Vegetable Shortening): 1-2 teaspoons. This is the secret agent ingredient that makes your melted chocolate smooth, glossy, and perfect for dipping.
- Sprinkles: Or any other topping your heart desires! Crushed nuts, sea salt, or a drizzle of a different kind of chocolate all count as this glorious fifth ingredient.
Tools & Kitchen Gadgets Used
While you don’t need an oven, a few gadgets will make this process a breeze.
- A Food Processor: The undisputed champion for pulverizing Oreos into a fine, sandy powder in seconds.
- An Electric Mixer (Hand or Stand): While you can do it by hand, an electric mixer ensures the cream cheese and Oreo crumbs are perfectly combined and lump-free.
- A Microwave-Safe Bowl: For melting your chocolate to silky perfection.
- A Small Cookie Scoop: The key to making your truffles uniform in size and looking super professional.
- A Baking Sheet lined with Parchment Paper: Your non-stick command center for chilling and setting the truffles.
- Two Forks or a Candy Dipping Tool: For dipping the truffles in chocolate without turning your fingers into a chocolatey mess.
Step-by-Step Instructions: Your Path to Truffle Glory
Ready to become a no-bake hero? Let’s do it.
- Obliterate the Oreos: Place the entire package of Oreo cookies into your food processor and pulse until they are transformed into very fine crumbs. If you want some for garnish later, scoop out two tablespoons and set them aside.
- Create the Dreamy Filling: In a large mixing bowl, beat the softened cream cheese with an electric mixer until it’s smooth and creamy. Add the Oreo crumbs and mix on low speed until everything is fully combined. The mixture will be thick and dough-like.
- Roll and Chill (The Crucial Step): Using a small cookie scoop, portion the mixture and roll it between your palms into 1-inch balls. Place the balls on your parchment-lined baking sheet. Once all the balls are rolled, place the baking sheet in the freezer for at least 30 minutes. Don’t skip this! Chilled balls are firm and a million times easier to dip.
- Melt the Chocolate: When you’re ready to dip, combine the chocolate chips and coconut oil in a microwave-safe bowl. Microwave in 30-second intervals, stirring well after each one, until the chocolate is completely melted and smooth.
- Take the Plunge: Working with a few chilled Oreo balls at a time, use two forks to drop one ball into the melted chocolate. Roll it around to coat it completely, then lift it out with one of the forks. Gently tap the fork against the side of the bowl to let the excess chocolate drip off.
- Decorate and Set: Place the dipped truffle back onto the parchment-lined baking sheet. If you’re using sprinkles or other toppings, add them immediately before the chocolate shell has a chance to set.
- The Final Chill: Once all your truffles are dipped and decorated, place the baking sheet in the refrigerator for about 15-20 minutes, or until the chocolate is completely firm.
Calories & Nutritional Info
Here is a ballpark estimate per truffle. Let’s be honest, nobody is eating just one.
- Calories: Approximately 110-130 per truffle.
- Fat: Around 7g.
- Carbohydrates: Roughly 12g.
- A Gentle PSA: These are decadent treats made of cookies, cream cheese, and chocolate. They are meant to be a joyful indulgence, so let’s not get bogged down in the numbers. 🙂
Common Mistakes to Avoid (For Perfect Truffles Every Time)
These are easy, but a few missteps can lead to frustration. Avoid them at all costs.
- The Lumpy Filling Fiasco: This is almost always caused by using cold cream cheese. It will not blend smoothly into the crumbs. I’m begging you, let your cream cheese soften to room temperature.
- The Mid-Dip Meltdown: If your Oreo balls are falling apart in the warm chocolate, it’s because you skipped the most important step. You must freeze the balls until they are firm before dipping.
- The Scourge of Seized Chocolate: You overheated your chocolate in the microwave and now it’s a thick, grainy mess. To avoid this, microwave in short bursts and stir well each time. Stop heating when there are still a few small lumps and just stir until they melt.
- The Clunky, Thick Coating: If your chocolate coating is super thick and gloopy, you probably skipped the coconut oil. That little bit of fat is the secret to a smooth, elegant, perfectly thin shell. Don’t skip it!
Variations & Customizations
The classic is divine, but this recipe is a fantastic base for your creativity.
- The Golden Funfetti: Use Golden Oreos instead of the classic chocolate. Mix 1/4 cup of rainbow sprinkles into the cream cheese filling. Dip in melted white chocolate and top with more sprinkles for a festive, birthday-cake vibe.
- The Mint-Chocolate Masterpiece: Use Mint Oreos for the filling. Dip the truffles in dark chocolate and sprinkle the tops with crushed peppermint candies or Andes mints.
- The Peanut Butter Lover’s Dream: Use Peanut Butter Oreos, or simply mix 1/3 cup of creamy peanut butter in with the cream cheese. Dip in milk chocolate and top with a sprinkle of flaky sea salt.
FAQ Section: Your 5-Ingredient Dessert Dilemmas, Solved
H3: How do you dip Oreo truffles without making a huge mess?
The two-fork method is your best friend. Use one fork to roll the ball in the chocolate and lift it out. Then, transfer the truffle to the second (drier) fork to place it on the parchment paper. This keeps your hands and the final product much cleaner.
H3: Can I use a different kind of chocolate for the coating?
Absolutely! White chocolate, milk chocolate, or dark chocolate all work beautifully. You can even use different colored candy melts for holidays or parties.
H3: Why is my filling too sticky or too dry?
Make sure you’re using the standard-sized package of Oreos and a full 8-ounce block of cream cheese. Using “double stuf” Oreos might make the filling a bit softer, and using less cream cheese could make it drier. The classic ratio is pretty foolproof.
H3: How long do Oreo truffles last?
Store them in an airtight container in the refrigerator. They will stay fresh and delicious for at least a week.
H3: Can you freeze Oreo truffles?
Yes! They freeze exceptionally well. Place them in a single layer in a freezer-safe container. They’ll last for up to 3 months. You can eat them straight from the freezer or let them soften for a few minutes.
H3: Can I use low-fat cream cheese?
IMO, it’s not the best idea. Full-fat cream cheese provides the best flavor and a firmer texture that helps the truffles hold their shape. The low-fat version can sometimes be a bit watery.
H3: What are some other easy 5-ingredient dessert ideas?
The world of simple desserts is vast! Think 5-ingredient peanut butter cookies (peanut butter, sugar, egg, vanilla, baking soda), a simple fruit crumble (fruit, sugar, flour, butter, oats), or chocolate avocado mousse (avocado, cocoa, sweetener, milk, vanilla).
Final Thoughts
You now hold the key to one of the easiest, most beloved, and most impressive desserts known to humankind. You are a no-bake hero, a truffle virtuoso, a legend of the last-minute potluck. Wield this power wisely.
So go forth and create! Turn that package of Oreos into something truly magical. And the next time someone asks you to bring dessert, you can smile confidently, knowing you’ve got this in the bag.

