
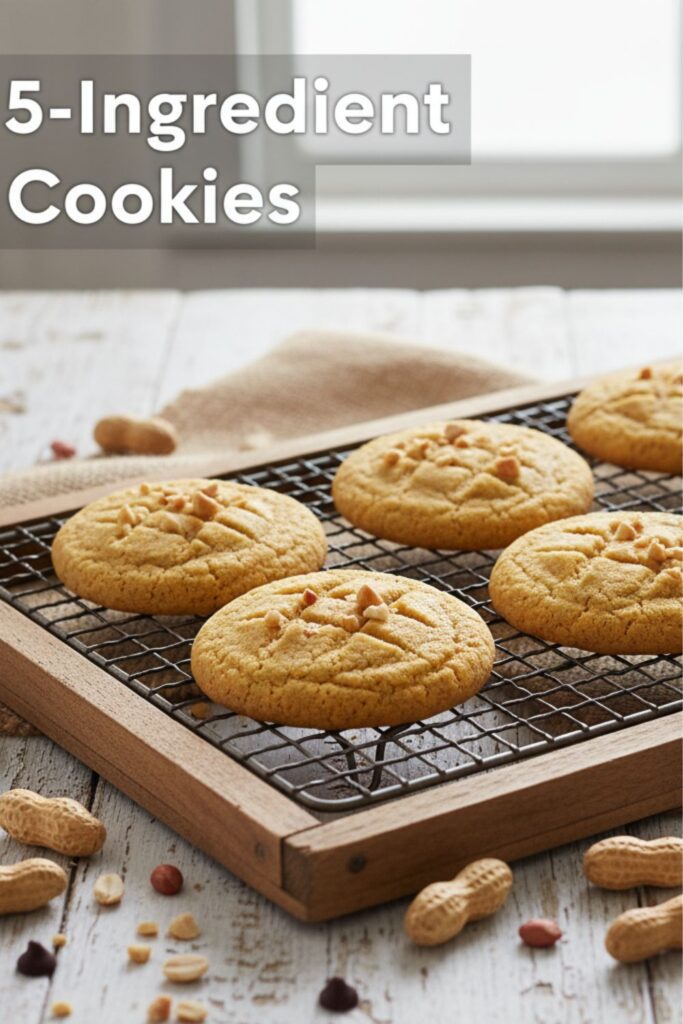
5-Ingredient Cookies: The Lazy Genius Recipe You Didn’t Know You Needed
Let’s be honest. You’ve had one of those days. The kind where the thought of measuring more than five things makes you want to curl up in a ball and order takeout for the third time this week. But the craving hits—that deep, primal need for a warm, gooey cookie. What if I told you that you’re only five simple ingredients and about 20 minutes away from pure bliss? I’m talking about the ultimate 5-ingredient cookies, the recipe that’s so easy, it feels like cheating. Seriously, it’s about to become your new party trick.
Why This Recipe is Awesome
So, why should you drop everything and make these cookies right now? Besides the obvious fact that they require almost zero effort? For starters, they are ridiculously delicious. We’re talking a perfect balance of sweet, salty, and rich flavor that tastes like it came from a fancy bakery, not your slightly-panicked-because-you-have-no-dessert kitchen.

These cookies are your secret weapon. Unexpected guests ringing the doorbell? No problem. Kids suddenly need treats for a bake sale you forgot about? You’re a hero. That late-night sugar craving I mentioned? Consider it conquered. They’re foolproof, fast, and frankly, a lifesaver. You’ll spend less time measuring and more time basking in the glory of your baking genius.
Ingredients

This is the best part—the ingredient list is so short you can actually remember it. No need to screenshot a long, complicated list while navigating the grocery store.
- 1 cup creamy peanut butter: The star of the show. Do not use the all-natural kind where the oil separates unless you’re prepared to stir it into oblivion. A classic brand like Jif or Skippy works best for texture.
- 1 cup granulated sugar: For that classic cookie sweetness. You can also use brown sugar for a chewier, more caramel-like flavor.
- 1 large egg: This is the binder that holds our little miracle together.
- 1 teaspoon vanilla extract: Because vanilla makes everything better. It’s a non-negotiable flavor booster.
- 1/2 cup chocolate chips: The fifth and final touch of magic. Semi-sweet is classic, but feel free to go wild with milk chocolate, dark chocolate, or even peanut butter chips.
Tools & Kitchen Gadgets Used

You don’t need a professional kitchen setup for this, but a few key tools will make your life even easier. Perfect for stocking your kitchen or, you know, adding to that Amazon cart. 😉
- Large Mixing Bowl: For containing the delicious chaos.
- Silicone Spatula or Wooden Spoon: To mix everything together without scratching your bowl.
- Measuring Cups and Spoons: For… well, measuring. Precision is key, even in a simple recipe.
- Baking Sheets: You’ll need one or two standard-sized baking sheets.
- Parchment Paper: An absolute must for preventing sticking and making cleanup a breeze. Don’t skip this!
- Cookie Scoop: Not essential, but a 1.5-tablespoon cookie scoop ensures all your cookies are uniform in size and bake evenly. Plus, it’s super satisfying to use.
Step-by-Step Instructions
Ready for the easiest baking session of your life? Let’s do this.
Step 1: Prep Your Station
First things first, preheat your oven to 350°F (175°C). While that’s heating up, line a baking sheet with parchment paper. This single step will save you from a future of scrubbing burnt cookie bits off a pan. You’re welcome.
Step 2: Mix It All Up
In your large mixing bowl, combine the peanut butter, sugar, egg, and vanilla extract. Stir everything together until it’s smooth and well-combined. The “dough” will be a bit thick and sticky. At this point, you might be thinking, “Is this really going to work?” Trust the process.
Step 3: Add the Good Stuff
Gently fold in the chocolate chips. Try not to overmix here; you just want them evenly distributed throughout the dough. You wouldn’t want any cookie to be left without chocolate, would you? The horror.
Step 4: Scoop and Roll
Using a cookie scoop or a tablespoon, portion out the dough into balls about 1.5 inches in diameter. Roll them between your palms to smooth them out and place them on your prepared baking sheet, leaving about 2 inches of space between each one.
Step 5: The Signature Press
These cookies don’t spread much on their own, so they need a little encouragement. Gently press down on each ball of dough with the back of a fork to create that classic crisscross pattern. This not only looks cute but also helps them bake more evenly.
Step 6: Bake to Perfection
Pop the baking sheet into your preheated oven and bake for 10-12 minutes. The cookies will look slightly underdone in the center when you take them out—this is the secret! They will set up as they cool. Do not, I repeat, do not overbake them, unless you enjoy eating sweet, peanut-flavored rocks.
Step 7: The Agonizing Wait
Let the cookies cool on the baking sheet for at least 5 minutes before transferring them to a wire rack to cool completely. This is, without a doubt, the hardest step. They will be fragile at first, so be gentle. Then, devour.
Calories & Nutritional Info

Here’s a rough estimate for those of you who like to keep track. Let’s not think too hard about it, though. They’re cookies, after all.
- Serving Size: 1 cookie
- Calories: Approximately 150-180 kcal (depending on the size and type of chocolate chips)
- Protein: ~4g
- Carbohydrates: ~15g
- Fat: ~10g
- Note: These cookies are naturally gluten-free, which is a huge bonus! Just make sure your peanut butter and vanilla extract are certified gluten-free if you have a serious intolerance.
Common Mistakes to Avoid
Even with a recipe this simple, things can go wrong. Here’s how to avoid the most common pitfalls.
- Overbaking the Cookies: I mentioned it before, but it bears repeating. The number one mistake is baking them until they look done in the oven. They will be soft when you pull them out. Let them cool on the pan to finish setting up. Trust me.
- Using Oily, Natural Peanut Butter: I love natural peanut butter, but it can be a recipe-wrecker. The oil separation creates a greasy, crumbly cookie that just falls apart. Stick to a conventional, emulsified peanut butter for the best texture.
- Skipping the Fork Press: If you don’t flatten the dough balls, you’ll end up with dense, spherical cookie lumps instead of perfectly baked cookies. They might still taste okay, but the texture will be off.
- Not Measuring Properly: It’s only five ingredients, so each one counts. Eyeballing the peanut butter or sugar can throw off the ratio and result in cookies that are too dry or too greasy. Use those measuring cups!
Variations & Customizations
Think of this recipe as your blank canvas. Ready to get creative?
1. The Nutty Professor
Swap the peanut butter for almond butter or cashew butter. For extra texture, use a crunchy version of the nut butter and add 1/4 cup of chopped walnuts or pecans along with the chocolate chips.
2. The Sweet & Salty Masterpiece
Use high-quality dark chocolate chunks instead of chips. Before you pop them in the oven, sprinkle the tops with a pinch of flaky sea salt. The salt enhances the chocolate and peanut butter flavors in the most incredible way. It’s so sophisticated.
3. The Keto-Friendly Cookie
Want to cut the carbs? It’s surprisingly easy. Swap the granulated sugar for a cup-for-cup keto-friendly sweetener like erythritol or monk fruit. Use sugar-free chocolate chips (like Lily’s). The result is a delicious low-carb treat that satisfies your cookie craving without the sugar crash.
FAQ Section
Got questions? I’ve got answers. Here are some things people are always asking about these magical cookies.
H3: Can I make these 5-ingredient cookies without peanut butter?
Absolutely! Almond butter, cashew butter, or even sunflower seed butter (for a nut-free option) work wonderfully as a 1-to-1 substitute.
H3: Are these cookies gluten-free?
Yes, this recipe is naturally gluten-free since it contains no flour. Just double-check that your vanilla extract and chocolate chips don’t contain any hidden gluten.
H3: How do I store these cookies?
Store them in an airtight container at room temperature for up to a week. TBH, they’ll probably be gone long before then.
H3: Can I make the dough ahead of time?
You bet. You can prepare the dough, cover the bowl, and refrigerate it for up to 3 days. You can also roll the dough into balls and freeze them on a baking sheet before transferring them to a freezer bag. Bake from frozen, adding a couple of extra minutes to the baking time.
H3: Why did my cookies turn out dry and crumbly?
The most likely culprit is overbaking. Even one extra minute can turn them from chewy to crumbly. The other possibility is an imbalance in your ingredients—too much sugar or not enough peanut butter can also dry them out.
H3: Can I use a different kind of sugar?
Yes! Swapping granulated sugar for light or dark brown sugar will give you a slightly softer, chewier cookie with a hint of caramel flavor.
H3: What other mix-ins can I add?
Go crazy! White chocolate chips, M&Ms, Reese’s Pieces, toffee bits, or even a handful of sprinkles would all be delicious additions. Just keep the total amount of mix-ins to around 1/2 cup so the cookies hold their shape.
Final Thoughts
And there you have it—the secret to satisfying your cookie cravings with minimal effort and maximum reward. Once you realize you can have warm, delicious cookies on demand in under 20 minutes, you’ll never look back. Go ahead, bake a batch. You deserve it. Your friends, family, and late-night-snacking self will thank you.

