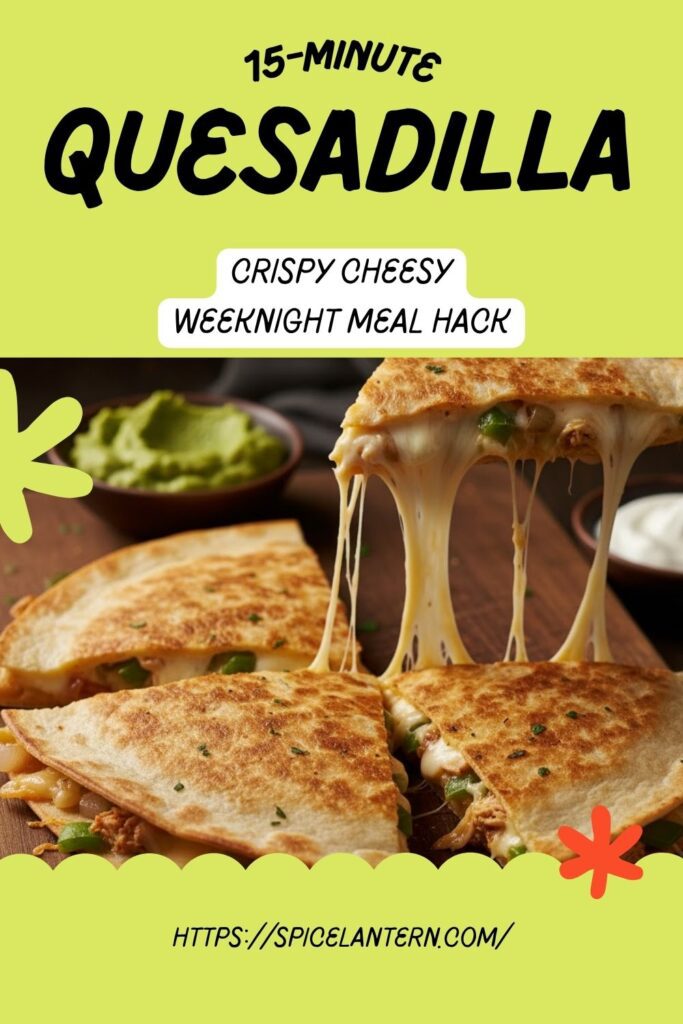
🔥 Grilled Cheese’s Cooler Cousin: Your Guide to the 15-Minute Quesadilla
Have you ever experienced that pure, unadulterated shame of ordering a fancy, overpriced something from a restaurant, only to realize the quesadilla on the menu looked way better? I have. And I decided enough was enough. The quesadilla is the ultimate, low-effort comfort food—it’s grilled cheese’s cooler, spicier cousin. But waiting for one? Absolutely not. This 15-minute quesadilla method ensures you go from zero to molten, cheesy perfection faster than your phone battery dies when you actually need it. Prepare to unlock the supreme power of the quick, crispy, and ridiculously satisfying cheesy thing.
Why This Recipe Is Awesome (It’s Pure, Uncut Efficiency)
Look, this isn’t rocket science, but there is an art to achieving quesadilla greatness, especially when time is of the essence. This recipe is awesome because:
- Real 15-Minute Speed: We rely on high heat and strategic placement. By using pre-cooked or ultra-thin fillings, we ensure everything melts and crisps up perfectly in about 5 minutes of cook time. The rest is just prep and enjoying the cheesy rewards.
- The Crunch Factor: Forget floppy, pale tortillas. Our method guarantees a golden-brown, satisfyingly crispy exterior that holds up to serious dipping. Doesn’t your inner child deserve that texture?
- Zero Food Waste: This recipe is the hero of “Use Up the Leftovers” night. Do you have a tablespoon of cooked chicken, a few stray beans, or a lonely slice of bell pepper? Throw it in! This recipe judges no one.
Ingredients: The Holy Trinity and the Helpers


Keep your fridge stocked with these, and you’ll always be ready for a 15-minute quesadilla emergency.
- 2 Large Flour Tortillas (Burrito size): Flour tortillas are best for folding and holding all the goodness.
- 1 cup Shredded Cheese: Use a mix! Monterey Jack (for melt) and Sharp Cheddar (for flavor). Shred your own cheese! Pre-shredded has stabilizers that stop the ooey-gooey pull.
- 1 tablespoon Neutral Oil (or Butter): Avocado, canola, or clarified butter works best for crisping.
- Optional Filling (Keep it DRY!):
- ¼ cup Cooked, Shredded Chicken or Ground Beef.
- 2 tablespoons Canned Black Beans (Rinsed and patted dry).
- 1 tablespoon Finely Diced Onion or Bell Pepper.
Key Substitutions:
- Flour Tortillas: Use large corn tortillas for a more authentic, slightly nuttier flavor, but you’ll need to cook them slightly longer to prevent tearing.
- Cheese: Oaxaca cheese is the authentic melting champion, similar to mozzarella. Cotija cheese adds great salty flavor when sprinkled on the outside.
- Fat: Use a non-stick spray for an oil-free option, but oil/butter gives you the best crust.
Tools & Kitchen Gadgets Used: Your Quick-Fire Setup

You don’t need a comal. You need a hot flat surface and a spatula.
- Large Skillet, Griddle, or Flat Pan: Cast iron is the ultimate champion for even heat and a crispy crust. A good non-stick pan is the next best thing.
- Spatula (Wide, sturdy): Essential for pressing the quesadilla flat and flipping without disaster.
- Cutting Board and Sharp Knife: For prepping ingredients and slicing the finished product.
- Paper Towels: Crucial for blotting any wet ingredients (see Common Mistakes).
Step-by-Step Instructions: Mastering the Molten Fold
Speed and heat are your allies. Move fast and enjoy the sizzle.
Step 1: Prep the Fillings (5 Minutes)
- Chop and Dry: Dice your onions, peppers, or any other additions very finely so they cook quickly. Pat down any wet ingredients (like canned beans or previously sautéed veggies) with a paper towel. This prevents a soggy center.
- Mix the Cheese: Combine your shredded cheeses in a small bowl. This ensures even flavor distribution.
- Assemble Your Station: Have your tortillas, oil, cheese, and fillings lined up and ready next to the stove.
Step 2: The Hot Pan Entry (2 Minutes)
- Heat your skillet or griddle over medium heat. We’re aiming for medium, not high! Too hot, and the tortilla burns before the cheese melts.
- Add ½ tablespoon of the oil (or butter) and swirl the pan to coat.
- Place one tortilla flat in the center of the pan. Let it heat up for about 30 seconds.
Step 3: Layering the Glory (3 Minutes)
- Sprinkle half of the shredded cheese mixture evenly over the tortilla. Leave a small border around the edges.
- Spread your pre-chopped, dry fillings evenly over the cheese. Don’t overload it! Thin is in.
- Top the fillings with the remaining cheese. The cheese is the glue, so make sure it surrounds the fillings.
- Place the second tortilla directly on top.
Step 4: Press, Flip, and Crisp (4 Minutes)
- Use your spatula to gently press down on the top tortilla. This helps the cheese start melting and adheres the layers.
- Cook for 2 minutes until the bottom is golden brown and crispy. Peek underneath!
- Carefully flip the quesadilla (use the spatula to steady the top).
- Add the remaining ½ tablespoon of oil to the pan, push the quesadilla into it, and cook the second side for another 2 minutes, pressing down periodically until the cheese is molten and gooey and both sides are deep golden brown.
Step 5: Slice and Serve (1 Minute)
- Transfer the finished, crispy quesadilla to your cutting board.
- Slice it into wedges (triangles are traditional, but squares work too).
- Serve immediately with a side of salsa, sour cream, or guacamole. Enjoy the cheesy stretch!
Calories & Nutritional Info: The Delicious Stats (Estimated)

These estimates are for one full quesadilla (two tortillas) with moderate cheese and light vegetable filling.
- Calories per serving (1 full quesadilla): ~450-550 calories
- Carbohydrates: ~35-45g
- Fat: ~25-35g (mostly from cheese and oil)
- Protein: ~20-30g (depending on added meat)
Nutritional Notes:
- Quesadillas are an excellent, high-protein way to sneak in veggies.
- To reduce calories: Use low-fat cheese and skip the oil by cooking it on a hot, dry, non-stick pan. It won’t be as crispy, but it’s faster.
- Boost fiber: Use whole wheat tortillas! They taste pretty similar here, TBH.
Common Mistakes to Avoid: The Cheese Pitfalls
Avoid these classic quesadilla catastrophes for supreme results.
- High-Heat Hysteria: Do not cook this on high heat! The tortilla will burn to a crisp before the cheese even starts thinking about melting. Keep it at medium! Patience is required, but only for 4 minutes total.
- Wet Fillings: This is the ultimate enemy. Wet ingredients (like tomato slices, raw mushrooms, or un-drained beans) create steam, leading to a limp, soggy middle. Always sauté veggies first and blot them dry.
- Overstuffing: Less is more. If you pile in too many fillings, the cheese glue can’t reach the edges, and your quesadilla will fall apart when you try to flip it. It also prevents even melting.
- Skipping the Press: Pressing the quesadilla down with the spatula helps the cheese melt faster by increasing the surface area contact with the hot pan, and fuses the two tortillas together.
Variations & Customizations: Your Quesadilla Playground
Got the basic melt down? Time to get experimental with fillings.
- Dessert Dilla (The Sweet Treat): Spread Nutella on one tortilla. Sprinkle with mini marshmallows and sliced bananas. Cook on medium-low heat until the chocolate is gooey and the banana is soft. Warning: Extremely addictive.
- Pesto & Feta Mediterranean: Use pesto as a base spread on one tortilla (instead of cheese as a layer). Fill with feta cheese, sun-dried tomatoes (blotted dry!), and spinach.
- Breakfast Scramble: Fill with scrambled eggs, cooked sausage bits, and pepper jack cheese. Serve with a side of hot sauce for the perfect quick brunch.
FAQ Section: The Little Cheesy Thing Explained
Quesadillas seem simple, but the details matter. Here’s what people ask.
Q1: What is the best cheese to use for melting?
A: Monterey Jack is the gold standard for meltability. Oaxaca cheese is also excellent. Using a blend (like Jack and Cheddar) gives you the best combination of melt and sharp flavor.
Q2: Should I use one tortilla folded or two tortillas?
A: For a large, satisfying meal (like this recipe), two full tortillas are best. For a quick snack or small size, you can use one large tortilla, layer the filling on half, and fold it over (the “D” shape).
Q3: How do I prevent the cheese from oozing out and burning?
A: Don’t overfill it! Keep the cheese about ½ inch away from the edge of the tortilla. Also, make sure your heat is medium, not high, to give the cheese time to melt inward before the crust burns.
Q4: What is the difference between a quesadilla and a burrito?
A: A quesadilla is typically cooked on a griddle, uses cheese as the primary glue, and is flat. A burrito is typically wrapped tightly, steamed or briefly griddled after being filled, and is a rolled cylinder shape that usually contains rice.
Q5: Can I make quesadillas in the microwave?
A: You can, but they will be limp, chewy, and soggy, with zero crispness. Skip the microwave and use a hot pan; it takes less than 5 minutes and delivers a vastly superior result.
Q6: Can I freeze leftover quesadillas?
A: Yes! Cool the quesadilla completely, slice it into wedges, and store it in an airtight freezer bag with parchment paper between slices. Reheat in a toaster oven or regular oven (400°F/200°C) until warm and crispy.
Q7: What is the best way to reheat a cold quesadilla?
A: The best way is in a skillet or toaster oven. The direct dry heat of both methods will re-crisp the tortilla, making it taste almost as good as fresh. Avoid the microwave!
Final Thoughts: Cheesy Perfection in a Quarter Hour
You have just mastered the ultimate comfort food hack: the 15-minute quesadilla. No more dry, flavorless nonsense. You now possess the power of the perfectly melted cheese pull and the crisp exterior. Go ahead, share this recipe with your lazy friends. They need this in their lives.