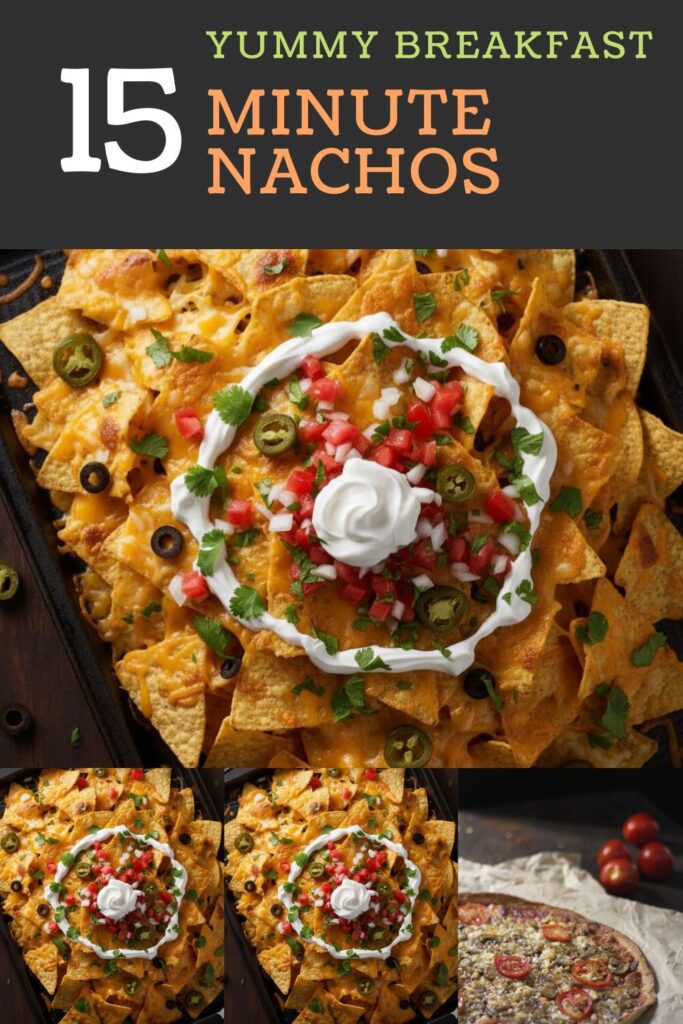
Nacho Emergency! The Ultimate 15-Minute Nachos You Need Right Now
Let’s be clear: when a craving for nachos strikes, it’s not a request; it’s an emergency. You don’t have time to brown ground beef, dice three pounds of vegetables, or wait for an oven to preheat for half an hour. You need gooey cheese, crunchy chips, and savory toppings, and you need them in 15 minutes. I cracked the code on 15-Minute Nachos by stripping away the unnecessary fuss and using high-impact, pre-prepped ingredients. This is the ultimate “I need salty, cheesy comfort right now” recipe. Forget those soggy, boring versions; you are about to achieve maximum flavor in minimal time.
Why This Recipe Is Awesome (And It’s Mostly Science)
Why will this ultra-fast method change your life? Because it respects your time and your appetite equally.
- Real 15-Minute Total Time: We use the broiler (or a toaster oven) for 3 minutes of melting magic. The rest of the time is pure assembly. It’s faster than arguing about which takeout place to order from.
- The Layering Secret: We avoid the tragic “bare chip syndrome” by layering the ingredients strategically. Every single chip gets a decent hit of cheese and topping. It’s cheesy democracy, IMO.
- Zero Soggy Centers: Because the heat is high and fast, the cheese melts before the chips can go limp. You get hot, gooey toppings over a crisp, crunchy base. It’s truly a texture masterpiece.
Ingredients: The High-Impact Heroes
We prioritize flavor and speed. Prep your ingredients before you even turn on the oven!
- 6 ounces Tortilla Chips: High-quality, sturdy chips are essential. Thin chips will go soggy and break easily.
- 1 ½ cups Shredded Cheese Blend: Monterey Jack (for melt) and Sharp Cheddar (for flavor). Shred your own cheese! Pre-shredded has anti-caking agents that slow down the melt.
- ½ cup Pre-cooked Protein (Warmed): Shredded rotisserie chicken, leftover taco meat, or a can of rinsed/drained black beans. Keep it warm for faster melting!
- ¼ cup Pickled Jalapeño Slices: The original, classic, non-negotiable spicy kick.
- Garnish (Cold Toppings Added AFTER Baking): Sour cream, salsa/pico de gallo, sliced avocado or guacamole, and chopped cilantro.
Key Substitutions:
- Cheese Blend: Use Oaxaca cheese for an authentic, epic melt. Pepper Jack is great if you need more internal heat.
- Protein: Sautéed cubed firm tofu or seasoned lentils work perfectly for a vegetarian swap.
- Jalapeños: Use pickled banana peppers if you prefer a milder, tangier heat.
Tools & Kitchen Gadgets Used: Your Speedy Setup
We are using minimal tools, maximizing the oven’s power.
- Baking Sheet (Rimmed): Essential for containing the chips and the cheesy goodness.
- Aluminum Foil or Parchment Paper: CRITICAL. Line the baking sheet for zero cleanup (which is a huge time-saver).
- Microwave-Safe Bowl or Small Skillet: For quickly heating the protein/beans.
- Serving Platter or Cutting Board: For the final, messy assembly.
- Oven Mitts: You are dealing with high, fast heat. Safety first!
Step-by-Step Instructions: The Race to Melt
We move fast. Preheat the broiler now and get ready for a quick, chaotic, delicious assembly.
Step 1: Preheat and Prep (3 Minutes)
- Set your oven to HIGH Broil (or the highest setting) and position the rack 6-8 inches below the heat source. High heat is the only way to achieve the melt in 3 minutes.
- Line your baking sheet with aluminum foil or parchment paper.
- Whip the Protein: Quickly warm your pre-cooked meat or beans in a microwave or small skillet. Warm toppings ensure the cheese melts faster.
Step 2: The Strategic Layer (3 Minutes)
- Lay half of your tortilla chips on the prepared baking sheet in a single layer. Don’t pile them high yet!
- Sprinkle half of your cheese blend and half of your warmed protein/beans evenly over this layer. This is the base layer of flavor.
- Lay the remaining chips on top of the first layer.
- Sprinkle the remaining cheese and protein over the top. Make sure every chip has a buddy with cheese. Scatter the jalapeños evenly now!
Step 3: The Broiler Blast (3 Minutes)
- Slide the baking sheet into the preheated broiler.
- WATCH THEM CONSTANTLY! Seriously, do not walk away. Broilers are unpredictable.
- The nachos are done when the cheese is fully melted, gooey, and bubbling, with a few small golden/brown spots. This usually takes 2-4 minutes.
Step 4: The Cool Toppings Finish (5 Minutes)
- Immediately pull the nachos out of the oven (they stop melting on the counter).
- Add cold toppings immediately: Dollop the sour cream (or Greek yogurt), spoon on the salsa/pico de gallo, and scatter the avocado/guacamole and cilantro.
- Serve them right on the baking sheet for maximum rustic appeal and zero dishwashing fuss. Enjoy the cheesy, crunchy chaos!
Calories & Nutritional Info: The Delicious Truth (Estimated)
These are estimates for a very generous serving of loaded nachos (1/2 the recipe).
- Calories per serving (Half the Recipe): ~500-650 calories
- Protein: ~25-40g (High protein, depending on meat/bean content!)
- Fat: ~30-45g (Mostly from chips and cheese.)
- Carbohydrates: ~40-60g
- Nutritional Note: Nachos are an indulgent comfort food. The avocados, beans, and fresh salsa do provide fiber and vitamins, so that’s the healthy justification you need.
Common Mistakes to Avoid: Stop the Soggy Syndrome
Nachos are simple, but they have key failure points. Avoid these!
- The Single Layer Mistake: Piling all the chips in one big heap results in bare, sad chips underneath. Layering (Step 2) is the only way to ensure every chip gets cheese and toppings.
- Using a Cold Topping: Cold toppings (especially cold salsa or sour cream) slow down the cheese melt. Make sure your meat/beans are warm before assembly.
- Forgetting the Liner: Cheese runs and burns onto the baking sheet, adding 15 minutes of scraping to your cleanup. Line the pan! It saves your sanity.
- The Broiler Blindspot: Leaving the broiler unattended is a rookie move. Cheese goes from gooey to charcoal in 30 seconds. Watch it like it owes you money!
- Wet, Cold Garnishes: Adding salsa, guacamole, or sour cream before melting makes the chips soggy during the bake. Always add cold garnishes AFTER the nachos come out of the oven!
Variations & Customizations: Your Chip Canvas
This method works for any flavor profile. Get creative beyond the classic beef.
- Breakfast Nachos (The Hangover Cure): Top chips with a blend of scrambled eggs, cooked sausage crumbles, and Pepper Jack cheese. Finish with fresh salsa and hot sauce.
- BBQ Pulled Chicken: Use shredded rotisserie chicken tossed in your favorite BBQ sauce (keep it thick!). Top chips with the chicken, red onion, and Monterey Jack. Finish with a drizzle of ranch dressing after baking.
- Taco Truck Veggie Delight (Vegan Swap): Skip the dairy cheese. Use a plant-based shredded melt or a quick cashew queso sauce. Top chips with warm black beans, corn, and chopped pickled onions. Finish with fresh cilantro and lime juice.
FAQ Section: The Pressing Nacho Questions
The internet has thoughts on nachos. Let’s settle the debate.
Q1: What is the ideal type of chip for nachos?
A: Thick, sturdy restaurant-style corn tortilla chips are best. They hold up to the weight of the toppings and the heat of the broiler without immediately going soggy.
Q2: What is the difference between nachos and totopos?
A: Totopos are the chips themselves (fried or baked tortillas), a term that originated in Mexico. Nachos refer to the dish of totopos topped with melted cheese and other ingredients.
Q3: Should I put sour cream on before or after baking?
A: Always after! Sour cream, like salsa, has a high water content. Baking it causes the chips to go soggy and makes the sour cream separate into an unpleasant, watery mess.
Q4: How do I keep the chips from getting soggy?
A: Use high heat (broiler), sturdy chips, and minimize moisture. Add wet ingredients like salsa and sour cream only after the cheese is melted and the nachos are out of the oven.
Q5: Can I use Velveeta or liquid cheese sauce?
A: You can, but that liquid cheese sauce is the “stadium style” nacho cheese (often containing no real cheese). Shredded cheese melts into a superior, gooey texture and is arguably better, IMO.
Q6: How should I store and reheat leftover nachos?
A: Leftovers get soggy, fast. Store them in an airtight container for up to 1 day. Reheat under the broiler for 1 minute to re-crisp the top layer, and add fresh cold toppings.
Q7: Should I season the chips before adding the toppings?
A: If you are using plain, unseasoned chips, a light dusting of chili powder and salt on the chips before layering is a great hack to ensure flavor reaches every layer.
Final Thoughts: The Clean Plate Club
You just achieved cheesy, crunchy bliss in a quarter hour. You mastered the 15-Minute Nachos and defeated the soggy chip epidemic. Go ahead, take a big, glorious, messy bite. You’re too efficient for boring snacks now.


